Does Fuel Type Affect EnginePerformance, The Difference Between 91 and 95
Table Of Contents:
|
You might pay extra for higher‑octane fuel assuming it delivers better performance, only to discover that nothing changes at all. So, is choosing the correct octane rating truly what gives your engine its real power?
Does the octane rating affect engine performance?
1 The octane rating measures a fuel’s ability to resist premature combustion (pre‑ignition) inside the combustion chamber. It is a key factor in determining whether the fuel is compatible with the engine’s compression design. Higher octane means greater resistance to knock under high pressure.
2 Modern high‑compression engines require higher‑octane fuel such as 95 to ensure controlled combustion, prevent knocking, and maintain smooth performance.
3 Economy or older engines typically operate efficiently on 91 octane because they do not generate high cylinder pressure and therefore do not require strong knock resistance.
4 Choosing the correct octane directly affects throttle response, engine smoothness, and performance stability under various conditions such as high ambient temperatures or heavy loads.
Does using higher‑octane fuel than recommended improve performance?
1 Using 95 octane in an engine designed for 91 does not increase power, because the engine is not engineered to benefit from higher knock resistance.
2 Standard engines lack the sensors and ignition‑timing maps needed to adjust spark timing to take advantage of higher octane, so performance remains unchanged.
3 In certain sports or turbocharged engines, higher octane may provide a slight improvement in responsiveness, but only if the engine can automatically advance ignition timing to utilize the extra knock resistance.
Does using lower‑octane fuel cause problems?
1 Using 91 octane in an engine that requires 95 leads to knocking, which is uncontrolled combustion causing vibrations inside the cylinder.
2 Persistent knocking reduces engine power and weakens acceleration, especially when climbing hills or driving with heavy loads.
3 Imperfect combustion increases fuel consumption because the engine compensates for power loss by injecting more fuel.
4 Long‑term knocking can damage spark plugs, the knock sensor, or even the cylinder head in severe cases.
What is the main difference between 91 and 95 octane fuel?
1 The difference is not about quality or cleanliness, but about each fuel’s ability to withstand pressure inside the combustion chamber.
2 91 octane suits low‑ to medium‑compression engines, while 95 is intended for high‑performance or turbocharged engines.
3 Some manufacturers design engines with precise octane requirements, making adherence to the recommended fuel essential for optimal performance and engine longevity.
4 Choosing the correct fuel type should always follow the manufacturer’s recommendations.
Does fuel type affect fuel consumption?
1 The correct octane helps achieve complete combustion, reducing fuel consumption and improving efficiency.
2 Using lower octane than required leads to imperfect combustion, increasing consumption by 10–15% in some vehicles.
3 In high‑performance engines, 95 octane may offer better efficiency at high speeds because the engine operates with ideal ignition timing and without knock.
4 In economy cars designed for 91, you will not notice any difference in consumption between 91 and 95.
Does mixing 91 and 95 octane fuel harm the engine?
1 Mixing the two does not cause direct damage, as the engine can handle blended octane normally.
2 If your car requires 95, mixing may lower the effective octane and cause mild knock under heavy load.
3 If your car runs on 91, mixing will not provide any performance benefit.
4 It is best not to rely on mixing as a long‑term solution; always use the correct fuel for consistent performance.
Does 95 octane fuel clean the engine better than 91?
1 The octane rating has no relation to the detergents or cleaning additives in the fuel.
2 Some fuel companies add more detergents to 91 than 95, and vice versa, so octane alone is not an indicator.
3 Engine cleanliness depends on the quality of chemical additives, not the octane rating.
4 For engine cleaning, use fuel with certified additives or dedicated cleaning products.
How does fuel choice affect maintenance?
1 Using the correct octane reduces carbon buildup in the combustion chamber and prevents abnormal heat levels.
2 Incorrect fuel can cause spark plug issues, knock sensor faults, or even cylinder head damage in severe cases.
3 Proper fuel maintains stable engine performance and reduces the need for frequent maintenance.
4 Following manufacturer recommendations saves you unnecessary repair costs over time.
What is the golden rule for choosing fuel?
1 Always follow the vehicle’s manual; recommendations are based on engine design and combustion requirements.
2 Do not use higher octane if your car does not need it—you will gain no additional benefit.
3 Do not use lower octane in high‑performance engines to avoid costly future damage.
Do modern cars need 95 octane more than older ones?
1 Many modern engines use technologies like direct injection and turbocharging, which require higher octane for controlled combustion.
2 Older engines generally operate well on 91 due to lower compression.
3 Some modern economy cars are still designed for 91 despite advanced technology, so generalization is not possible.
4 Always check the vehicle manual or the fuel cap label.
Does climate or temperature affect fuel choice?
1 In hot climates, engines experience higher pressure, making correct octane selection more critical.
2 Higher octane fuel handles heat better, especially in high‑performance engines.
3 In cold climates, the difference between 91 and 95 becomes less noticeable because thermal pressure inside the engine is lower.
4 Climate does not change the required octane; it only affects engine behavior when using an incorrect fuel type.
FAQs
Related Blogs
Car Recalls in Saudi Arabia: VIN Checks and Next Steps
Table of Contents:
|
To check car recalls in Saudi Arabia, enter the VIN on the official recall platform, then read the campaign details and follow the instructions for your vehicle. A matching model name or model year alone does not establish inclusion, and no result does not mean the car is defect-free. If a campaign applies, contact the responsible party named in it, ask about driving instructions and an appointment, and retain confirmation of the completed repair.
What are car recalls in Saudi Arabia?
A recall is an action to address an announced defect, not a general description of every problem a car develops. The Ministry of Commerce explains that its enquiry service checks whether products or vehicles are included in campaigns announced in cooperation with manufacturers and local agents. Start with the official source rather than a shared image or a message of unknown origin.
Refer to the Ministry of Commerce defective products enquiry service (in Arabic) for the service sequence: access the platform, enter the VIN or search for the product, then follow the campaign details and required actions. Do not assume a recall means replacing the car; the relevant action is the one specified for the campaign once its applicability to your vehicle is confirmed.
What should you prepare before a VIN recall check?
Have the vehicle identification number, or VIN, ready. Read it from a reliable document for the car or from the location identified in the owner’s manual. Do not substitute the registration plate number or another identifier simply because its name sounds similar. For help identifying it, see the guide to your vehicle identification number, then match the details to the actual car.
- Copy the complete number exactly and check the letters and digits before searching, especially when copying from an image or message.
- Keep the basic vehicle details and any recall notice you received so you can explain your enquiry clearly when making contact.
- If the number on a document differs from the one on the car, have a qualified party clarify the discrepancy before relying on the search result.
Do not send full images of your documents to untrusted accounts to make an enquiry. Start through the official channel and provide what the responsible party requests through its authorised contact method, without posting your details in public comments.
How do you search the recall platform?
- Open the official defective products recall platform and find the vehicle or product checking field rather than only browsing the latest announcements.
- Enter the VIN you checked and run the search. If the field rejects the entry, review the number and field instructions rather than guessing a replacement character.
- Read the full result and open the details of any associated campaign. Note its reference if shown, the defect description and the required action.
- Review the instructions, then contact the specified party to confirm VIN inclusion and arrange the next step, rather than choosing a contact from an unofficial advertisement.
Searching by product or brand name helps you find announcements, but it does not replace matching the individual car. Keep the date of your enquiry and a copy of the details for reference. Do not treat an old screenshot as a permanent answer about recalls, particularly when a new notice arrives.
How should you interpret the search result?
Distinguish finding an announcement from confirming that your vehicle is included, and distinguish inclusion from actual completion of the required action. This table helps you choose the next step; it does not represent fixed status labels used by the platform:
| What did you find? | What should you do? |
| An announcement naming your car model | Match the VIN and check the campaign scope before assuming it applies to your car. |
| A result indicating that the vehicle is included | Read the campaign instructions and contact the party responsible for carrying out the action. |
| No result, or a search that could not be completed | Check the entry; if you have a notice or a specific concern, seek confirmation from the relevant party. |
| The seller says the repair was completed | Request the completion document and match it to the VIN and the relevant campaign. |
The absence of a recall result does not guarantee safety or replace an inspection when there are unusual symptoms. Likewise, do not attribute a noise or vibration to a campaign simply because its description seems similar. Diagnosing a fault requires a professional, while the enquiry answers a different question: whether the car is included in the campaign.
What should you do if your car is included?
Read the full defect description, risk and instructions before planning a trip to a service centre. There is no single driving recommendation for every campaign. If the announcement specifies instructions about use or stopping, follow them. If anything remains unclear, ask the responsible party how to handle and transport the car before moving it.
- Provide the VIN and campaign reference, and ask for confirmation that the discussion concerns this specific car and action.
- Ask where the work takes place, how to book and what to bring, and confirm the instructions to follow until the appointment.
- Keep the contact and appointment details, and ask how to obtain written confirmation when the work is finished.
Do not deliberately try to reproduce the defect, dismantle a suspected component or cancel a warning to continue driving. If the action requires a part or technical work, do not assume that buying a replacement yourself closes the campaign. To understand parts choices outside this process, read the guide to genuine, aftermarket and used car parts; follow up recall work with the party responsible for it.
How do you follow up and keep proof of repair?
When collecting the car, request a document showing the work performed and its date, linked to the VIN and campaign. Check that the details concern your car, and ask whether the action is complete or another step remains. An appointment confirmation or service-centre visit alone does not necessarily show that the recall work is finished.
Keep the document with the vehicle records, a copy of the announcement and important correspondence. If a later search seems inconsistent with the completion document, show both to the responsible party and request clarification instead of assuming one overrides the other. If symptoms remain or a concern appears after the work, report it and request a technical assessment. Proof of campaign repair is not a certificate that the car has no other faults.
What should you check before buying a used car?
Add a check for open recalls, meaning those whose required action is not yet complete, to your pre-purchase checklist. Request the VIN, match it to the car and search for yourself rather than relying on a verbal assurance or an image for a similar vehicle. If the seller mentions a completed earlier campaign, request its document and review the VIN and work details.
If a campaign applies and completion is unclear, ask the responsible party what remains before deciding to buy or use the vehicle. Do not make a recall result a substitute for a technical inspection or a review of the car’s condition; combine it with these used car inspection tips before purchase. The aim is to establish what has been verified and what needs follow-up, not to obtain a comprehensive guarantee from one search result.
Frequently asked questions about car recalls
- Is the car name enough to establish inclusion? Do not rely on it alone. Identify the vehicle using its VIN, then confirm campaign applicability with the responsible party if the result remains unclear.
- Does no result mean the car is completely safe? No. The enquiry is not a comprehensive technical inspection and does not justify ignoring symptoms or warnings that need professional assessment.
- Should I wait for a fault before making contact? Once inclusion is confirmed, follow the campaign instructions and contact the responsible party about the action without waiting for a noticeable symptom or trying to produce one.
- Can I book any workshop to close the recall? Start with the party identified in the announcement and ask it to direct you to the place of service and explain completion confirmation, rather than assuming any independent repair is enough.
- What should I keep after the action is completed? Retain confirmation linked to the VIN and campaign, the work date and important correspondence to make follow-up or explaining the car’s history when selling it easier.
Start with the correct VIN, read the full announcement and follow up with the responsible party until completion and documentation are clear. Make the enquiry part of caring for a car and checking it before purchase, not a replacement for a technical inspection or its specific safety instructions.

Car Brand Logos and Names: A Guide to Badges in Saudi Arabia
Table Of Contents:
|
Car brand logos are the badges and names each manufacturer places on the front grille, the boot lid and the centre of the steering wheel, and the easiest way to learn them is to group them by country of origin: Japanese badges such as Toyota's three ovals, Korean ones such as Hyundai's slanted H, and Chinese brands, many of which spell out their full name in Latin letters, alongside German, European and American badges. In this guide you will find each brand's name as it is written and said, a short description of its badge, its meaning where it is documented, and a table for quick comparison.
What are car brand logos and where do you find them on a car?
A car badge (the logo or emblem) is the trademark that identifies the manufacturer, and it usually appears in several places:
- The centre of the front grille or the bonnet, the most visible spot for the logo.
- The boot lid, where the model name and sometimes the trim are usually written next to it.
- The centre of the steering wheel, the wheel caps and the car key.
Badges fall into two types: a standalone symbol such as a star, rings or a lion, or a name spelled out in letters, as with many American and new Chinese brands, and knowing this difference helps you recognise a car from a distance.
What are the best-known Japanese car brand logos?
Japanese badges are very familiar on the Kingdom's roads, and most are simple symbols that are easy to remember:
- Toyota: three ovals that form the letter T; the company says the two overlapping ovals represent mutual trust between the customer and the company, and the outer oval represents the global expansion of its technology.
- Lexus: a curved letter L inside an oval; it is Toyota's luxury vehicle division.
- Nissan: the name NISSAN across a thin circle; the name began as an abbreviation of the Japanese holding company Nihon Sangyo.
- Honda: a wide, upright letter H inside a frame with rounded corners.
- Mitsubishi: three red diamonds meeting at the centre, chosen by founder Iwasaki Yataro because they recalled the emblem of the Tosa clan that employed him and his own family crest.
- Mazda: a stretched letter M shaped like wings inside a circle; according to the company's website, the name is also linked to its founder, Jujiro Matsuda.
- Suzuki: a red letter S with sharp lines.
- Isuzu: the name ISUZU in bold letters; the name comes from the Isuzu River and means fifty bells.
What are the Korean car brand logos?
- Hyundai: a slanted letter H inside an oval; the Korean word means modernity.
- Kia: the word KIA in a sharp, angular script; according to the company, the name means rising from Asia.
- Genesis: two spread wings with a shield in the middle; it is the luxury brand of Hyundai Motor Group.
Which Chinese car brand logos are common in Saudi Arabia?
Chinese cars have become familiar in the Saudi market, and their best-known badges include:
- Changan: a shape like the letter V inside a circle; the name comes from the Chongqing Changan Arsenal and literally means long-lasting peace.
- Chery: an oval with a symbol resembling the letter A in the middle.
- Geely: the name GEELY is written in Latin letters on the rear of many of its models.
- Haval: the name HAVAL in large letters; it is a brand specialising in SUVs, owned by Great Wall Motor, which is named after the Great Wall of China.
- MG: the letters MG inside an octagon; it is a British marque founded in Oxford and owned today by the Chinese company SAIC Motor.
- BYD: the letters BYD in a bold typeface; the name had no particular meaning, and the company later adopted Build Your Dreams as a slogan matching its letters.
- Hongqi: a vertical red strip running from the bonnet to the grille on many of its models; the name means red banner, and it is the oldest Chinese passenger car brand, owned by FAW Group.
How do you recognise the new Chinese car brands?
Many Chinese brands have appeared in recent years, some cannot be recognised from the badge alone, and here are practical ways to tell them apart:
- Read the written name: many new brands spell out their full name on the grille or the boot instead of a standalone symbol, such as Jetour, Omoda, Jaecoo and Deepal.
- Know the parent company: Jetour, Omoda and Jaecoo belong to Chery, Deepal to Changan, Haval to Great Wall and Lynk & Co to Geely, and brands within one group may share some models or platforms.
- Learn what the name means: Jetour combines the words jet and tour, signifying a convenient journey according to the brand; the O in Omoda comes from oxygen and moda means modern, according to Chery; Jaecoo comes from the German word Jäger, meaning hunter, and the English word cool; and Deepal's Chinese name means deep blue.
- Do not rely on the badge alone: some brands have changed their logo more than once, and its look may differ from one model year to another, so confirm the manufacturer and model on the car's registration card.
- Check the VIN: its first characters identify the manufacturer, and it is recorded on the registration card and stamped on the car's body.
What are the German and European car brand logos?
European badges often rely on old symbols with well-known stories:
- Mercedes-Benz: a three-pointed star inside a circle, which for the original Daimler company symbolised Gottlieb Daimler's aim of motorisation on land, water and in the air.
- BMW: a circle divided into blue and white quarters inside a black ring bearing the company name; its colours recall the flag of Bavaria, while the idea that it is an aircraft propeller is a myth.
- Audi: four interlinked rings, each representing one of the four companies that joined to form Auto Union, Audi's predecessor.
- Volkswagen: the letters V and W inside a circle; the German name means people's car.
- Skoda: a winged arrow inside a circle; the arrow represents speed, the wings progress and freedom, and the eye precision; it is a Czech brand.
- Peugeot: a lion; the original logo was a lion walking on an arrow, symbolising the speed, strength and flexibility of Peugeot's saw blades; it is a French brand.
- Renault: a diamond-shaped lozenge that the French company has placed on the front of its cars since the nineteen-twenties.
- Land Rover: a green oval carrying the name of the British brand.
- Rolls-Royce: two interlocking letters R and the Spirit of Ecstasy mascot on the bonnet; the British company is a wholly owned subsidiary of the BMW group.
- Lamborghini: a raging bull, chosen by founder Ferruccio Lamborghini after he admired the fighting bulls at the Miura ranch in Spain; it is an Italian brand.
What are the American car brand logos?
American badges tend towards written names and simple shapes:
- Ford: a blue oval with the name Ford in white script.
- Chevrolet: the gold bowtie, whose origin is unsettled; the company's account says William Durant took it from a wallpaper pattern in a French hotel.
- GMC: the letters GMC, usually in red; it is a General Motors brand.
- Jeep: the word JEEP in plain letters, and many people know it by its grille with vertical slots.
- Dodge: the name DODGE in large letters on the grille or the rear.
- Lincoln: a four-point star inside a frame; it is a luxury brand owned by Ford and named after US President Abraham Lincoln.
Car brand logos table: brand, country of origin and badge description
A quick summary of each brand's badge:
| Brand | Country of origin | Badge description |
| Toyota | Japan | Three ovals |
| Nissan | Japan | Name inside a thin circle |
| Honda | Japan | Upright letter H |
| Mitsubishi | Japan | Three red diamonds |
| Hyundai | Korea | Slanted H in an oval |
| Kia | Korea | The word KIA in a sharp script |
| Changan | China | V shape inside a circle |
| Chery | China | A-like symbol in an oval |
| Jetour | China | Name in Latin letters |
| Haval | China | HAVAL in large letters |
| MG | Britain (Chinese owner) | MG inside an octagon |
| BYD | China | The letters BYD |
| Mercedes-Benz | Germany | Three-pointed star in a circle |
| BMW | Germany | Circle with blue and white quarters |
| Audi | Germany | Four interlinked rings |
| Volkswagen | Germany | VW letters in a circle |
| Peugeot | France | Lion |
| Ford | USA | Blue oval |
| Chevrolet | USA | Gold bowtie |
| GMC | USA | Red GMC letters |
Frequently asked questions about car brand logos
- How do I tell the Hyundai logo from the Honda logo? The Hyundai logo is a slanted letter H inside an oval, while the Honda logo is a wide, upright letter H inside a frame with rounded corners.
- Which car has a horse, bull or lion logo? The black prancing horse on a yellow background is the logo of Italy's Ferrari, the horse inside a coloured shield belongs to Germany's Porsche, the raging bull to Lamborghini and the lion to Peugeot.
- Is a brand's country of origin the country where the car is made? Not always; the country of origin is the brand's home, and its models may be built in other countries, so check the manufacturing details in the VIN and the registration card.
- Why do companies change their logos? Usually when they renew their identity, as Nissan, Kia and BYD have done in recent years, so you may see two logos for the same brand on cars from different years.
- How can I confirm a car's brand if its badge has been replaced? Some owners fit modified badges or the badge of another model, so rely on the registration card and the VIN rather than the badge, especially when buying a used car.
Car brand logos become easier to remember when you link each badge to its country and parent company, read the name written on the boot when in doubt, and check the registration card and the VIN before any purchase decision. You can browse the cars available at Saleh Cars Group to get to know the different brands and models.
Overheating Without Coolant Loss: Causes and Safe Action
Table of Contents:
|
Overheating without coolant loss is possible: coolant visible in the reservoir does not prove that it circulates through the engine or releases heat effectively. The fault may involve coolant flow, airflow or cooling controls, and the temperature reading itself may also need checking. If an overheating warning appears, stop somewhere safe, switch off the engine and request assistance. Do not keep driving because the reservoir looks full.
Overheating Without Coolant Loss: What Does a Stable Level Mean?
The everyday expression water level refers here to engine coolant, not a recommendation to use plain water. This article focuses on a level that appears normal despite an overheating warning. For the wider picture, see the guide to engine overheating causes and what to do.
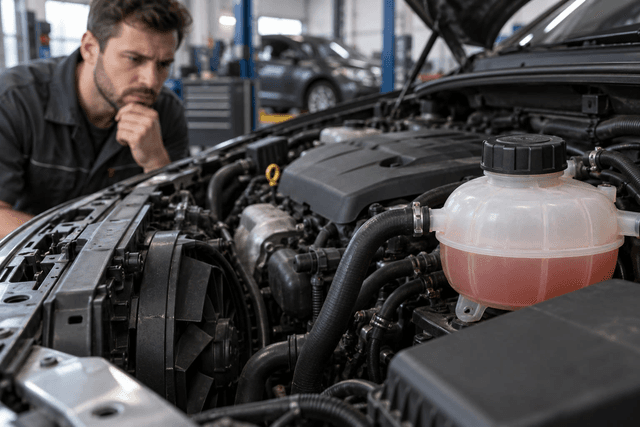
The reservoir’s role and the method for reading its level depend on the cooling-system design: it may be a pressurized part of the system or a recovery tank. Coolant also expands when hot, so comparing a hot reading with a cold one cannot establish system health. A visual reading within the marks on a cold engine, following the manual, tells you only about the level. It does not prove that passages are free of air or restrictions, or rule out a fault or a leak whose effects are not yet apparent.
How Can the Engine Overheat When Coolant Is Present?
The cooling system must move heat away from the engine and then transfer it to the air through the radiator. A failure at either stage can raise the temperature without an obvious drop in level. These are possibilities for inspection, not a shopping list of replacement parts:
- Fan or fan control: insufficient air may pass through the radiator while stationary. Seeing a fan turn once does not prove that its speed or all operating modes are correct.
- Thermostat: if it does not regulate coolant passage correctly, heat transfer to the radiator may be impaired despite an apparently adequate amount in the reservoir.
- Trapped air: air can interfere with coolant movement and heat transfer, particularly if the problem started after cooling-system work. The timing is a clue for the technician, not proof of a diagnosis.
- Insufficient pumping: the water pump may not provide the required flow. This does not necessarily produce a visible leak or an obvious noise that the driver can identify.
- Restricted heat exchange: internal restrictions in radiator passages or an external obstruction to airflow can reduce cooling. Reservoir level cannot distinguish between them.
- System pressure: a fault in the cap or components that retain pressure can affect the coolant’s resistance to boiling. Never test a cap by removing it while hot or guess at a different pressure rating.
For an explanation of circulation specifically, read about the water pump’s role in circulating coolant. Mentioning the pump does not make it the most likely cause in your car, and replacing it without checking the rest of the system may not solve the problem.
What Can Traffic and Highway Patterns Tell You?
Record only the conditions you already observed during previous use. Do not drive again or leave the engine running to reproduce overheating. The pattern can help a workshop organize its checks, but it is not a conclusive diagnosis:
| Previous observation | What might the technician check? | What does it not prove? |
| Temperature rises at a stop and eases when moving | Airflow, fan performance and fan control | It does not prove that only the fan is faulty |
| The warning appears on the highway or uphill | Coolant flow and heat exchange under load | It does not identify the pump or radiator specifically |
| It began after a coolant change or repair | Correct filling, trapped air and connections | It does not confirm trapped air without checks |
| It coincides with air conditioning use | Cooling performance as load and airflow change | It does not prove low AC refrigerant |
If the connection with AC use is your main observation, there is a separate explanation of engine overheating when the air conditioning is on. The key point here is that a normal coolant level cannot rule out a cooling fault, whatever the conditions when the warning appears.
Could the Temperature Reading Be Wrong?
A temperature sensor, its wiring or the display system may affect the reading. However, do not assume the warning is false because the reservoir is full or you cannot see steam. Some cooling faults show no obvious external sign at first. Treat the warning seriously until a qualified technician verifies the actual temperature and readings.
The technician compares diagnostic data and appropriate measurements with the vehicle’s specifications and operating conditions. A fault code alone cannot condemn a part, and the absence of a code does not prove that cooling is normal. There is also no single operating temperature for every car. Use the owner’s manual and vehicle-specific service information to interpret the gauge and warning message.
What Should You Do Safely When the Warning Appears?
- Move to the nearest safe stopping place away from traffic and use hazard lights as needed. Stop and switch off the engine. Do not try to drive to a workshop with an overheating warning.
- Stay clear of steam and spraying fluid. Never open a hot radiator or coolant reservoir cap, and do not assume that pressure has disappeared just because the gauge has fallen.
- Do not work near fans or put hands or tools in their operating area: a fan may start automatically even after the engine is switched off. Do not test it by hand or touch hot hoses.
- Do not pour cold water onto a hot engine or add fluid to a hot system. Request roadside assistance and arrange transport for inspection rather than repeatedly restarting the engine to see what happens.
Once the engine has cooled completely, you may record the level visible from outside the reservoir if this is possible and safe according to the manual, without removing caps or parts. A normal level or a warning that disappears after shutdown does not establish that the fault has gone or that continuing the journey is safe.
What Information and Checks Should You Discuss With the Workshop?
Tell the technician when the warning appeared: while stopped, climbing or travelling. Mention any preceding service work or fluid addition. Describe the message and any smell or steam you noticed from a safe position. Photograph the dashboard only after stopping, and do not reproduce the fault for documentation.
- Ask for the coolant level, specification and system condition to be checked, rather than accepting the reservoir is full as the entire assessment.
- Discuss fan operation and control, thermostat and pump function, and radiator flow as indicated by the diagnostic findings.
- Leave pressure and cap testing and air-removal procedures to the technician, using tools and methods appropriate to the system design.
- Ask what evidence identifies the fault and which check verified the repair before the car is handed back.
If initial checks do not identify the cause, broader diagnosis may be necessary. Do not jump to a head-gasket diagnosis, or rule it or another internal fault out solely because the reservoir level is stable. Testing should determine the next step.
Why Is Adding Water Not a Universal Fix?
If the level is within the correct limits, adding fluid will not repair a fan or restore impaired flow, and may exceed the permitted fill level. Use coolant meeting the vehicle’s specification and the concentration stated in the manual. Plain water is not a universal substitute, and color alone does not establish compatibility. Read about coolant differences and choosing a suitable fluid for more context.
Do not mix unknown products or experiment with additives to treat overheating. Flushing and air removal are not identical procedures on every vehicle; leave them to a professional when technically justified. Maintaining the correct level matters, but it is only one part of system health, not a replacement for checking performance.
Frequently Asked Questions About Overheating With a Stable Level
Does a full reservoir mean the radiator is full?
Not necessarily; it depends on the system design and condition. The visible level alone does not prove correct filling or circulation, and never justifies opening a hot cap.
Does the absence of a leak rule out pump failure?
No. Leakage is not the only possible sign of a pump fault. Its ability to circulate coolant needs appropriate assessment, not just a look underneath the car.
Can I drive if the gauge drops after stopping?
A lower reading does not prove the fault has gone. After an overheating warning, do not resume driving to test the car; request assistance and inspection before using it again.
Should I remove the thermostat to solve the problem?
Do not remove the thermostat as an experiment: it is part of cooling regulation. A technician should assess it and fit the correct replacement if necessary.
Does overheating without coolant loss mean a faulty sensor?
No. The overheating can be real despite a stable level. Do not ignore the warning or disconnect the sensor; have the reading and system performance checked together.
Conclusion: Check Cooling Performance, Not Just the Level
A stable coolant level neither rules out overheating nor identifies its cause. Stop safely at a warning, switch off the engine, avoid hot caps and fans, and give your observations to a qualified technician. A sound repair starts with evidence of the fault, not extra water or random parts replacement.

Vehicle Registration Renewal on Absher: Steps and Requirements
Table of Contents:
|
Vehicle registration renewal is available electronically through Absher vehicle services once the service requirements are met and the automated eligibility check is passed. Start by reviewing insurance, technical inspection and any required payments, then select the vehicle, choose registration renewal and confirm the transaction. Istimara means the vehicle registration here, not the person’s driving licence. This guide explains what to prepare and how to handle a renewal that cannot proceed, without confusing renewal with ownership transfer or an inspection booking.
What Is Vehicle Registration Renewal on Absher?
Renewal extends the registration of a previously registered vehicle. The official vehicle registration renewal page on the National Portal explains that the service is available electronically through Absher without visiting traffic offices, and that eligibility is checked automatically against the service requirements. Reaching the vehicle screen therefore does not establish that renewal is complete.
When checking an expiry date, first identify the document: a driving licence relates to the driver, while vehicle registration relates to the vehicle. This distinction matters when researching requirements; do not apply driving licence renewal conditions to registration renewal. Follow the service name shown in your account rather than an old screenshot of a different menu.
What Are the Vehicle Registration Renewal Requirements?
The official service page lists the following requirements. Use them as a checklist before starting, while also referring to what the service displays for your vehicle when you apply. A receipt or an old copy of a document is not a substitute for checking its validity and that it relates to the intended vehicle.
- Valid vehicle insurance: check the coverage dates and vehicle details, not just the purchase notification.
- A valid technical inspection certificate: distinguish an inspection appointment from an existing valid certificate.
- Payment of renewal fees and any late-renewal penalty, as required by the service, rather than relying on a widely quoted amount.
- Payment of any traffic violations: check the payment status rather than assuming that starting a bank transaction completes the process.
The required-documents tab also specifies an existing vehicle registration. This guide does not add requirements to upload photographs or other documents simply because somebody else encountered them; follow what the service actually requests. Because renewal eligibility is checked automatically, verify availability in your account rather than deciding based on a date quoted in an unofficial explanation.
How Should You Check Insurance, Inspection and Violations?
Start with insurance: open the policy details and check that the policy is valid and covers the same vehicle. To distinguish the type of cover from the validity of a policy, read about comprehensive versus third-party car insurance. Choosing cover that fits your needs is different from checking a renewal requirement; the name of the cover alone does not establish that an application will be accepted.
Next, review the inspection certificate. If you need to prepare for an appointment, use the periodic vehicle inspection preparation checklist to organise technical checks, not as proof of passing. Inspection is a separate process with its own result, not a renewal-screen button that substitutes for a valid certificate.
Then review violations and any payment requirements displayed. The guide to checking, paying and disputing traffic violations explains the related services. Do not confuse filing a dispute with satisfying the renewal payment requirement; rely on the displayed status and the relevant authority’s instructions rather than assuming another action removed the obstacle.
What Are the Steps to Renew Registration on Absher?
The following route follows the official service instructions. Read the details on each screen before moving on. If the menus appear in a different order in your interface, look for vehicle registration renewal under vehicle services rather than selecting another service because its name is similar.
- Log in to Absher through its official channel, then select Vehicles.
- Select Manage Vehicles from the services menu and review the vehicles shown in your account.
- Choose the vehicle whose registration you want to renew and check its details before proceeding.
- Select Renew Vehicle Registration; the system automatically checks eligibility against the service conditions and requirements.
- Review the information displayed, complete any requirements and select Confirm Renewal.
- Check for the successful renewal message, review the updated registration details and retain any transaction reference displayed.
Payment alone, or closing the screen, does not prove successful renewal. If your session ends before the result appears, return to the vehicle details and check what actually happened before repeating the steps. The aim is to confirm that the correct vehicle’s registration was updated, not simply to complete a sequence of clicks.
How Do Renewal, Ownership Transfer and Inspection Differ?
These services may relate to the same vehicle, but each serves a different purpose. Use the table to identify your starting point, then review the relevant service conditions separately. Do not assume completing one also completes another.
| Procedure | Purpose | What Does Not Prove Completion? |
| Registration renewal | Renew the vehicle registration | Buying insurance or booking an inspection alone |
| Ownership transfer | Transfer the vehicle to another owner | Registration renewal alone |
| Technical inspection | Inspect the vehicle and obtain its result | An appointment without the inspection taking place |
If your aim is to sell or buy the vehicle, review the Absher ownership transfer steps and sale conditions instead of treating renewal as a substitute for transfer. Organise your notes under separate headings: registration status, insurance status, inspection result and transfer transaction status when relevant. This helps avoid confusing different documents.
Why Can Renewal Fail to Proceed, and What Should You Do?
An unmet published requirement is a possible reason renewal cannot proceed, but it does not explain every message. Start with the text displayed in your account and review the item it identifies, rather than repeating the request or changing several things without understanding the issue.
- If the message concerns insurance or inspection, match the vehicle and validity dates against the relevant document and contact its issuer if the information conflicts.
- If it concerns payment, review the requirement, transaction status and receipt before paying again. Do not assume an amount or reason that the screen does not state.
- If eligibility is unclear or the renewal option is missing, review the current service conditions and vehicle details, then ask official support for clarification.
- If a technical message appears without explanation, note its text, the time and the stage reached. Reopen the service to check the result; do not describe it as a final rejection without confirmation.
When contacting support, explain where the process stopped and which documents you checked. Never share your password or verification code, and hide personal details in any screenshot you post. This is a way to organise follow-up, not a guarantee of processing time or acceptance.
Frequently Asked Questions About Vehicle Registration Renewal
- Is registration renewal the same as driving licence renewal? No. Registration, or Istimara, relates to the vehicle, while the driving licence relates to the driver. Check the service name before reviewing its requirements or using it.
- Is valid insurance enough to renew registration? No. Insurance is one requirement; the official page also lists a valid inspection certificate and payment requirements. Automated eligibility verification remains part of the renewal process.
- Is booking a periodic inspection enough? The published requirement is a valid technical inspection certificate. A booking is not that certificate and does not show that the vehicle passed the inspection.
- Must I visit a traffic office to renew? The official page describes electronic renewal through Absher without visiting traffic offices. If your case cannot proceed, follow the service message and support guidance rather than assuming a particular in-person procedure.
- How can I tell that renewal is complete? Check the successful renewal message and then review the registration details. The National Portal lists digital registration display and registration printing as related services; do not confuse accessing the document with carrying out renewal itself.
In short, prepare the vehicle requirements, renew the registration through Absher and verify the result. If the process cannot proceed, address the item identified in the message or request official clarification, without assuming fees, deadlines or exceptions that the service does not show.
Choosing a Car Battery: Size, Capacity, Type and Installation
Table of Contents:
|
Choosing a car battery starts with confirming that the battery really is the cause of the problem, then matching what the owner’s manual or the current battery label specifies: size and mounting, terminal orientation, capacity in Ah, cold cranking amps (CCA) and battery technology. After that, check the manufacture date and warranty terms, and make sure installation is done properly, which may include registering the battery in the car’s system. This guide explains each step in general terms; your owner’s manual and a qualified technician remain the reference for your car’s specifications.
When Should You Start Choosing a Car Battery?
Do not buy a battery just because the car failed to start once. Weak starting can be linked to the battery, but also to the starter motor, the connections or the charging system. Ask a specialist to test the battery and charging system with suitable equipment, and review the car battery failure symptoms and how to test them to recognise signs worth checking.
If the engine cranks normally but does not start, the battery may not be the cause; see the guide on an engine that cranks but will not start. If the battery keeps going flat, there may be a hidden electrical drain in the car, and fitting a new battery without fixing the cause may simply pass the problem on to it. Once testing confirms the battery, prepare the following before visiting the seller:
- A clear photo of the current battery label showing all printed details.
- The battery specification page in the owner’s manual, if available.
- Whether the car has an automatic engine stop-start system.
- Where the battery sits: engine bay, boot or under a seat.
Which Specifications Should Match the Manual or Label?
The first reference is the owner’s manual, then the label of the original battery if it is still fitted. The table below summarises what to compare before paying and where to find it.
| Item | Where to find it | Why it matters |
| Size or group | Owner’s manual or current battery label | Defines overall dimensions and fit on the tray |
| Mounting dimensions | Battery tray and hold-down clamp | A poorly secured battery vibrates and can be damaged |
| Terminal orientation | Position of the positive and negative terminals on the current battery | A different layout may stop cables reaching or strain them |
| Capacity (Ah) | Label or owner’s manual | Indicates the energy stored in the battery |
| Cold cranking amps (CCA) | Label | Indicates the battery’s ability to deliver starting current |
| Technology type | Label and owner’s manual | Must suit the charging system and any stop-start system |
Two batteries can look alike yet differ in terminal orientation, height or mounting lip. Ask the seller to compare the new battery directly with the old one. If the current label differs from the manual, the previous battery may not have matched in the first place; rely on the manual or ask the dealer or a qualified technician.
What Do Capacity (Ah) and Cold Cranking Amps (CCA) Mean?
Capacity in Ah describes how much energy the battery stores, which matters when the battery powers the car’s systems with the engine off. Cold cranking amps (CCA) describe the battery’s ability to deliver a high current at the moment of starting in cold conditions, according to a specific test standard.
A label may state CCA according to a different standard from another battery, so only compare two figures measured to the same standard, and ask the seller to clarify. The general rule is not to go below the car’s specified capacity or current.
On the other hand, a higher figure is not automatically better; what matters is that the battery keeps the correct size and technology. In cars that record battery data in their system, the actual capacity of the new battery may need to be entered during registration, so tell the technician about any difference from the original.
What Is the Difference Between Flooded, EFB and AGM Batteries?
The general idea of each type is as follows, while the manual decides what your car needs:
- Conventional flooded battery: common in cars without an automatic stop-start system; some serviceable types need the electrolyte level checked.
- EFB battery: an enhanced flooded battery built to withstand repeated starting and discharge cycles better than a conventional one, used in many cars with stop-start systems.
- AGM battery: the electrolyte is absorbed in glass fibre mats and the battery is sealed; it copes better with electrical loads and repeated discharge, and is used in cars with higher electrical demands.
In a car with automatic stop-start, the battery handles frequent engine restarts and powers systems while the engine is stopped. Fitting a lower technology than specified, such as a conventional flooded battery instead of EFB or EFB instead of AGM, may weaken system performance, shorten battery life and trigger warning messages. Moving to a higher technology should only happen if the owner’s manual or the dealer allows it.
If the battery sits inside the cabin or boot, the manufacturer may specify a sealed type or a particular vent outlet; do not fit a different battery in that location without confirming that it matches.
How Do You Read the Manufacture Date and Warranty Terms?
The manufacture date usually appears as a code printed on the lid or case or on a small sticker, and the code format differs between manufacturers, so ask the seller to explain the code on the battery itself, and prefer the most recently made battery among the matching options.
A battery stored for a long time may lose some charge, so ask whether the seller tested it before sale. For the warranty, read the written terms on the invoice or warranty card rather than relying on a verbal promise, and pay attention to the following:
- What the warranty covers, how a fault is proven, and whether the battery must be tested by the seller.
- Whether installation elsewhere, or fitting the battery to a car it does not match, affects the warranty.
- Which documents are needed for a claim; keep the invoice somewhere easy to find.
How Does Saudi Heat Affect Your Battery Choice?
High temperatures speed up the reactions inside a battery and may increase fluid loss and ageing of the internal plates. This does not mean choosing a battery simply because it is marketed for heat; it means sticking to the correct specification and technology and choosing a recently made battery.
After installation, help the battery by parking in the shade where possible, keeping the terminals clean and checking the battery and charging system during routine maintenance. For more on how heat affects the car in general, read the summer car care guide for Saudi heat.
What Should You Consider When Installing the New Battery?
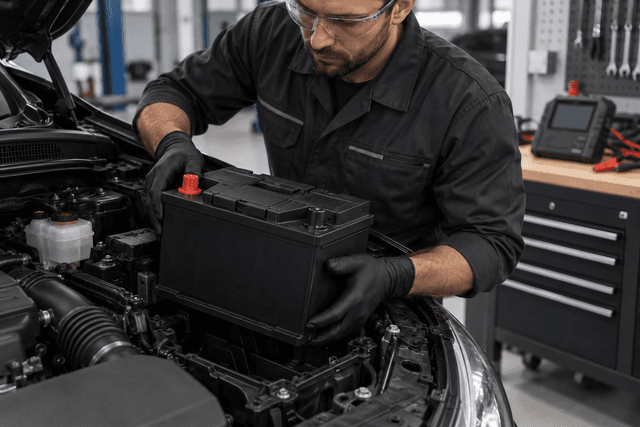
If you are not confident about the steps, leave the installation to a qualified technician. If you fit it yourself, wear eye protection and gloves, switch the engine off and keep the key away, disconnect and reconnect the terminals in the order given in the owner’s manual, avoid letting a metal tool touch both terminals, and keep any sparks or flames away from the battery.
- Battery registration: some cars require the new battery to be registered in the energy management system with a diagnostic tool so that charging is adjusted for a new battery. Ask the technician whether your car needs this.
- Saving settings: disconnecting the battery may erase settings such as the clock and radio, and some systems may need resetting according to the manual. Some technicians use a memory saver during the swap.
- Clean terminals: remove corrosion from the terminals and cable ends, and check that the clamps are sound before connecting.
- Secure mounting: fix the battery with its hold-down clamp so it cannot move, tighten the terminals without excessive force, and refit the protective covers.
After installation, start the car and watch for any warning message. If one appears, return to the technician to check the installation and registration rather than trying to clear the warning yourself.
How Do You Dispose of the Old Battery Safely?
A battery contains acid and lead, so do not open it, drain it or put it in household waste. Keep it upright, protect its terminals from contact, and hand it to the seller, a workshop or a party that accepts used batteries for recycling. If it is cracked or leaking, do not touch it with bare hands and ask the workshop to handle it.
Frequently Asked Questions About Choosing a Car Battery
How can I tell a battery fault from a starter fault?
Slow cranking with dim lights may point to the battery, while a click with bright lights may point to the starter motor. These are indications, not a diagnosis, so have the battery and charging system tested and review the signs of a failing starter motor before buying.
Can I fit a battery with a higher capacity than the original?
It may be possible in some cases if the size and technology still match, but the decision rests with the owner’s manual and the technician, especially in cars that record battery data in their system.
Can I fit a conventional battery to a car with stop-start?
This is not recommended; use the technology specified in the manual, such as EFB or AGM, because a lower technology may not withstand the frequent restart pattern.
Do all cars need the new battery to be registered?
No, but some cars require it using a diagnostic tool. Ask the technician or check the manual before installation, and do not assume the swap is complete once the terminals are connected.
What should I do with the old battery after replacing it?
Do not open it or throw it away with household waste. Keep it upright and hand it to the seller, a workshop or a party that accepts used batteries for recycling.
Conclusion
First confirm that the battery is the problem, then match size, terminals, capacity, CCA and technology to the owner’s manual, and check the manufacture date and warranty terms. Leave installation and registration to a technician if you are unsure, and dispose of the old battery safely.
When to Replace Car Tyres: Tread, Cracks and Warning Signs
Table Of Contents:
|
If you are asking when to replace car tyres, the short answer is: replace a tyre when the surface of the tread reaches the level of the raised wear indicators inside the grooves, when a bulge, a deep cut or clear cracks appear in its sidewall, or when the rubber has aged to the point at which the tyre or car manufacturer recommends replacement, even if the tread looks good. In this guide we explain how to check your tyres, what the wear pattern reveals, and how to choose the right replacement.
When should you replace car tyres? The key signs in brief
Replacement is not tied to a single distance for every car, but to the tyre's condition and its maker's recommendations. The main signs are:
- The tread surface has reached the level of the wear indicators in any part of the tyre, not just on average.
- A bulge or bubble in the sidewall, a deep cut, or exposed cords or internal fabric.
- Clear cracks in the sidewall or between the tread blocks, showing that the rubber has aged and hardened.
- Uneven wear that has left part of the tyre smooth even though the rest of its surface is sound.
- A persistent vibration that does not go away after balancing, or repeated pressure loss in the same tyre with no visible cause.
How do you check tread depth using the TWI wear indicators?
Inside the grooves are small raised bars called wear indicators, whose location is marked by the letters TWI or a small triangle on the tyre's shoulder, and when the tread surface is level with them, the tyre has reached the end of its usable life. To check:
- Park the car on level ground and turn the steering wheel to one side so you can see the front tyres clearly.
- Look for the TWI mark or triangle on the tyre's shoulder, then look into the groove next to it to find the raised bar.
- Compare the level of the tread surface with the bar; the closer they are to level, the closer the replacement date.
- Repeat the check on the inner edge, the centre and the outer edge, and at several points around the tyre's circumference.
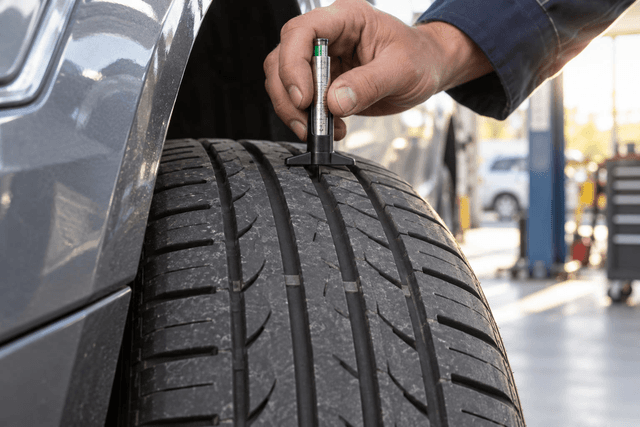
- For a more precise reading, use a tread depth gauge, available at tyre shops, and record the reading for each tyre.
- Some drivers use a coin as a rough gauge, but it is no substitute for a proper gauge or a look by a qualified technician.
Do not wait until they are exactly level if you travel often or drive in the rain, as water clearance and grip weaken gradually as the tread gets shallower.
What do tyre cracks and sidewall bulges mean?
The sidewall flexes with every turn of the wheel and carries the car's weight, so any damage to it is more dangerous than tread wear:
- Fine surface cracks: an early sign of rubber ageing caused by heat and sun, which calls for the tyre to be inspected by a specialist and monitored.
- Deep cracks: if they widen or reach the tyre's inner layers, it is time to replace it.
- A bulge or bubble: damage to the tyre's internal structure, usually after hitting a pothole or kerb, which requires immediate replacement and no travelling on it.
- Cuts and gashes: a deep cut in the sidewall weakens the tyre even if no air is leaking from it yet.
What does the tyre wear pattern reveal?
The wear pattern reveals the cause of the problem, and if you do not fix it, new tyres will wear the same way:
| Wear pattern | Likely cause | What to do |
| Both edges more than the centre | Pressure lower than recommended | Set the pressure according to the driver's door sticker and check it regularly |
| Centre more than the edges | Pressure higher than recommended | Set the recommended pressure, not the maximum pressure printed on the tyre |
| One inner or outer edge | Wheel alignment or suspension fault | Check the alignment and suspension parts |
| Diagonal, feather-like wear | Incorrect toe between the two wheels | Have the alignment set at an equipped workshop |
| Repeated patches or scallops | Unbalanced wheels or worn shock absorbers | Balance the wheels and check the shock absorbers |
| A single flat spot | Hard braking with a locked wheel, or standing a long time without moving | Have a specialist assess the tyre |
If you see wear on both edges, start by reviewing the causes, signs and solutions for low tyre pressure, and if the wear is on one edge or comes with the car pulling to one side, read about the difference between wheel balancing and alignment.
How do Saudi heat and sand affect tyre life?
Rubber ages over time even if the car is used little, and you will find how to tell a tyre's age from the DOT code in our article on how to read tyre size and manufacture date. There is no single lifespan for all tyres, so refer to the tyre and car makers' recommendations. In the Kingdom's climate, some factors speed up deterioration:
- Direct sun and high heat speed up the hardening and cracking of rubber, especially for cars standing for long periods in open car parks, so park in the shade whenever possible.
- Hot asphalt raises tyre temperature, and the effect grows with low pressure or overloading on long trips.
- Sandy, gravel and desert tracks expose the tread and sidewall to cuts from sharp stones, so inspect the tyres after every desert trip.
- If you lower tyre pressure (deflating) to drive on sand, restore it to the recommended value before returning to asphalt, because highway driving at low pressure raises tyre temperature.
Should you replace tyres in pairs or all four together?
Ideally all four tyres match, but replacing them all together is not always necessary:
- Replace both tyres on the same axle together at least, so grip does not differ between the two sides when braking or cornering.
- When replacing only one pair, many tyre makers recommend fitting the newer pair on the rear axle for better stability, unless the owner's manual says otherwise.
- In four-wheel-drive or all-wheel-drive cars, the owner's manual may require the four tyres to be close in size and degree of wear to protect the drive system, so check it before replacing only two.
What about the spare tyre?
The spare forgotten in the boot ages just like the other tyres, even if it is never used:
- Check its pressure regularly and before every trip, because a flat spare will not help you when you get a puncture.
- Read its manufacture date and inspect its sidewall, as it may be older than the tyres on the car.
- A small temporary spare is designed for a limited distance and speed stated in the owner's manual or on the tyre's side, so use it only to reach the nearest tyre shop.
- If your car comes with a repair kit instead of a spare, check its expiry and how to use it.
How do you choose the right replacement tyre: size, load and speed?
Choose what your car was designed for, not just what the shop has in stock, and check the following:
- Size: copy it from the sticker on the driver's door frame or from the owner's manual, not from the tyre currently fitted, which may be different.
- Load index and speed symbol: choose values equal to or higher than the car manufacturer's recommendation, never lower.
- Manufacture date: ask for recently made tyres with close dates, especially on the same axle.
- Type of use: a driver who often travels on highways has different needs from one who drives in the desert or carries heavy loads, so ask about the tyre designed for your use.
- Changing the size: do not change the size of your tyres or rims without consulting a specialist; to learn the effect, read our article on whether the wrong rims make your car use more fuel.
- After fitting: balance the wheels, set the pressure according to the driver's door sticker, and check the alignment if the old tyres were worn unevenly.
What is the tyre energy efficiency label in Saudi Arabia?
The Saudi Standards, Metrology and Quality Organization offers the Energy Efficiency Label for Tires service, and explains that the label serves as a guide for consumers before purchasing the product to increase their awareness of its energy efficiency before buying it.
The organization lists tyres among the products subject to the efficiency label regulations, and the aims of these labels include reducing energy consumption for the consumer, enabling the consumer to know a product's efficiency before buying, and protecting consumer safety and health and the environment. In practice:
- When comparing tyres of the same size, ask to see the energy efficiency label for each one and read its details.
- Do not make the label your only criterion; size, load index, speed symbol, manufacture date and the tyre's suitability for your use come first.
- Requirements and procedures may be updated from time to time, so check the latest information on the organization's website.
Frequently asked questions about replacing car tyres
- Should I replace a tyre that is old even if its tread is good? Tread depth alone is not enough, as rubber hardens over time; have it checked by a specialist and follow the tyre maker's recommendation.
- Can a puncture in the side of the tyre be repaired? Repairing holes in the sidewall or shoulder is not usually recommended, while for a hole in the tread area the technician decides whether it can be repaired based on its size and position.
- Can I fit two tyres of different types? This is not recommended on the same axle, and it is best for all four tyres to match in type and tread pattern, especially in four-wheel-drive cars.
- Are small cracks between the tread blocks dangerous? They are a sign of ageing that may not require immediate replacement, but have a specialist monitor them, and if they deepen, replace the tyre.
- How often should I check my tyres? Check their pressure and appearance regularly, for example when refuelling, before every trip, and after hitting a pothole or kerb or after a desert trip.
Checking your tyres takes only minutes: look at the wear indicators, inspect the sidewall, notice the wear pattern and read the manufacture date. If a danger sign appears, do not postpone the change; choose a replacement with the recommended size, load and speed ratings, then fix the cause of any uneven wear.