Top 10 SUVs for 2024
Top 10 SUVs for 2024: Discover Your Options with Saleh Cars
With the growing demand for SUVs, 2024 introduces a range of new models that cater to drivers seeking power, safety, and advanced technology. These vehicles combine modern design with practical capabilities, making them the perfect choice for families and adventure enthusiasts alike.
In this article, we’ll explore the top 10 SUVs for 2024, focusing on the options available at Saleh Cars Group to help you choose the perfect vehicle that suits your needs.
1. Kia Telluride 2024
The 2024 Kia Telluride has solidified its place as a favorite for fans of family-friendly SUVs. Its bold design with strong lines gives it a commanding road presence. Under the hood, it features a 3.8-liter V6 engine producing 291 horsepower, delivering smooth performance on highways and rugged terrains. The spacious interior is complemented by modern technology such as a large touchscreen and smart navigation system, making it a vehicle that balances comfort and practicality.
2. Hyundai Palisade 2024
If you’re looking for an SUV that offers luxurious comfort and advanced technology, the 2024 Hyundai Palisade is a choice worth considering. Equipped with a 3.8-liter V6 engine, it delivers powerful performance with excellent fuel efficiency. Its interior is designed to meet the needs of large families with three rows of seating, along with features like intelligent climate control and an integrated infotainment system.
3. Mazda CX-5 2024
The 2024 Mazda CX-5 offers the perfect blend of sporty performance and sleek design. Thanks to its 2.5-liter Skyactiv-G engine, the car delivers sufficient power for daily driving with outstanding fuel efficiency. The interior design stands out for its high-quality materials and attention to detail, alongside advanced safety features such as blind-spot monitoring and forward collision warning.
4. Genesis GV70 2024
For those seeking luxury in an SUV, the 2024 Genesis GV70 provides an exceptional driving experience with a sophisticated interior featuring premium materials. It comes with a 2.5-liter twin-turbo engine producing 300 horsepower, offering sporty performance with smooth handling. Advanced driving technology, such as semi-autonomous driving systems, makes the GV70 a standout choice for luxury enthusiasts.
5. Honda CR-V 2024
The 2024 Honda CR-V continues to cement its reputation as one of the most reliable SUVs, thanks to its practicality and efficiency. It delivers strong performance with its 1.5-liter turbocharged engine and excellent fuel economy. The vehicle includes advanced safety technologies like lane-keeping assist and forward collision warning, making it an ideal car for daily commuting.
6. Toyota RAV4 2024
The 2024 Toyota RAV4 is an excellent choice for those seeking a versatile SUV. It features a 2.5-liter engine with an optional all-wheel-drive system, providing solid performance on both paved roads and off-road trails. The bold exterior design reflects strength and adventure, while the interior offers features like wireless charging and advanced safety systems.
7. Ford Explorer 2024
For those looking for a family SUV that combines comfort and powerful performance, the 2024 Ford Explorer is an ideal choice. It comes with a 3.0-liter EcoBoost V6 engine producing 400 horsepower in the sporty ST trim, delivering dynamic performance. Thanks to its spacious interior and intelligent all-wheel-drive system, it provides an outstanding driving experience in all conditions.
8. Nissan Pathfinder 2024
The 2024 Nissan Pathfinder returns with a more modern design and significant improvements in performance and technology. It features a 3.5-liter V6 engine producing 284 horsepower, providing excellent capability for long-distance travel and adventures. The interior is spacious, offering modern technologies like a smart navigation system and support for Apple CarPlay and Android Auto.
9. Chevrolet Traverse 2024
If you need a large SUV that accommodates the entire family, the 2024 Chevrolet Traverse is the perfect choice. It features a 3.6-liter V6 engine producing 310 horsepower, with seating for up to eight passengers. The vehicle offers a wide range of safety features, such as forward collision alert and lane-keeping assist, making it a safe and comfortable option.
10. BAIC X7 Honor 2024
The 2024 BAIC X7 Honor offers a unique experience with its modern design and advanced technological features. It comes with a 1.5-liter turbocharged engine producing 180 horsepower, paired with a smooth automatic transmission. The interior is equipped with digital displays and safety systems such as blind-spot monitoring and intelligent driving assistance, making it a strong competitor in its class.
Why Choose Saleh Cars?
When looking for the perfect SUV for 2024, Saleh Cars offers a wide range of premium options. With excellent after-sales services, flexible financing options, and dedicated customer support, Saleh Cars ensures a smooth and secure car-buying experience.
For more details on these vehicles and the available offers, visit the official website of Saleh Cars Group:
salehcars.com
Conclusion
Whether you’re looking for a luxury SUV, a family car, or a sporty vehicle, 2024 brings an impressive selection of SUVs that cater to various needs and preferences. By comparing specifications and technologies, you’ll find the perfect car that offers an exceptional driving experience.
Choose your next car with Saleh Cars and enjoy an unmatched car-buying journey! 🚗✨
FAQs
Related Blogs
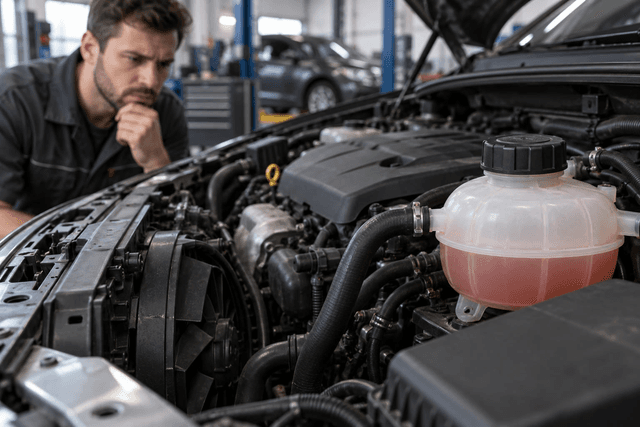
Overheating Without Coolant Loss: Causes and Safe Action
Table of Contents:
|
Overheating without coolant loss is possible: coolant visible in the reservoir does not prove that it circulates through the engine or releases heat effectively. The fault may involve coolant flow, airflow or cooling controls, and the temperature reading itself may also need checking. If an overheating warning appears, stop somewhere safe, switch off the engine and request assistance. Do not keep driving because the reservoir looks full.
Overheating Without Coolant Loss: What Does a Stable Level Mean?
The everyday expression water level refers here to engine coolant, not a recommendation to use plain water. This article focuses on a level that appears normal despite an overheating warning. For the wider picture, see the guide to engine overheating causes and what to do.
The reservoir’s role and the method for reading its level depend on the cooling-system design: it may be a pressurized part of the system or a recovery tank. Coolant also expands when hot, so comparing a hot reading with a cold one cannot establish system health. A visual reading within the marks on a cold engine, following the manual, tells you only about the level. It does not prove that passages are free of air or restrictions, or rule out a fault or a leak whose effects are not yet apparent.
How Can the Engine Overheat When Coolant Is Present?
The cooling system must move heat away from the engine and then transfer it to the air through the radiator. A failure at either stage can raise the temperature without an obvious drop in level. These are possibilities for inspection, not a shopping list of replacement parts:
- Fan or fan control: insufficient air may pass through the radiator while stationary. Seeing a fan turn once does not prove that its speed or all operating modes are correct.
- Thermostat: if it does not regulate coolant passage correctly, heat transfer to the radiator may be impaired despite an apparently adequate amount in the reservoir.
- Trapped air: air can interfere with coolant movement and heat transfer, particularly if the problem started after cooling-system work. The timing is a clue for the technician, not proof of a diagnosis.
- Insufficient pumping: the water pump may not provide the required flow. This does not necessarily produce a visible leak or an obvious noise that the driver can identify.
- Restricted heat exchange: internal restrictions in radiator passages or an external obstruction to airflow can reduce cooling. Reservoir level cannot distinguish between them.
- System pressure: a fault in the cap or components that retain pressure can affect the coolant’s resistance to boiling. Never test a cap by removing it while hot or guess at a different pressure rating.
For an explanation of circulation specifically, read about the water pump’s role in circulating coolant. Mentioning the pump does not make it the most likely cause in your car, and replacing it without checking the rest of the system may not solve the problem.
What Can Traffic and Highway Patterns Tell You?
Record only the conditions you already observed during previous use. Do not drive again or leave the engine running to reproduce overheating. The pattern can help a workshop organize its checks, but it is not a conclusive diagnosis:
| Previous observation | What might the technician check? | What does it not prove? |
| Temperature rises at a stop and eases when moving | Airflow, fan performance and fan control | It does not prove that only the fan is faulty |
| The warning appears on the highway or uphill | Coolant flow and heat exchange under load | It does not identify the pump or radiator specifically |
| It began after a coolant change or repair | Correct filling, trapped air and connections | It does not confirm trapped air without checks |
| It coincides with air conditioning use | Cooling performance as load and airflow change | It does not prove low AC refrigerant |
If the connection with AC use is your main observation, there is a separate explanation of engine overheating when the air conditioning is on. The key point here is that a normal coolant level cannot rule out a cooling fault, whatever the conditions when the warning appears.
Could the Temperature Reading Be Wrong?
A temperature sensor, its wiring or the display system may affect the reading. However, do not assume the warning is false because the reservoir is full or you cannot see steam. Some cooling faults show no obvious external sign at first. Treat the warning seriously until a qualified technician verifies the actual temperature and readings.
The technician compares diagnostic data and appropriate measurements with the vehicle’s specifications and operating conditions. A fault code alone cannot condemn a part, and the absence of a code does not prove that cooling is normal. There is also no single operating temperature for every car. Use the owner’s manual and vehicle-specific service information to interpret the gauge and warning message.
What Should You Do Safely When the Warning Appears?
- Move to the nearest safe stopping place away from traffic and use hazard lights as needed. Stop and switch off the engine. Do not try to drive to a workshop with an overheating warning.
- Stay clear of steam and spraying fluid. Never open a hot radiator or coolant reservoir cap, and do not assume that pressure has disappeared just because the gauge has fallen.
- Do not work near fans or put hands or tools in their operating area: a fan may start automatically even after the engine is switched off. Do not test it by hand or touch hot hoses.
- Do not pour cold water onto a hot engine or add fluid to a hot system. Request roadside assistance and arrange transport for inspection rather than repeatedly restarting the engine to see what happens.
Once the engine has cooled completely, you may record the level visible from outside the reservoir if this is possible and safe according to the manual, without removing caps or parts. A normal level or a warning that disappears after shutdown does not establish that the fault has gone or that continuing the journey is safe.
What Information and Checks Should You Discuss With the Workshop?
Tell the technician when the warning appeared: while stopped, climbing or travelling. Mention any preceding service work or fluid addition. Describe the message and any smell or steam you noticed from a safe position. Photograph the dashboard only after stopping, and do not reproduce the fault for documentation.
- Ask for the coolant level, specification and system condition to be checked, rather than accepting the reservoir is full as the entire assessment.
- Discuss fan operation and control, thermostat and pump function, and radiator flow as indicated by the diagnostic findings.
- Leave pressure and cap testing and air-removal procedures to the technician, using tools and methods appropriate to the system design.
- Ask what evidence identifies the fault and which check verified the repair before the car is handed back.
If initial checks do not identify the cause, broader diagnosis may be necessary. Do not jump to a head-gasket diagnosis, or rule it or another internal fault out solely because the reservoir level is stable. Testing should determine the next step.
Why Is Adding Water Not a Universal Fix?
If the level is within the correct limits, adding fluid will not repair a fan or restore impaired flow, and may exceed the permitted fill level. Use coolant meeting the vehicle’s specification and the concentration stated in the manual. Plain water is not a universal substitute, and color alone does not establish compatibility. Read about coolant differences and choosing a suitable fluid for more context.
Do not mix unknown products or experiment with additives to treat overheating. Flushing and air removal are not identical procedures on every vehicle; leave them to a professional when technically justified. Maintaining the correct level matters, but it is only one part of system health, not a replacement for checking performance.
Frequently Asked Questions About Overheating With a Stable Level
Does a full reservoir mean the radiator is full?
Not necessarily; it depends on the system design and condition. The visible level alone does not prove correct filling or circulation, and never justifies opening a hot cap.
Does the absence of a leak rule out pump failure?
No. Leakage is not the only possible sign of a pump fault. Its ability to circulate coolant needs appropriate assessment, not just a look underneath the car.
Can I drive if the gauge drops after stopping?
A lower reading does not prove the fault has gone. After an overheating warning, do not resume driving to test the car; request assistance and inspection before using it again.
Should I remove the thermostat to solve the problem?
Do not remove the thermostat as an experiment: it is part of cooling regulation. A technician should assess it and fit the correct replacement if necessary.
Does overheating without coolant loss mean a faulty sensor?
No. The overheating can be real despite a stable level. Do not ignore the warning or disconnect the sensor; have the reading and system performance checked together.
Conclusion: Check Cooling Performance, Not Just the Level
A stable coolant level neither rules out overheating nor identifies its cause. Stop safely at a warning, switch off the engine, avoid hot caps and fans, and give your observations to a qualified technician. A sound repair starts with evidence of the fault, not extra water or random parts replacement.
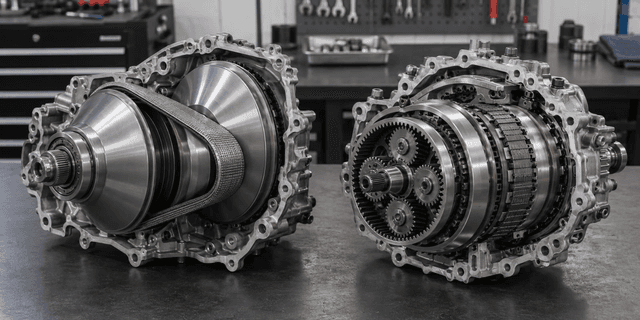
CVT vs Automatic: Differences and Pre-Purchase Checks
Table Of Contents:
|
CVT vs automatic: neither is the best choice for everyone. What matters is how the car responds in your daily use, the transmission’s condition and its service history, not its name alone. You may prefer the continuous acceleration of the former or the distinct shifts of the latter. Before buying, identify the actual transmission, drive the car in suitable conditions and separate normal behaviour from a symptom requiring professional inspection. This is a buying comparison, not a blanket reliability verdict.
CVT vs Automatic: What Exactly Are We Comparing?
Here, CVT means a conventional design that continuously varies its transmission ratio using variable pulleys and a metal belt or chain, depending on its construction. Conventional automatic means a transmission with fixed gear ratios that shifts between them and uses a torque converter to transfer power between the engine and transmission. The comparison does not cover every technology described as automatic or erase differences within either family.
A torque converter alone does not identify the type: some CVTs also use one. Likewise, do not assume that an e-CVT in a hybrid is the same pulley-and-belt transmission. The term can describe a hybrid system that varies the relationship between engine speed and vehicle movement differently. Architectures vary between systems, so consult the description of the particular vehicle rather than relying on the letters.
For an introduction to other designs, read the guide to transmission types and how they work; here, the focus is what to observe and verify when choosing.
How Do Acceleration and Shifts Feel Different?
With a CVT, engine sound may rise and engine speed may stay relatively steady while the car continues gaining road speed. This can be part of ratio control, not sufficient evidence of transmission slip. Software may also simulate stepped shifts, so the tachometer alone cannot identify transmission type or establish its health. What matters is a predictable response appropriate to the driving situation.
In a stepped automatic, engine speed may fall on an upshift or rise when you request more acceleration. How noticeable each shift feels depends on calibration, the engine and cabin isolation. Not every perceptible shift is a fault, but repeated harsh jolts should not be accepted merely because the transmission is conventional. Compare with a healthy car of the same specification if possible and seek professional advice when unsure.
A Comparison Table for Setting Your Priorities
| Comparison point | Conventional CVT | Stepped automatic |
| Acceleration | Continuous ratio changes, sometimes with simulated shifts | Shifts between fixed ratios with varying smoothness |
| Sound and feel | May hold higher engine speed during acceleration | Engine sound may change noticeably during shifts |
| Suitability check | Observe pull-away smoothness and whether the acceleration sound suits you | Observe shift timing and response to acceleration requests |
| Maintenance | Fluid specification and schedule depend on the particular transmission | Fluid specification and schedule depend on the particular transmission |
| Buying decision | Vehicle condition and use matter more than the label | Vehicle condition and use matter more than the label |
Which Suits Traffic, Long Trips and Hills?
Describe your daily driving rather than ranking technologies from best to worst. In traffic, assess low-speed control and the transition between stopping and moving. On an open road, notice refinement at a steady speed and the response to moderate, legal acceleration. The engine, weight, accelerator calibration and insulation can influence your impression as much as transmission type, so do not attribute every difference to it.
If you regularly drive on hills or carry passengers and luggage, check load limits and driving instructions in the owner’s manual. Do not infer towing capability from the transmission name or test loads or gradients outside permitted limits. For fuel consumption, compare data for the exact trim and engine under comparable measurement conditions; a CVT does not guarantee lower fuel use on every trip.
What Should You Verify About Fluid and Service History?
Ask for invoices showing service dates, mileage and the fluid specification used, not merely a statement that the fluid was changed. Do not assume automatic transmission fluid suits a CVT or that all CVT fluids are interchangeable. The reference is the approved specification for that transmission and its correct service procedure. Transmission type alone cannot establish one fluid-change schedule for every car.
Discuss how your operating conditions affect the service schedule with a qualified provider, along with any documented repairs or leaks. Do not request an indiscriminate fluid change or flush as a cure for every vibration, and do not open hot components to inspect fluid yourself. Read about transmission fluid changes and care for general background, then give your vehicle’s manual priority over conflicting general advice.
A Pre-Purchase Checklist for Either Transmission
Treat the drive as a way to gather observations, not a certificate that the car is fault-free. Agree on a safe, permitted route and have a passenger take notes without distracting you. Do not deliberately overheat the transmission or use aggressive launches to expose faults.
- Confirm the transmission in the actual vehicle’s specifications and production year. Advertisement wording and selector appearance are insufficient, and specifications may differ between trims.
- Review the service history and any previous replacement or repair. Ask why the repair was needed and what was done; request documents rather than relying on verbal reassurance.
- Start with gentle driving and observe pull-away, low-speed movement and gradual acceleration. Stay within speed limits and never watch the instruments at the expense of the road.
- With the car fully stopped and the brakes applied, observe its response when selecting forward or reverse as instructed in the manual. Never switch direction while moving or repeat the manoeuvre aggressively.
- Note whether the observation occurred at the start or after driving, with or without air conditioning, and whether it repeated under the same conditions. Do not set a universal delay threshold separating healthy from faulty.
- Before a final agreement, arrange an independent professional inspection including an appropriate road test and electronic checks when needed, with an explanation rather than just a fault-code printout.
To compare comfort, visibility and the rest of the car as well, use the pre-purchase test drive checklist alongside these transmission-specific checks.
When Does an Observation Need Professional Diagnosis?
Repeated vibration, a noticeable response delay, a temperature warning or a sudden performance change deserves assessment, but none proves transmission failure by itself. The engine, its mounts or other systems may contribute. Describe when the symptom appeared rather than requesting transmission replacement based on a video or personal impression.
If a temperature warning or loss of drive affects safety, end the test in a safe place, follow the owner’s manual and seek appropriate help. Do not clear warnings or keep accelerating to test them. Read about transmission symptoms that warrant inspection to recognise possible observations, not to diagnose your car or assume one definite cause.
Frequently Asked Questions About CVT and Automatics
Does Steady Engine Speed Mean a CVT Is Slipping?
Not necessarily; acceleration can continue at nearly constant engine speed. A changed response with reduced drive or a warning needs professional assessment, not a verdict from the tachometer alone.
Does a Conventional Automatic Always Last Longer?
It is not sound to generalise lifespan or reliability across all designs. Condition, history, maintenance and use are essential when assessing an individual car.
Can Both Types Use the Same Transmission Fluid?
Do not assume compatibility from a fluid’s name or colour. Check the specification required for the exact transmission and have a professional follow its approved service procedure.
Is e-CVT the Same as a Belt CVT?
Not necessarily: similar names do not establish identical construction. Check the explanation of the hybrid’s system; systems described by this term do not necessarily share one design.
Is a Short Drive Enough to Establish Transmission Health?
No; some symptoms may not appear during a short drive. Combine it with service records and an independent inspection, especially when documents are missing or observations remain unexplained.
Conclusion: Choose the Right Car, Not Just a Label
Choose after defining your use, testing the response and verifying maintenance and inspection findings. Do not reject a CVT solely because it sounds different, or accept a conventional automatic with unexplained symptoms. A stronger decision combines driving suitability with documented condition and clear instructions for caring for the car.

Driving License Renewal on Absher: Requirements and Steps
Table of Contents:
|
Driving license renewal in Saudi Arabia is done electronically through the Absher platform under traffic services, without visiting traffic offices, provided you complete the regulatory requirements such as paying the fees and completing a medical examination. This electronic service covers private driving licenses and motorcycle licenses only, and the remaining validity of the license must be less than 365 days. This guide explains the requirements as shown on the official service page at the time of writing, the renewal and delivery steps, why a request may not proceed, and how it differs from renewing the vehicle registration (Istimara).
What Is the Driving License Renewal Service on Absher and Who Can Use It?
The driving license renewal page on the National Portal describes a service that lets individuals renew their driving license electronically, easily and efficiently, without visiting traffic offices. It lists the service duration as immediate and the delivery channels as the website portal and smartphone apps. The Absher service guide defines the beneficiary as a citizen or resident who is registered and activated on the Absher platform.
So first make sure your Absher account is active and that you can log in, then check your license type. According to the prerequisites tab, the service covers renewing private driving licenses and motorcycle licenses only. If your license is of another type, do not assume this service will accept it; ask the official traffic channels about the right procedure for your case.
What Are the Published Driving License Renewal Requirements?
The official service page lists the following requirements. Use the table as a checklist before logging in to Absher, while following what the service displays for your case when you apply. Requirements may be updated, and the service page at the time you apply is the reference.
| Requirement as Shown on the Service Page | What to Check Before Starting |
| A private or motorcycle driving license | The license type recorded in your details |
| Payment of license renewal fees through government payments via banks | That payment was actually made for the correct service, not just that a payment screen was opened |
| Payment of traffic violations, if any | The status of any violations recorded against you before applying |
| Remaining license validity of less than 365 days | Your expiry date, using the driving license information service |
| A medical examination through a certified medical center | That the examination was done at a certified center |
The required documents tab repeats payment of any violations, payment of the renewal fees and the medical examination, and does not mention uploading photos or extra papers. Do not rely on circulated lists that add unpublished documents. If you have violations, review how to check and pay traffic violations before starting the renewal.
What Are the Steps for Driving License Renewal on Absher?
The following steps are taken from the service page on the National Portal. If the menus look different in your interface, look for the driving license renewal service under traffic services, and do not choose a similarly named service such as vehicle registration renewal.
- Log in to the Absher platform.
- Select “My Services”.
- Choose “Traffic” from the services list.
- Select the “Renew Driving License” service.
- Read the service description, terms and conditions, then select “Next”.
- Review your personal information, specify the renewal period (2 years, 5 years or 10 years), then select “Confirm Renewal”.
- Fill in your National Address details for license delivery.
- Review the entered data.
- Pay the delivery fees using a card (Visa, Mada, Mastercard).
- A message confirms that the driving license renewal is completed.
Note that the payment inside these steps is for delivery. For the renewal fees themselves, the prerequisites tab says they are paid through government payments via banks. This guide does not state amounts for any period; follow what the service shows for your case. Before filling in the address, make sure your National Address is correct, because it is used for the license delivery request.
Closing the screen or completing a payment alone does not prove the renewal is complete. Check for the success message, then review your license details before repeating any step if your session was interrupted.
Why Can License Renewal Fail to Proceed, and What Should You Check?
The service page does not publish a list of error messages, but the published requirements help you identify which item to review. Always start with the text of the message shown in your account, then compare it with the following possibilities:
- The remaining validity of the license is not less than 365 days; check the expiry date through the driving license information service.
- The renewal fees have not been paid or the payment has not appeared yet; review the transaction status and receipt before paying again.
- There are unpaid traffic violations; do not assume that filing a dispute replaces this requirement before its outcome is clear.
- There is no medical examination from a certified medical center.
- The license type is not covered, because the service is limited to private and motorcycle licenses.
- The account is not registered or activated on Absher, since the service guide defines the beneficiary as a registered and activated user.
If the message is unclear, note its text, the time of the attempt and the stage where you stopped, then contact the official support channels shown on the service page. Never share your password or verification code with anyone, and do not treat a failed attempt as a final rejection without confirmation from the competent authority.
How Does Driving License Renewal Differ From Istimara Renewal?
The two documents are often confused because both are called a license. The driving license belongs to the driver, while the Istimara is the vehicle registration and relates to the car itself. Each therefore has its own Absher service and its own requirements, so do not apply the conditions of one to the other.
The medical examination and the remaining license validity are published requirements for driving license renewal and have nothing to do with the condition of your car. If what you need to renew is the vehicle document, follow the guide to vehicle registration renewal on Absher and why it may fail, which explains that service’s requirements and steps.
Likewise, vehicle insurance does not appear among the driving license renewal requirements on the service page. If you are reviewing your car insurance at the same time for other reasons, read about comprehensive versus third-party car insurance to choose a suitable policy.
Frequently Asked Questions About Driving License Renewal
Can I renew my driving license without visiting a traffic office?
Yes, according to the official service page: the service is electronic through Absher without the need to visit traffic offices, provided the regulatory requirements are completed. If your case cannot proceed, follow the service message and the competent authority’s guidance.
How early can I renew my license before it expires?
The prerequisites tab requires the remaining validity of the license to be less than 365 days. You can check your license validity electronically through the driving license information service listed among the related services.
Is a medical examination required for driving license renewal?
Yes. The official page lists a medical examination through a certified medical center among both the prerequisites and the required documents. Complete the examination at a certified center before starting the service.
What renewal periods are available?
The service steps mention choosing the renewal period of 2 years, 5 years or 10 years while reviewing your details. Choose from the options shown to you and review what applies to each option as displayed in the service.
How do I receive my license after renewal?
The steps include filling in your National Address details for license delivery and then paying the delivery fees by card. The National Portal also lists a digital driving license display service among the related services, which is separate from renewal.
Conclusion
Prepare the driving license renewal requirements first: pay the fees and any violations, complete the medical examination at a certified center, and confirm that the remaining validity meets the published condition. Then follow the steps on Absher and check for the success message. If the request cannot proceed, address the item identified in the message or request clarification through the official channels.
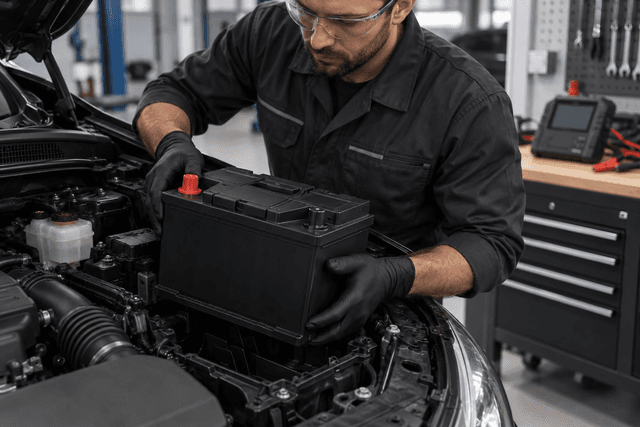
Choosing a Car Battery: Size, Capacity, Type and Installation
Table of Contents:
|
Choosing a car battery starts with confirming that the battery really is the cause of the problem, then matching what the owner’s manual or the current battery label specifies: size and mounting, terminal orientation, capacity in Ah, cold cranking amps (CCA) and battery technology. After that, check the manufacture date and warranty terms, and make sure installation is done properly, which may include registering the battery in the car’s system. This guide explains each step in general terms; your owner’s manual and a qualified technician remain the reference for your car’s specifications.
When Should You Start Choosing a Car Battery?
Do not buy a battery just because the car failed to start once. Weak starting can be linked to the battery, but also to the starter motor, the connections or the charging system. Ask a specialist to test the battery and charging system with suitable equipment, and review the car battery failure symptoms and how to test them to recognise signs worth checking.
If the engine cranks normally but does not start, the battery may not be the cause; see the guide on an engine that cranks but will not start. If the battery keeps going flat, there may be a hidden electrical drain in the car, and fitting a new battery without fixing the cause may simply pass the problem on to it. Once testing confirms the battery, prepare the following before visiting the seller:
- A clear photo of the current battery label showing all printed details.
- The battery specification page in the owner’s manual, if available.
- Whether the car has an automatic engine stop-start system.
- Where the battery sits: engine bay, boot or under a seat.
Which Specifications Should Match the Manual or Label?
The first reference is the owner’s manual, then the label of the original battery if it is still fitted. The table below summarises what to compare before paying and where to find it.
| Item | Where to find it | Why it matters |
| Size or group | Owner’s manual or current battery label | Defines overall dimensions and fit on the tray |
| Mounting dimensions | Battery tray and hold-down clamp | A poorly secured battery vibrates and can be damaged |
| Terminal orientation | Position of the positive and negative terminals on the current battery | A different layout may stop cables reaching or strain them |
| Capacity (Ah) | Label or owner’s manual | Indicates the energy stored in the battery |
| Cold cranking amps (CCA) | Label | Indicates the battery’s ability to deliver starting current |
| Technology type | Label and owner’s manual | Must suit the charging system and any stop-start system |
Two batteries can look alike yet differ in terminal orientation, height or mounting lip. Ask the seller to compare the new battery directly with the old one. If the current label differs from the manual, the previous battery may not have matched in the first place; rely on the manual or ask the dealer or a qualified technician.
What Do Capacity (Ah) and Cold Cranking Amps (CCA) Mean?
Capacity in Ah describes how much energy the battery stores, which matters when the battery powers the car’s systems with the engine off. Cold cranking amps (CCA) describe the battery’s ability to deliver a high current at the moment of starting in cold conditions, according to a specific test standard.
A label may state CCA according to a different standard from another battery, so only compare two figures measured to the same standard, and ask the seller to clarify. The general rule is not to go below the car’s specified capacity or current.
On the other hand, a higher figure is not automatically better; what matters is that the battery keeps the correct size and technology. In cars that record battery data in their system, the actual capacity of the new battery may need to be entered during registration, so tell the technician about any difference from the original.
What Is the Difference Between Flooded, EFB and AGM Batteries?
The general idea of each type is as follows, while the manual decides what your car needs:
- Conventional flooded battery: common in cars without an automatic stop-start system; some serviceable types need the electrolyte level checked.
- EFB battery: an enhanced flooded battery built to withstand repeated starting and discharge cycles better than a conventional one, used in many cars with stop-start systems.
- AGM battery: the electrolyte is absorbed in glass fibre mats and the battery is sealed; it copes better with electrical loads and repeated discharge, and is used in cars with higher electrical demands.
In a car with automatic stop-start, the battery handles frequent engine restarts and powers systems while the engine is stopped. Fitting a lower technology than specified, such as a conventional flooded battery instead of EFB or EFB instead of AGM, may weaken system performance, shorten battery life and trigger warning messages. Moving to a higher technology should only happen if the owner’s manual or the dealer allows it.
If the battery sits inside the cabin or boot, the manufacturer may specify a sealed type or a particular vent outlet; do not fit a different battery in that location without confirming that it matches.
How Do You Read the Manufacture Date and Warranty Terms?
The manufacture date usually appears as a code printed on the lid or case or on a small sticker, and the code format differs between manufacturers, so ask the seller to explain the code on the battery itself, and prefer the most recently made battery among the matching options.
A battery stored for a long time may lose some charge, so ask whether the seller tested it before sale. For the warranty, read the written terms on the invoice or warranty card rather than relying on a verbal promise, and pay attention to the following:
- What the warranty covers, how a fault is proven, and whether the battery must be tested by the seller.
- Whether installation elsewhere, or fitting the battery to a car it does not match, affects the warranty.
- Which documents are needed for a claim; keep the invoice somewhere easy to find.
How Does Saudi Heat Affect Your Battery Choice?
High temperatures speed up the reactions inside a battery and may increase fluid loss and ageing of the internal plates. This does not mean choosing a battery simply because it is marketed for heat; it means sticking to the correct specification and technology and choosing a recently made battery.
After installation, help the battery by parking in the shade where possible, keeping the terminals clean and checking the battery and charging system during routine maintenance. For more on how heat affects the car in general, read the summer car care guide for Saudi heat.
What Should You Consider When Installing the New Battery?
If you are not confident about the steps, leave the installation to a qualified technician. If you fit it yourself, wear eye protection and gloves, switch the engine off and keep the key away, disconnect and reconnect the terminals in the order given in the owner’s manual, avoid letting a metal tool touch both terminals, and keep any sparks or flames away from the battery.
- Battery registration: some cars require the new battery to be registered in the energy management system with a diagnostic tool so that charging is adjusted for a new battery. Ask the technician whether your car needs this.
- Saving settings: disconnecting the battery may erase settings such as the clock and radio, and some systems may need resetting according to the manual. Some technicians use a memory saver during the swap.
- Clean terminals: remove corrosion from the terminals and cable ends, and check that the clamps are sound before connecting.
- Secure mounting: fix the battery with its hold-down clamp so it cannot move, tighten the terminals without excessive force, and refit the protective covers.
After installation, start the car and watch for any warning message. If one appears, return to the technician to check the installation and registration rather than trying to clear the warning yourself.
How Do You Dispose of the Old Battery Safely?
A battery contains acid and lead, so do not open it, drain it or put it in household waste. Keep it upright, protect its terminals from contact, and hand it to the seller, a workshop or a party that accepts used batteries for recycling. If it is cracked or leaking, do not touch it with bare hands and ask the workshop to handle it.
Frequently Asked Questions About Choosing a Car Battery
How can I tell a battery fault from a starter fault?
Slow cranking with dim lights may point to the battery, while a click with bright lights may point to the starter motor. These are indications, not a diagnosis, so have the battery and charging system tested and review the signs of a failing starter motor before buying.
Can I fit a battery with a higher capacity than the original?
It may be possible in some cases if the size and technology still match, but the decision rests with the owner’s manual and the technician, especially in cars that record battery data in their system.
Can I fit a conventional battery to a car with stop-start?
This is not recommended; use the technology specified in the manual, such as EFB or AGM, because a lower technology may not withstand the frequent restart pattern.
Do all cars need the new battery to be registered?
No, but some cars require it using a diagnostic tool. Ask the technician or check the manual before installation, and do not assume the swap is complete once the terminals are connected.
What should I do with the old battery after replacing it?
Do not open it or throw it away with household waste. Keep it upright and hand it to the seller, a workshop or a party that accepts used batteries for recycling.
Conclusion
First confirm that the battery is the problem, then match size, terminals, capacity, CCA and technology to the owner’s manual, and check the manufacture date and warranty terms. Leave installation and registration to a technician if you are unsure, and dispose of the old battery safely.
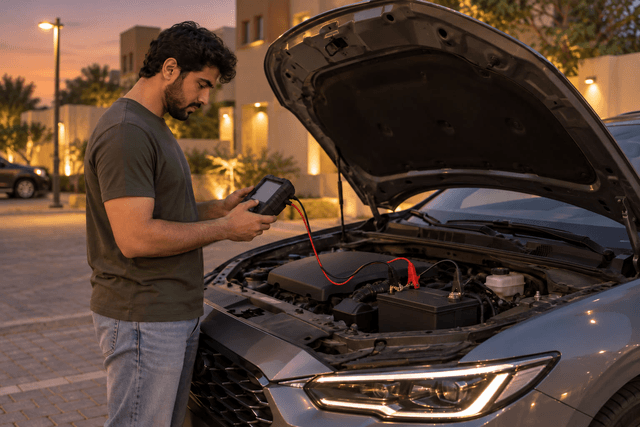
Car Won't Crank: Battery or Starter Problem? How to Tell
Table of Contents:
|
If you turn the key or press the start button and the engine does not turn over at all, the cause may lie in the car battery or its connections, in the starter motor and its circuit, or in a starting condition that has not been met, such as the gear position or key recognition. Whether it is a battery or starter problem usually shows in the dashboard lights, the type of sound and the result of a jump start test. These are indications for ordering the checks, while confirmation comes from a qualified technician with proper equipment.
How Is a No-Crank Different from Cranking Without Starting?
A no-crank means the engine does not turn when you try to start it: you hear nothing, or only a click or rapid clicking. If the starter turns the engine at its usual sound but the engine does not fire, that is a different situation, usually caused by fuel, spark or sensors, which we cover in the guide on an engine that cranks but will not start. Here we focus on the first case, whose diagnosis starts with the electrical side.
How Can Sounds and Lights Reveal a Battery or Starter Problem?
Watch the moment of starting and the dashboard lights before and during it, as each sign has a more likely cause, not a final verdict:
- No sound and no lights, or a very dim dashboard: this may point to a completely flat battery, a loose or corroded terminal, or a main fuse.
- No sound with bright lights: this may mean the start command is not reaching the starter, because of the gear position, the brake or clutch pedal, the key not being recognised, or a relay or fuse.
- A single click with bright lights that do not dim: this may point to the starter or the switch that pushes its gear (the solenoid), or to a weak starter cable or ground strap.
- Rapid repeated clicking with dimming lights: this may point to a poorly charged battery or badly connected terminals, so the solenoid does not receive enough current, releases and tries again.
- Slow, laboured cranking: this may point to a weak battery or corroded connections, and sometimes to a starter drawing excess current because of internal wear.
- Whirring or grinding without the engine turning: this may mean the starter gear is not meshing with the flywheel ring gear or that teeth on one of them are damaged, so stop trying.
- It starts one time and not the next: this may point to a loose connection, a starter that is starting to fail, an intermittent relay or the gear position sensor, so note when the problem occurs and tell the technician.
For more detail on each side, see the signs of a failing starter motor and car battery failure symptoms and how to test them.
Why Won’t the Car Crank with a New Battery?
Fitting a new battery does not mean the problem is over; the old one may have been fine, or the cause may be somewhere that was never checked. The main possibilities are:
- Terminals not tightened properly, corrosion left on the cable ends, or a damaged or loose ground strap between the engine and the body.
- A new battery that is not fully charged, because it was stored for a long time or was drained by lights or accessories left on.
- A battery that does not match the car’s specification in capacity, cranking current or technology; see the guide to choosing a new car battery.
- A parasitic drain that empties the battery while parked, so the car starts today and will not crank tomorrow morning; read about hidden electrical drain in the car.
- A weak charging system (alternator), so the battery runs down gradually despite driving, and a charging warning light may appear on the dashboard.
- The starter relay or the starting circuit fuse, or the starter motor itself and its solenoid, especially if the symptoms were present before the battery was changed.
- The key not being recognised because of a weak remote battery or a fault in the immobilizer, which blocks the starter in some cars.
- The gear selector not in P or N on an automatic, the clutch not fully pressed or its switch faulty on a manual, or the brake not pressed in cars with a start button.
Which Safe Checks Can You Do Before the Workshop?
These checks do not require removing any part, and they help you narrow down the likely cause:
- Make sure the gear selector is in P or N and that you are pressing the brake or clutch as the owner’s manual requires, and try starting in N if it fails in P.
- Look at the dashboard lights: bright, dim or off? Does a message about the key or a battery warning light appear?
- Headlight test: switch on the headlights and watch their reflection on a wall while trying to start. Heavy dimming may point to the battery or its connections, while lights that stay bright with a single click may point to the starter. Some cars switch off electrical loads during starting, so do not rely on this observation alone.
- Try the spare key, check the remote battery if a key-not-detected message appears, and follow the alternative starting method if the owner’s manual gives one.
- Inspect the terminals by eye with the engine off: are the cables secure? Is there white or green corrosion? Do not move them with a metal tool, and never touch both terminals together.
- Try a jump start by following the steps to jump-start a car safely: if the engine cranks normally, the battery or its connections are more likely; if the same click remains, the starter or its circuit is more likely.
What Should You Avoid When the Car Won’t Crank?
- Do not tap the starter with a tool while someone else tries to start the car; being close to the fan, belts and hot parts during a sudden turn can cause injury.
- Do not keep cranking without a pause or hold the start for long; the starter is designed for intermittent use and can overheat, so let it rest between attempts as the owner’s manual advises.
- Do not bypass the relay or bridge the starter or battery terminals with a screwdriver or wire; the engine may turn suddenly while the car is in gear, or sparks and electrical damage may occur.
- Do not replace the starter or battery by guesswork before testing, as that may not fix the problem.
- Do not try to jump-start a battery that is swollen, cracked or leaking fluid; ask for help.
How Do You Read Battery and Starter Signs in One Table?
The table below summarises common signs, the more likely side and the suggested next step:
| Sign | More likely | Also worth ruling out | Next step |
| No sound, dashboard dark | Battery or terminals | Main fuse | Inspect the terminals by eye and try a jump start |
| No sound, dashboard bright | Starting circuit | Gear position, key and relay | Confirm P or N and the brake, and try the spare key |
| Single click, bright lights | Starter or solenoid | Starter cable or ground strap | Have the starter and its circuit tested |
| Rapid clicking, lights dim | Battery or terminals | Weak charging system | Try a jump start, then test the battery and charging |
| Slow, laboured cranking | Battery or connections | Starter drawing high current | Ask for a battery load test and a starter draw test |
| Whirring or grinding, no crank | Starter gear | Flywheel ring gear teeth | Stop trying and have it inspected |
| Intermittent problem | Loose connection or weakening starter | Relay or gear position sensor | Note when it happens and tell the technician |
What Does a Technician Test to Confirm the Cause?
A technician relies on measurement against the manufacturer’s data, and usually checks:
- The battery’s condition under load or with a battery tester, not just its charge.
- Voltage drop across the positive cable and the ground path while cranking, to reveal resistance in connections that cannot be seen.
- The current the starter draws, since a high draw may point to a tired starter or mechanical resistance in the engine.
- Whether the start signal reaches the starter through the relay, the fuse and the gear position or clutch switch.
- The charging system, and stored fault codes in the car’s computer if messages about the key or the immobilizer appear.
Frequently Asked Questions About a Car That Won’t Crank
What is the starter motor in a car?
The starter motor is a small electric motor that draws its current from the battery and turns the engine at the moment of starting through a gear that meshes with the flywheel, then disengages once the engine runs, so it needs a healthy battery and good connections.
How can I tell the starter has failed rather than the battery?
If the battery is charged and tested, the terminals are sound, and the single click with bright lights repeats even with a jump start, the starter or its circuit becomes more likely, and a technician confirms it by measuring voltage drop and current draw.
What does a clicking sound from the starter mean when starting?
Rapid clicking usually happens when the starter does not receive enough current because of a weak battery or corroded or loose terminals, while a single click with bright lights may be linked to the starter or its solenoid.
Does tapping the starter fix the problem?
The starter may work temporarily after being tapped, but that is a sign of a fault in it rather than a fix, and it is dangerous while someone else tries to start the car.
Can a smart key stop the car from starting?
Yes. If the car does not recognise the key because of a weak key battery or a system fault, the starter may not turn or the engine may not fire, a message usually appears on the dashboard, and the owner’s manual may explain an alternative starting method.
Conclusion
When the car will not crank, note the dashboard lights, the type of sound and the result of a jump start: dim lights and rapid clicking lean towards the battery, while a single click with bright lights leans towards the starter, and do not forget the gear position and the key. Avoid risky shortcuts, and leave confirmation to a qualified technician.
Transmission Limp Mode: Stuck in Gear, Causes and What to Do
Table of Contents:
|
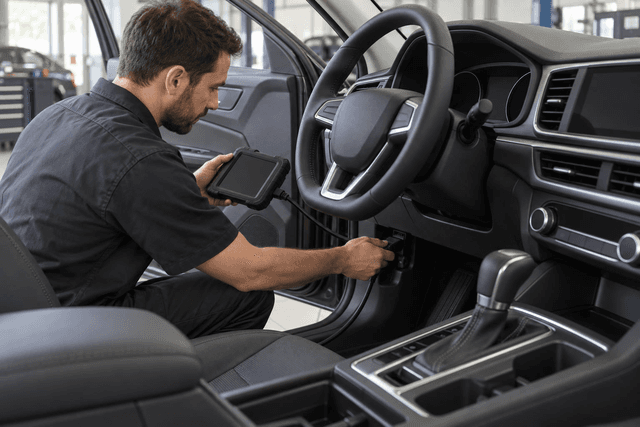
An automatic transmission stuck in one gear and not shifting has usually entered what is known as emergency or protection mode, commonly called transmission limp mode: the transmission computer detects a fault and holds a fixed gear to protect itself and let you reach a safe place. The cause may be linked to the transmission fluid or its temperature, a sensor or electrical connection, a weak battery or internal wear. The right response is to stop safely, watch the dashboard warning lights, avoid driving long distances and then have the fault codes read with a scan tool by a qualified technician.
What Is Transmission Limp Mode?
A modern automatic transmission is controlled by an electronic unit called the transmission control unit (TCU), often referred to as the transmission computer. The unit relies on sensor readings to decide when to shift, and operates electric valves (solenoids) that direct fluid pressure to the internal clutches.
When it receives an implausible reading or detects a significant fault, it may enter limp mode: automatic shifting stops and the transmission holds one gear, throttle response may be reduced, and the check engine light or a transmission message often appears. The aim is to protect the transmission from further damage and let you reach a safe place or a nearby workshop at low speed, not to continue the journey.
The transmission may behave normally again after a restart, but that does not mean the fault has gone. For other general warning signs, such as leaks and slipping, see the warning signs of low transmission fluid and how to prevent damage.
Why Does the Transmission Stick in 3rd, 4th or 1st Gear?
The gear held in limp mode depends on the transmission design: some designs keep the gear they were in when the fault was detected, while others move to a fixed backup gear. That is why drivers describe the problem as the transmission being stuck in 3rd, 4th or 2nd gear.
Sticking in a high gear makes pulling away from a stop feel heavy, while sticking in 1st raises engine speed as you go faster without a shift. This may point to a problem with the speed signal the computer reads or with the shift solenoids, or to protection triggered by fluid temperature.
Before drawing any conclusion, make sure the selector is not in manual mode, L or any position that restricts the gears.
What Causes an Automatic Transmission Not to Shift?
The causes usually fall into five categories, and more than one can be present at the same time:
- Transmission fluid: a low level, degraded condition or high temperature may weaken the pressure that shifting depends on. Maintenance is covered in the guide on why ignoring transmission fluid changes can ruin your gearbox.
- Sensors: such as the input and output speed, selector position, fluid temperature and accelerator pedal sensors; a wrong reading from any of them may push the transmission into limp mode.
- Transmission electrics: wiring, connectors, solenoids and the control unit itself; corrosion, moisture or a damaged harness may cut the signal or make it intermittent.
- Battery and charging system: low voltage may confuse electronic control units and produce scattered faults, including transmission faults.
- Internal mechanical wear: such as worn clutch packs (friction plates), valve body problems or torque converter issues, which only a specialist inspection can confirm.
This is why the symptom alone is not enough to identify the faulty part; a simple electrical fault can feel similar to an internal one.
Which Symptoms Appear in Each Situation?
Pay attention to the situation in which the problem appears, because describing it accurately helps the technician:
- Stuck in a high gear: weak take-off and slow acceleration, and the gear number may stay fixed on the dashboard.
- No upshift: engine speed rises and the engine gets louder as you go faster without moving to the next gear.
- Delayed engagement or harsh shifts: a clear delay after moving the selector to D or R, or a strong jolt when shifting; harsh shifts can also be linked to the engine and transmission mounts.
- Transmission not responding: you move the selector to D or R and the car does not move or moves with difficulty; in this case do not try to drive.
- Warning light or message: such as the check engine light or a message about the transmission or its temperature, depending on the car. See dashboard warning light meanings and when to stop immediately.
Why Is the Shifter Stuck in P?
A selector that will not leave P is usually a different case from limp mode; most automatic transmissions lock the selector until you press the brake, using an electric lock that relies on the brake pedal switch signal. Possible causes include:
- A faulty brake pedal switch, which may also stop the rear brake lights from working.
- A fault in the electric selector lock or its connections.
- A weak battery, so the lock does not receive enough voltage.
- Parking on a slope so the car’s weight rests on the park lock, making the selector stiff; apply the handbrake before selecting P.
Press the brake firmly and do not force the selector. In many cars the owner’s manual describes a way to release the selector lock manually in an emergency; use it only as described in the manual with the handbrake applied, then have the cause checked. If the brake lights do not work, do not drive the car until they are repaired, because drivers behind you will not know you are braking.
What Should You Do Step by Step When the Transmission Sticks?
- Switch on the hazard lights, move calmly away from the fast lane and stop in a safe place.
- Watch the dashboard: if a red light or a temperature warning appears, switch the engine off and do not continue driving.
- Make sure the selector is in D and the car is not in manual mode or L.
- Let the engine and transmission cool down, and do not touch hot parts.
- Check the transmission fluid only if your car has a dipstick for it, and only with the method and temperature specified in the owner’s manual; many modern transmissions have no dipstick and need a workshop to check them.
- If the transmission returns to normal after a restart, treat it as a temporary improvement and drive calmly to the nearest workshop; otherwise call a flatbed tow truck after checking the owner’s manual on towing.
- Ask a qualified technician to read the fault codes with a scan tool that supports the transmission, and to check the sensors, connections and fluid.
Do not settle for clearing the codes; clearing them without fixing the cause hides the problem and deletes data the technician needs, and limp mode may return at a worse moment. Continuing to drive long distances in this mode may also turn a simple fault into greater internal damage.
Table: Symptom, Likely Cause and What to Do
The following table summarises common possibilities; it is guidance, not a final diagnosis:
| Symptom | Likely cause category | What to do |
| Stuck in a high gear with weak take-off | Limp mode due to a sensor, transmission electrics or fluid | Stop safely and have the codes read |
| No upshift with a loud engine | Speed signal, solenoids or fluid temperature | Avoid long distances and book an inspection |
| Delayed engagement or harsh shifts | Fluid level or condition, internal wear or engine mounts | Check fluid per the manual, then diagnose at a workshop |
| Selector will not leave P | Brake switch, selector lock or battery | Press the brake, check the manual, do not force it |
| Scattered faults with weak starting | Weak battery or charging system | Test the battery and charging before blaming the transmission |
| Red warning, overheating or the car will not move | High temperature, very low fluid or internal fault | Switch the engine off and call a technician or flatbed |
Is a Stuck Transmission Different in a CVT?
A CVT changes its ratio continuously and does not rely on fixed gears, so it does not usually stick in 3rd or 4th in the same sense. It may, however, enter a protection mode that limits acceleration, so engine speed rises without matching progress. It also needs the fluid type specified in the owner’s manual. Learn the difference in the comparison of CVT and conventional automatic transmissions.
Frequently Asked Questions About Transmission Limp Mode
Can I drive while the transmission is in limp mode?
Only for a short distance at low speed to a safe place or a nearby workshop, provided no red light, temperature warning or unusual noise appears. Otherwise, call a flatbed tow truck.
Does a weak battery affect an automatic transmission?
It may; low voltage can confuse control units and produce transmission faults, and it may prevent the selector from being released from P, so the battery and charging system should be tested as part of the diagnosis.
What are the symptoms of a faulty transmission sensor?
They may include sticking in one gear, erratic shifts or shifts at the wrong moment, or an incorrect gear number on the dashboard, together with the check engine light. Nothing can be confirmed before the codes are read and the sensor and its connections are checked.
Does clearing the codes with a scan tool fix the problem?
No; clearing switches the warning off temporarily without fixing the cause, and it may delete data that helps the technician with the diagnosis.
How can I reduce the chance of the transmission sticking again?
Follow the maintenance schedule in the owner’s manual, deal with leaks and warning lights early, and avoid straining the transmission with heat and excessive loads. For more, see the tips to maintain your car’s automatic transmission.
Conclusion
A transmission stuck in one gear and not shifting is often a sign that it has entered limp mode. Stop safely, watch the dashboard, check the selector position and only check the fluid using the manual’s method, then have the codes read by a qualified technician instead of clearing them or continuing to drive.