Engine Coolant Level: How to Check, Top Up and Replace It
Table of Contents:
|
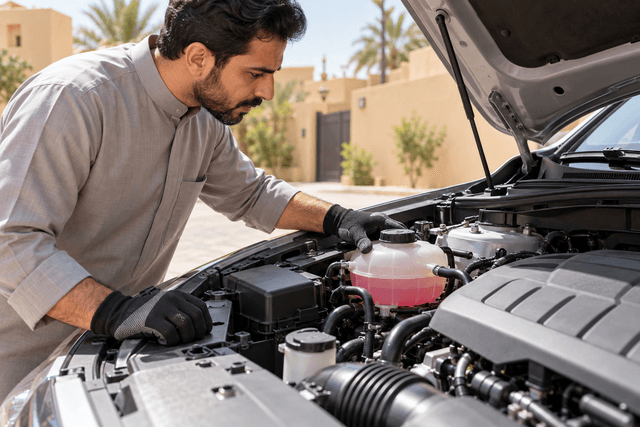
Radiator water is the engine coolant that circulates between the engine and the radiator to carry heat away and protect the system from corrosion and boiling. To check the engine coolant level safely, park on level ground, wait until the engine is completely cold, then look at the fluid in the reservoir (expansion tank) from the outside; the normal level is usually between the MIN and MAX marks. If it is low, top up with coolant that matches the owner’s manual up to MAX, and never open the radiator or reservoir cap while the engine is hot. Repeated loss, however, may point to a leak that needs checking by a qualified technician.
What Is Radiator Water and Why Is Plain Water Not a Substitute?
What many drivers in Saudi Arabia call radiator water is actually coolant, also known as antifreeze, which is mixed with water in a ratio set by the manufacturer. It contains additives that protect the system’s metal parts from corrosion, raises the boiling point of the fluid inside the pressurised system and lowers its freezing point. To understand the role of the radiator itself and its parts, see the guide to radiator function, types and care.
Plain water alone does not provide this protection, and adding it dilutes the existing coolant, weakening its protection against corrosion and boiling; depending on its mineral content it may also leave deposits. It should only be used as a temporary emergency measure to reach a safe place if the owner’s manual allows it, after which the system should be refilled with the correct coolant at the specified concentration as soon as possible. For colours and types, see the risks of using the wrong radiator fluid, bearing in mind that colour alone does not define the specification.
Where Is the Coolant Reservoir and What Do the MIN and MAX Marks Mean?
In most modern cars you do not need to open the radiator to read the level; there is a semi-transparent plastic tank in the engine bay called the reservoir or expansion tank, marked MIN for the lower limit and MAX for the upper limit, sometimes shown in another form such as LOW and FULL. The level rises as the engine heats up and falls as it cools, which is why the reading is taken with a cold engine.
Locate the reservoir in the owner’s manual, and do not confuse it with the washer fluid tank or the brake fluid reservoir. In some designs the reservoir cap is the pressure cap for the system, so treat it with the same caution as the radiator cap.
How Do You Check the Engine Coolant Level With a Cold Engine?
- Park on level ground, switch the engine off and apply the parking brake.
- Wait until the engine is completely cold; checking before the first start of the day or after a long stop is best, and do not rely on the temperature gauge dropping alone.
- Look at the fluid level through the side of the reservoir without opening the cap; the normal level is between MIN and MAX.
- Note the colour and cleanliness of the coolant, and any deposits or oily film on its surface.
- Inspect the ground under the front of the car and the visible hoses for signs of leaks.
Important warning: never open the radiator cap or a pressurised reservoir cap while the engine is hot or warm, because the coolant is under pressure and steam and hot fluid can spray out and cause burns. In the Saudi summer the engine bay may stay hot for longer after switching off, so allow enough time before touching any part. Make the check a regular habit and do it before trips, following the owner’s manual recommendations.
How Do You Top Up Coolant Correctly?
- Choose the type specified in the owner’s manual by its written specification, not by colour or appearance.
- Check the type of product: ready-to-use premixed coolant is added as it is, while concentrate must be diluted before adding, using the type of water and the ratio stated on the product label or in the manual.
- Do not mix two different types unless the manual allows it, and if you do not know which type is in the car, ask a technician.
- Once the engine is fully cold, open the reservoir cap slowly using a cloth, and add coolant to the reservoir rather than the radiator unless the manual says otherwise, up to the MAX mark without exceeding it, then close the cap firmly.
- Wear gloves, wipe up any spills immediately, and keep containers away from children and animals, because coolant can be poisonous if swallowed.
If the reservoir has run dry or the level has dropped a lot, air may have entered the system, and removing it is a job for a qualified technician.
What Signs May Indicate Low Coolant or a Leak?
- A distinctive sweet smell around the car or inside the cabin.
- Coloured puddles under the front of the car, or dried residue and crust around hoses and joints.
- White steam rising from the engine bay.
- A rising temperature gauge on the dashboard, or a temperature warning light or low coolant message.
- Cold air from the heater even though it is set to hot after the engine has warmed up.
These signs are only indications, and more than one problem can share the same sign. A leak may come from a hose, the radiator, the cap or the water pump; for pump symptoms specifically, read about the functions of the water pump and signs of failure. If the temperature does rise, read the main causes of engine overheating and what to do, and do not keep driving with a red temperature warning.
What Does Each Situation Mean and What Should You Do?
| Situation | What it may indicate | What to do |
| Level below MIN with a cold engine | A leak or gradual loss of coolant | Top up with matching coolant to MAX and watch the level |
| Needing to top up again and again | An external or internal leak, or a cap that does not hold pressure | Have the system checked by a technician rather than just refilling |
| Coloured puddles and a sweet smell under the car | A leak from a hose, the radiator or the pump | Have a technician find the source before long journeys |
| White steam with a rising temperature gauge | Overheating or a leak of hot coolant | Stop safely, switch the engine off and do not open any cap |
| Discoloured coolant, deposits or oil in it | Aged or contaminated coolant | Ask for an inspection and check the change interval in the maintenance schedule |
| Level above MAX with a cold engine | Previous overfilling | Add nothing and ask the technician to correct the level |
Why Does Radiator Water Keep Dropping?
Coolant works in a closed system, so it should not drop noticeably and repeatedly. If you need to top up again and again, this may point to a small external leak that evaporates before leaving a puddle, a cap that does not hold pressure, or an internal leak in the engine, which may come with signs such as thick white smoke from the exhaust or a change in the appearance of the engine oil.
Do not rely on repeated refilling; ask the technician to check the system with suitable tools such as a pressure test, and tell them how often you added coolant and when. In the opposite case, where the temperature rises while the level stays stable, the problem may lie in circulation or cooling itself; see the guide to overheating without coolant loss and safe action.
When Is It Time to Replace the Coolant Completely?
The protective additives in coolant are gradually used up, which is why the manufacturer sets the change interval in the maintenance schedule of the owner’s manual, and it may differ by coolant type and operating conditions. Follow the schedule, and ask for an inspection earlier if the coolant changes colour or shows deposits or traces of oil.
A complete change involves draining the system, possibly flushing it, then refilling with the matching coolant and removing trapped air, which is work best left to a workshop. In Saudi heat, with traffic and long air conditioning use, the cooling system works under a higher load, so check the level and hoses before summer and trips. Do not pour old coolant into drains or onto the ground.
Frequently Asked Questions About Radiator Water
Can I put plain water in the radiator?
Only in an emergency and if the owner’s manual allows it, because water dilutes the coolant and weakens its protection; refill with the correct coolant as soon as possible.
What is the normal radiator water level?
It is usually between the MIN and MAX marks on the reservoir when checked with a cold engine. A reading with a hot engine is higher because the coolant expands, so do not rely on it.
Why does water come out of the radiator when the car overheats?
This can happen when the coolant boils or its pressure rises, pushing it out through the cap, the overflow outlet or a leak point. Stop safely, switch the engine off and keep away from the steam, do not open any cap until it has cooled, then have the cause checked.
Can I mix coolant of a different colour or type?
This is not recommended unless the owner’s manual or the product label allows it. If you do not know which type is in your car, ask the technician before topping up; the solution may be a complete coolant change.
What is the best type of car coolant?
The best type is the one that matches the specification in your owner’s manual, not the most popular one or one of a particular colour. Look for the specification on the container label, and choose premixed coolant if you are unsure about dilution.
Conclusion
Check radiator water with a cold engine from outside the reservoir, keep the level between MIN and MAX with the coolant specified in the owner’s manual, and never open any cap while the engine is hot. Plain water is only an emergency measure; repeated loss or signs of a leak call for a technician’s inspection, and a complete change is due according to the maintenance schedule.
How to Test MAF Sensor Readings and Clean the Sensor
Table of Contents:
|
How to test MAF sensor readings correctly starts with ruling out simple causes such as a clogged air filter or air entering after the sensor, then a visual inspection, then reading codes and live data with an OBD-II scan tool and comparing them with what the service data states or the technician expects. If the sensor is dirty, clean it only with a spray made for MAF sensors and without touching the sensing element. Your owner’s manual and a qualified technician remain the reference for your car’s values and procedures.
What Does the MAF Sensor Measure and When Should You Suspect It?
The MAF (mass air flow) sensor usually sits between the air filter box and the throttle body and measures the amount of air entering the engine, so the engine computer can calculate the right amount of fuel. It differs from the manifold absolute pressure (MAP) sensor, which measures pressure inside the manifold, and from the intake air temperature sensor, which may be built into the MAF sensor housing. Some engines rely on a MAP sensor instead of a MAF sensor or alongside it, so first confirm which sensor your car has.
Symptoms may include the engine warning light, an unstable idle, misfiring, weak pulling and higher fuel consumption, and they are shared with many other faults; so see MAF sensor symptoms, causes and prevention for details, and causes of power loss under acceleration if weak pulling is the main symptom.
Which Simple Causes Should You Rule Out Before Testing the Sensor?
Many abnormal readings are caused by what surrounds the sensor rather than the sensor itself. Check the following with the engine off and cold:
- Air filter: a clogged or poorly seated filter may restrict airflow or let dust reach the sensor. Review the signs your car needs a new air filter.
- Air entering after the sensor: the sensor does not measure this air, so the air-fuel mixture may be upset and symptoms may resemble a sensor fault.
- Intake hose and clamps: look for a crack, a loose hose or a slack clamp between the sensor and the throttle body.
- Sensor connector: make sure it is firmly seated, its pins are free of corrosion and moisture, and its wires are intact.
How to Test MAF Sensor Readings Step by Step
Order the tests from the simplest to the most precise, and do not move on before finishing the previous step:
- Visual inspection: look for dirt, oil traces, damage or a foreign object in the air path, without touching the delicate sensing element with your fingers or any tool.
- Reading codes and live data with an OBD-II scan tool, usually the most important step.
- Unplug test: an indicative test that a technician performs with care, and it should not be relied on alone.
- Multimeter check: an electrical test that differs from car to car and is done according to the service manual.
How Do You Read Fault Codes and Live Data With a Scan Tool?
Connect the scan tool to the diagnostic port under the dashboard, and note the stored and pending codes and the freeze frame data before clearing anything. Codes may point to the sensor circuit, a reading out of range, or a lean or rich mixture; for other reasons, see the common causes of the engine warning light.
Then open the live data and watch the sensor reading:
- At idle: once the engine reaches operating temperature, compare the reading with what the service data states or the technician expects for your engine.
- When raising the revs gradually: the reading is expected to rise smoothly, while jumps, dropouts or a flat reading may point to a problem with the sensor or its wiring.
- Fuel trims: the technician reads them alongside the sensor reading, as their pattern may help distinguish unmetered air from an inaccurate reading.
Do not rely on figures published for other cars, because values vary with the engine and its design.
Is the Unplug Test Reliable, and When Is a Multimeter Used?
In this test the technician unplugs the sensor connector with the engine off and then starts it to see whether its behaviour changes, since the computer usually falls back on estimated values without the signal. If performance clearly improves, this may suggest an inaccurate reading, but the result is indicative, not a final verdict.
Some cars enter limp mode, run worse or show no change at all, and a fault code is stored because of the disconnection; so the test stays with the technician as part of a broader diagnosis, and the car should not be driven with the sensor unplugged.
A multimeter is used to check the supply, ground and signal, but connector pins and the measuring method differ between cars, and some sensors send a frequency signal that a standard measurement cannot read; so it follows the wiring diagram in the service manual or is done by a qualified technician.
How Do You Clean a MAF Sensor Correctly?
Cleaning helps when the sensor is dirty but sound; it does not fix an electrical fault. Follow the cleaner’s label; in general:
- Switch the engine off, let it cool, and work in a well-ventilated place away from flames, as cleaning sprays are usually flammable.
- Disconnect the sensor connector, then remove the sensor carefully with the right tool, as some sensors use special screws.
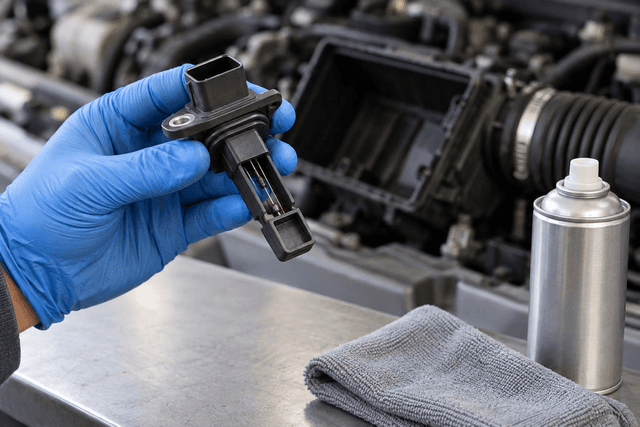
- Spray the sensing element with a cleaner made for MAF sensors only, from the distance recommended on the can, without touching it or wiping it with a cloth, brush or cotton bud.
- Let it air-dry completely, and never install it while wet.
- Refit the sensor and connector, tighten the intake hose and clamps, then start the engine and watch its behaviour and the engine warning light.
Which Mistakes Damage the MAF Sensor During Cleaning?
Avoid the following, because it may damage the sensor or hide the fault instead of fixing it:
- Using brake cleaner, carburettor cleaner or general solvents, which may leave residue or damage plastic and the sensing element.
- Blowing compressed air or spraying water, which may damage the delicate element or let moisture reach the circuit.
- Touching or wiping the sensing element, or cleaning while the engine is running or hot.
- Over-oiling washable air filters, because excess oil may travel with the air and contaminate the sensor; follow the filter instructions or use the filter specified in the manual.
- Clearing codes straight after cleaning before confirming the cause has been addressed.
Once the real cause has been addressed, the codes can be cleared and the repair verified with normal driving and another look at the live data; the computer may need some driving to relearn its fuel trims. If the code returns, the problem is not solved yet.
When Is Cleaning Enough and When Does the MAF Sensor Need Replacing?
Cleaning is often enough if the reading returns to a normal pattern and the symptoms disappear. Replacement is considered when:
- The sensing element is broken, the sensor body is cracked or its terminals are damaged.
- The reading stays abnormal after cleaning and after ruling out air leaks and wiring or connector problems.
- The technician confirms with a scan tool or electrical measurement that the fault is inside the sensor itself.
When replacing it, choose a part matching the part number or the vehicle identification number, as a non-matching sensor may give wrong readings. If high fuel consumption continues after the repair, review the causes of higher fuel consumption, as there are many other possible reasons.
What Do the Test Results Mean and What Is the Next Step?
The table summarises common findings; all of them are possibilities that need confirmation:
| Symptom or finding | What it may mean | Next step |
| Clogged or poorly seated air filter | Restricted airflow or dust reaching the sensor | Replace the filter as per the manual, then retest |
| Cracked hose or slack clamp after the sensor | Air entering that the sensor does not measure | Fix the leak before judging the sensor |
| Dirt or oil traces on the sensor | Inaccurate reading | Clean it with the dedicated spray and find the oil source |
| Reading does not rise smoothly with revs | Dirty or failed sensor or a wiring problem | Clean it, then have the wiring and reading checked by a technician |
| Code related to the sensor circuit | Fault in the connector, wiring or sensor | Inspect the connector and request electrical testing per the service manual |
| Code returns after cleaning and repairs | Fault inside the sensor or an undetected cause | Diagnosis by a qualified technician; replacement may be needed |
Frequently Asked Questions About Testing and Cleaning the MAF Sensor
How do I know if the MAF sensor is bad?
Symptoms alone are not enough because they resemble other faults. Confirmation comes from reading codes and live data after ruling out the air filter, air leaks and the connector, preferably with a qualified technician.
What is the best spray for cleaning a MAF sensor?
A product whose label clearly states that it is made for MAF sensors, leaves no residue once dry and is safe on plastic parts. Read the label and follow its instructions.
Can I clean the MAF sensor with brake or carburettor cleaner?
This is not recommended, because these cleaners are harsher than needed and may leave residue or damage the sensing element.
Should I clear the fault code after cleaning the MAF sensor?
Clear it only after the cause has been addressed, then verify by driving and checking the live data. Clearing the code does not fix the fault, and if it returns, have it diagnosed.
Can I drive the car with a faulty MAF sensor?
It may remain drivable, with performance and fuel consumption affected. But if the engine warning light flashes, the engine clearly loses power or a red warning appears, avoid driving and call for help.
Conclusion
The right way to test a MAF sensor starts with ruling out the air filter, air leaks and the connector, then a visual inspection, then reading codes and live data. Clean the sensor with a dedicated spray without touching the sensing element, do not clear codes before the cause is addressed, and leave electrical tests and the replacement decision to a qualified technician.
Transmission Limp Mode: Stuck in Gear, Causes and What to Do
Table of Contents:
|
An automatic transmission stuck in one gear and not shifting has usually entered what is known as emergency or protection mode, commonly called transmission limp mode: the transmission computer detects a fault and holds a fixed gear to protect itself and let you reach a safe place. The cause may be linked to the transmission fluid or its temperature, a sensor or electrical connection, a weak battery or internal wear. The right response is to stop safely, watch the dashboard warning lights, avoid driving long distances and then have the fault codes read with a scan tool by a qualified technician.
What Is Transmission Limp Mode?
A modern automatic transmission is controlled by an electronic unit called the transmission control unit (TCU), often referred to as the transmission computer. The unit relies on sensor readings to decide when to shift, and operates electric valves (solenoids) that direct fluid pressure to the internal clutches.
When it receives an implausible reading or detects a significant fault, it may enter limp mode: automatic shifting stops and the transmission holds one gear, throttle response may be reduced, and the check engine light or a transmission message often appears. The aim is to protect the transmission from further damage and let you reach a safe place or a nearby workshop at low speed, not to continue the journey.
The transmission may behave normally again after a restart, but that does not mean the fault has gone. For other general warning signs, such as leaks and slipping, see the warning signs of low transmission fluid and how to prevent damage.
Why Does the Transmission Stick in 3rd, 4th or 1st Gear?
The gear held in limp mode depends on the transmission design: some designs keep the gear they were in when the fault was detected, while others move to a fixed backup gear. That is why drivers describe the problem as the transmission being stuck in 3rd, 4th or 2nd gear.
Sticking in a high gear makes pulling away from a stop feel heavy, while sticking in 1st raises engine speed as you go faster without a shift. This may point to a problem with the speed signal the computer reads or with the shift solenoids, or to protection triggered by fluid temperature.
Before drawing any conclusion, make sure the selector is not in manual mode, L or any position that restricts the gears.
What Causes an Automatic Transmission Not to Shift?
The causes usually fall into five categories, and more than one can be present at the same time:
- Transmission fluid: a low level, degraded condition or high temperature may weaken the pressure that shifting depends on. Maintenance is covered in the guide on why ignoring transmission fluid changes can ruin your gearbox.
- Sensors: such as the input and output speed, selector position, fluid temperature and accelerator pedal sensors; a wrong reading from any of them may push the transmission into limp mode.
- Transmission electrics: wiring, connectors, solenoids and the control unit itself; corrosion, moisture or a damaged harness may cut the signal or make it intermittent.
- Battery and charging system: low voltage may confuse electronic control units and produce scattered faults, including transmission faults.
- Internal mechanical wear: such as worn clutch packs (friction plates), valve body problems or torque converter issues, which only a specialist inspection can confirm.
This is why the symptom alone is not enough to identify the faulty part; a simple electrical fault can feel similar to an internal one.
Which Symptoms Appear in Each Situation?
Pay attention to the situation in which the problem appears, because describing it accurately helps the technician:
- Stuck in a high gear: weak take-off and slow acceleration, and the gear number may stay fixed on the dashboard.
- No upshift: engine speed rises and the engine gets louder as you go faster without moving to the next gear.
- Delayed engagement or harsh shifts: a clear delay after moving the selector to D or R, or a strong jolt when shifting; harsh shifts can also be linked to the engine and transmission mounts.
- Transmission not responding: you move the selector to D or R and the car does not move or moves with difficulty; in this case do not try to drive.
- Warning light or message: such as the check engine light or a message about the transmission or its temperature, depending on the car. See dashboard warning light meanings and when to stop immediately.
Why Is the Shifter Stuck in P?
A selector that will not leave P is usually a different case from limp mode; most automatic transmissions lock the selector until you press the brake, using an electric lock that relies on the brake pedal switch signal. Possible causes include:
- A faulty brake pedal switch, which may also stop the rear brake lights from working.
- A fault in the electric selector lock or its connections.
- A weak battery, so the lock does not receive enough voltage.
- Parking on a slope so the car’s weight rests on the park lock, making the selector stiff; apply the handbrake before selecting P.
Press the brake firmly and do not force the selector. In many cars the owner’s manual describes a way to release the selector lock manually in an emergency; use it only as described in the manual with the handbrake applied, then have the cause checked. If the brake lights do not work, do not drive the car until they are repaired, because drivers behind you will not know you are braking.
What Should You Do Step by Step When the Transmission Sticks?
- Switch on the hazard lights, move calmly away from the fast lane and stop in a safe place.
- Watch the dashboard: if a red light or a temperature warning appears, switch the engine off and do not continue driving.
- Make sure the selector is in D and the car is not in manual mode or L.
- Let the engine and transmission cool down, and do not touch hot parts.
- Check the transmission fluid only if your car has a dipstick for it, and only with the method and temperature specified in the owner’s manual; many modern transmissions have no dipstick and need a workshop to check them.
- If the transmission returns to normal after a restart, treat it as a temporary improvement and drive calmly to the nearest workshop; otherwise call a flatbed tow truck after checking the owner’s manual on towing.
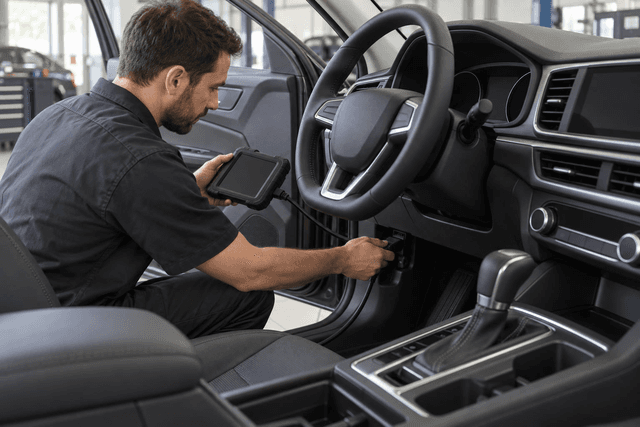
- Ask a qualified technician to read the fault codes with a scan tool that supports the transmission, and to check the sensors, connections and fluid.
Do not settle for clearing the codes; clearing them without fixing the cause hides the problem and deletes data the technician needs, and limp mode may return at a worse moment. Continuing to drive long distances in this mode may also turn a simple fault into greater internal damage.
Table: Symptom, Likely Cause and What to Do
The following table summarises common possibilities; it is guidance, not a final diagnosis:
| Symptom | Likely cause category | What to do |
| Stuck in a high gear with weak take-off | Limp mode due to a sensor, transmission electrics or fluid | Stop safely and have the codes read |
| No upshift with a loud engine | Speed signal, solenoids or fluid temperature | Avoid long distances and book an inspection |
| Delayed engagement or harsh shifts | Fluid level or condition, internal wear or engine mounts | Check fluid per the manual, then diagnose at a workshop |
| Selector will not leave P | Brake switch, selector lock or battery | Press the brake, check the manual, do not force it |
| Scattered faults with weak starting | Weak battery or charging system | Test the battery and charging before blaming the transmission |
| Red warning, overheating or the car will not move | High temperature, very low fluid or internal fault | Switch the engine off and call a technician or flatbed |
Is a Stuck Transmission Different in a CVT?
A CVT changes its ratio continuously and does not rely on fixed gears, so it does not usually stick in 3rd or 4th in the same sense. It may, however, enter a protection mode that limits acceleration, so engine speed rises without matching progress. It also needs the fluid type specified in the owner’s manual. Learn the difference in the comparison of CVT and conventional automatic transmissions.
Frequently Asked Questions About Transmission Limp Mode
Can I drive while the transmission is in limp mode?
Only for a short distance at low speed to a safe place or a nearby workshop, provided no red light, temperature warning or unusual noise appears. Otherwise, call a flatbed tow truck.
Does a weak battery affect an automatic transmission?
It may; low voltage can confuse control units and produce transmission faults, and it may prevent the selector from being released from P, so the battery and charging system should be tested as part of the diagnosis.
What are the symptoms of a faulty transmission sensor?
They may include sticking in one gear, erratic shifts or shifts at the wrong moment, or an incorrect gear number on the dashboard, together with the check engine light. Nothing can be confirmed before the codes are read and the sensor and its connections are checked.
Does clearing the codes with a scan tool fix the problem?
No; clearing switches the warning off temporarily without fixing the cause, and it may delete data that helps the technician with the diagnosis.
How can I reduce the chance of the transmission sticking again?
Follow the maintenance schedule in the owner’s manual, deal with leaks and warning lights early, and avoid straining the transmission with heat and excessive loads. For more, see the tips to maintain your car’s automatic transmission.
Conclusion
A transmission stuck in one gear and not shifting is often a sign that it has entered limp mode. Stop safely, watch the dashboard, check the selector position and only check the fluid using the manual’s method, then have the codes read by a qualified technician instead of clearing them or continuing to drive.
Car Won't Crank: Battery or Starter Problem? How to Tell
Table of Contents:
|
If you turn the key or press the start button and the engine does not turn over at all, the cause may lie in the car battery or its connections, in the starter motor and its circuit, or in a starting condition that has not been met, such as the gear position or key recognition. Whether it is a battery or starter problem usually shows in the dashboard lights, the type of sound and the result of a jump start test. These are indications for ordering the checks, while confirmation comes from a qualified technician with proper equipment.
How Is a No-Crank Different from Cranking Without Starting?
A no-crank means the engine does not turn when you try to start it: you hear nothing, or only a click or rapid clicking. If the starter turns the engine at its usual sound but the engine does not fire, that is a different situation, usually caused by fuel, spark or sensors, which we cover in the guide on an engine that cranks but will not start. Here we focus on the first case, whose diagnosis starts with the electrical side.
How Can Sounds and Lights Reveal a Battery or Starter Problem?
Watch the moment of starting and the dashboard lights before and during it, as each sign has a more likely cause, not a final verdict:
- No sound and no lights, or a very dim dashboard: this may point to a completely flat battery, a loose or corroded terminal, or a main fuse.
- No sound with bright lights: this may mean the start command is not reaching the starter, because of the gear position, the brake or clutch pedal, the key not being recognised, or a relay or fuse.
- A single click with bright lights that do not dim: this may point to the starter or the switch that pushes its gear (the solenoid), or to a weak starter cable or ground strap.
- Rapid repeated clicking with dimming lights: this may point to a poorly charged battery or badly connected terminals, so the solenoid does not receive enough current, releases and tries again.
- Slow, laboured cranking: this may point to a weak battery or corroded connections, and sometimes to a starter drawing excess current because of internal wear.
- Whirring or grinding without the engine turning: this may mean the starter gear is not meshing with the flywheel ring gear or that teeth on one of them are damaged, so stop trying.
- It starts one time and not the next: this may point to a loose connection, a starter that is starting to fail, an intermittent relay or the gear position sensor, so note when the problem occurs and tell the technician.
For more detail on each side, see the signs of a failing starter motor and car battery failure symptoms and how to test them.
Why Won’t the Car Crank with a New Battery?
Fitting a new battery does not mean the problem is over; the old one may have been fine, or the cause may be somewhere that was never checked. The main possibilities are:
- Terminals not tightened properly, corrosion left on the cable ends, or a damaged or loose ground strap between the engine and the body.
- A new battery that is not fully charged, because it was stored for a long time or was drained by lights or accessories left on.
- A battery that does not match the car’s specification in capacity, cranking current or technology; see the guide to choosing a new car battery.
- A parasitic drain that empties the battery while parked, so the car starts today and will not crank tomorrow morning; read about hidden electrical drain in the car.
- A weak charging system (alternator), so the battery runs down gradually despite driving, and a charging warning light may appear on the dashboard.
- The starter relay or the starting circuit fuse, or the starter motor itself and its solenoid, especially if the symptoms were present before the battery was changed.
- The key not being recognised because of a weak remote battery or a fault in the immobilizer, which blocks the starter in some cars.
- The gear selector not in P or N on an automatic, the clutch not fully pressed or its switch faulty on a manual, or the brake not pressed in cars with a start button.
Which Safe Checks Can You Do Before the Workshop?
These checks do not require removing any part, and they help you narrow down the likely cause:
- Make sure the gear selector is in P or N and that you are pressing the brake or clutch as the owner’s manual requires, and try starting in N if it fails in P.
- Look at the dashboard lights: bright, dim or off? Does a message about the key or a battery warning light appear?
- Headlight test: switch on the headlights and watch their reflection on a wall while trying to start. Heavy dimming may point to the battery or its connections, while lights that stay bright with a single click may point to the starter. Some cars switch off electrical loads during starting, so do not rely on this observation alone.
- Try the spare key, check the remote battery if a key-not-detected message appears, and follow the alternative starting method if the owner’s manual gives one.
- Inspect the terminals by eye with the engine off: are the cables secure? Is there white or green corrosion? Do not move them with a metal tool, and never touch both terminals together.
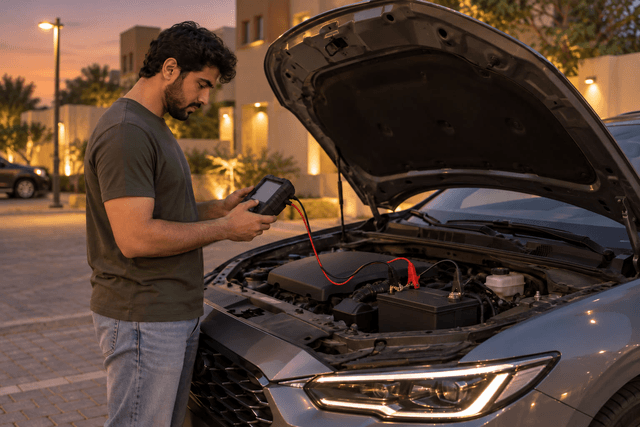
- Try a jump start by following the steps to jump-start a car safely: if the engine cranks normally, the battery or its connections are more likely; if the same click remains, the starter or its circuit is more likely.
What Should You Avoid When the Car Won’t Crank?
- Do not tap the starter with a tool while someone else tries to start the car; being close to the fan, belts and hot parts during a sudden turn can cause injury.
- Do not keep cranking without a pause or hold the start for long; the starter is designed for intermittent use and can overheat, so let it rest between attempts as the owner’s manual advises.
- Do not bypass the relay or bridge the starter or battery terminals with a screwdriver or wire; the engine may turn suddenly while the car is in gear, or sparks and electrical damage may occur.
- Do not replace the starter or battery by guesswork before testing, as that may not fix the problem.
- Do not try to jump-start a battery that is swollen, cracked or leaking fluid; ask for help.
How Do You Read Battery and Starter Signs in One Table?
The table below summarises common signs, the more likely side and the suggested next step:
| Sign | More likely | Also worth ruling out | Next step |
| No sound, dashboard dark | Battery or terminals | Main fuse | Inspect the terminals by eye and try a jump start |
| No sound, dashboard bright | Starting circuit | Gear position, key and relay | Confirm P or N and the brake, and try the spare key |
| Single click, bright lights | Starter or solenoid | Starter cable or ground strap | Have the starter and its circuit tested |
| Rapid clicking, lights dim | Battery or terminals | Weak charging system | Try a jump start, then test the battery and charging |
| Slow, laboured cranking | Battery or connections | Starter drawing high current | Ask for a battery load test and a starter draw test |
| Whirring or grinding, no crank | Starter gear | Flywheel ring gear teeth | Stop trying and have it inspected |
| Intermittent problem | Loose connection or weakening starter | Relay or gear position sensor | Note when it happens and tell the technician |
What Does a Technician Test to Confirm the Cause?
A technician relies on measurement against the manufacturer’s data, and usually checks:
- The battery’s condition under load or with a battery tester, not just its charge.
- Voltage drop across the positive cable and the ground path while cranking, to reveal resistance in connections that cannot be seen.
- The current the starter draws, since a high draw may point to a tired starter or mechanical resistance in the engine.
- Whether the start signal reaches the starter through the relay, the fuse and the gear position or clutch switch.
- The charging system, and stored fault codes in the car’s computer if messages about the key or the immobilizer appear.
Frequently Asked Questions About a Car That Won’t Crank
What is the starter motor in a car?
The starter motor is a small electric motor that draws its current from the battery and turns the engine at the moment of starting through a gear that meshes with the flywheel, then disengages once the engine runs, so it needs a healthy battery and good connections.
How can I tell the starter has failed rather than the battery?
If the battery is charged and tested, the terminals are sound, and the single click with bright lights repeats even with a jump start, the starter or its circuit becomes more likely, and a technician confirms it by measuring voltage drop and current draw.
What does a clicking sound from the starter mean when starting?
Rapid clicking usually happens when the starter does not receive enough current because of a weak battery or corroded or loose terminals, while a single click with bright lights may be linked to the starter or its solenoid.
Does tapping the starter fix the problem?
The starter may work temporarily after being tapped, but that is a sign of a fault in it rather than a fix, and it is dangerous while someone else tries to start the car.
Can a smart key stop the car from starting?
Yes. If the car does not recognise the key because of a weak key battery or a system fault, the starter may not turn or the engine may not fire, a message usually appears on the dashboard, and the owner’s manual may explain an alternative starting method.
Conclusion
When the car will not crank, note the dashboard lights, the type of sound and the result of a jump start: dim lights and rapid clicking lean towards the battery, while a single click with bright lights leans towards the starter, and do not forget the gear position and the key. Avoid risky shortcuts, and leave confirmation to a qualified technician.
Overheating Without Coolant Loss: Causes and Safe Action
Table of Contents:
|
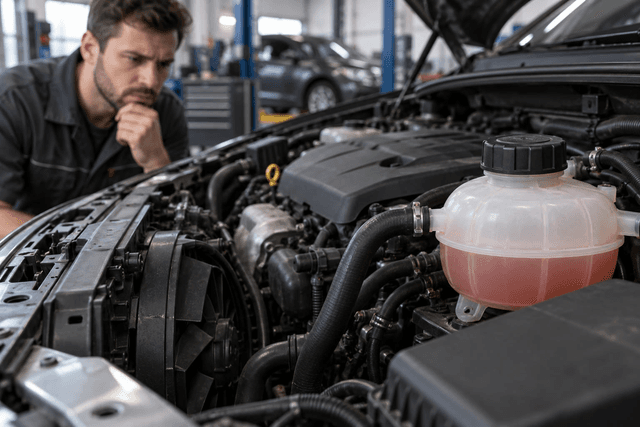
Overheating without coolant loss is possible: coolant visible in the reservoir does not prove that it circulates through the engine or releases heat effectively. The fault may involve coolant flow, airflow or cooling controls, and the temperature reading itself may also need checking. If an overheating warning appears, stop somewhere safe, switch off the engine and request assistance. Do not keep driving because the reservoir looks full.
Overheating Without Coolant Loss: What Does a Stable Level Mean?
The everyday expression water level refers here to engine coolant, not a recommendation to use plain water. This article focuses on a level that appears normal despite an overheating warning. For the wider picture, see the guide to engine overheating causes and what to do.
The reservoir’s role and the method for reading its level depend on the cooling-system design: it may be a pressurized part of the system or a recovery tank. Coolant also expands when hot, so comparing a hot reading with a cold one cannot establish system health. A visual reading within the marks on a cold engine, following the manual, tells you only about the level. It does not prove that passages are free of air or restrictions, or rule out a fault or a leak whose effects are not yet apparent.
How Can the Engine Overheat When Coolant Is Present?
The cooling system must move heat away from the engine and then transfer it to the air through the radiator. A failure at either stage can raise the temperature without an obvious drop in level. These are possibilities for inspection, not a shopping list of replacement parts:
- Fan or fan control: insufficient air may pass through the radiator while stationary. Seeing a fan turn once does not prove that its speed or all operating modes are correct.
- Thermostat: if it does not regulate coolant passage correctly, heat transfer to the radiator may be impaired despite an apparently adequate amount in the reservoir.
- Trapped air: air can interfere with coolant movement and heat transfer, particularly if the problem started after cooling-system work. The timing is a clue for the technician, not proof of a diagnosis.
- Insufficient pumping: the water pump may not provide the required flow. This does not necessarily produce a visible leak or an obvious noise that the driver can identify.
- Restricted heat exchange: internal restrictions in radiator passages or an external obstruction to airflow can reduce cooling. Reservoir level cannot distinguish between them.
- System pressure: a fault in the cap or components that retain pressure can affect the coolant’s resistance to boiling. Never test a cap by removing it while hot or guess at a different pressure rating.
For an explanation of circulation specifically, read about the water pump’s role in circulating coolant. Mentioning the pump does not make it the most likely cause in your car, and replacing it without checking the rest of the system may not solve the problem.
What Can Traffic and Highway Patterns Tell You?
Record only the conditions you already observed during previous use. Do not drive again or leave the engine running to reproduce overheating. The pattern can help a workshop organize its checks, but it is not a conclusive diagnosis:
| Previous observation | What might the technician check? | What does it not prove? |
| Temperature rises at a stop and eases when moving | Airflow, fan performance and fan control | It does not prove that only the fan is faulty |
| The warning appears on the highway or uphill | Coolant flow and heat exchange under load | It does not identify the pump or radiator specifically |
| It began after a coolant change or repair | Correct filling, trapped air and connections | It does not confirm trapped air without checks |
| It coincides with air conditioning use | Cooling performance as load and airflow change | It does not prove low AC refrigerant |
If the connection with AC use is your main observation, there is a separate explanation of engine overheating when the air conditioning is on. The key point here is that a normal coolant level cannot rule out a cooling fault, whatever the conditions when the warning appears.
Could the Temperature Reading Be Wrong?
A temperature sensor, its wiring or the display system may affect the reading. However, do not assume the warning is false because the reservoir is full or you cannot see steam. Some cooling faults show no obvious external sign at first. Treat the warning seriously until a qualified technician verifies the actual temperature and readings.
The technician compares diagnostic data and appropriate measurements with the vehicle’s specifications and operating conditions. A fault code alone cannot condemn a part, and the absence of a code does not prove that cooling is normal. There is also no single operating temperature for every car. Use the owner’s manual and vehicle-specific service information to interpret the gauge and warning message.
What Should You Do Safely When the Warning Appears?
- Move to the nearest safe stopping place away from traffic and use hazard lights as needed. Stop and switch off the engine. Do not try to drive to a workshop with an overheating warning.
- Stay clear of steam and spraying fluid. Never open a hot radiator or coolant reservoir cap, and do not assume that pressure has disappeared just because the gauge has fallen.
- Do not work near fans or put hands or tools in their operating area: a fan may start automatically even after the engine is switched off. Do not test it by hand or touch hot hoses.
- Do not pour cold water onto a hot engine or add fluid to a hot system. Request roadside assistance and arrange transport for inspection rather than repeatedly restarting the engine to see what happens.
Once the engine has cooled completely, you may record the level visible from outside the reservoir if this is possible and safe according to the manual, without removing caps or parts. A normal level or a warning that disappears after shutdown does not establish that the fault has gone or that continuing the journey is safe.
What Information and Checks Should You Discuss With the Workshop?
Tell the technician when the warning appeared: while stopped, climbing or travelling. Mention any preceding service work or fluid addition. Describe the message and any smell or steam you noticed from a safe position. Photograph the dashboard only after stopping, and do not reproduce the fault for documentation.
- Ask for the coolant level, specification and system condition to be checked, rather than accepting the reservoir is full as the entire assessment.
- Discuss fan operation and control, thermostat and pump function, and radiator flow as indicated by the diagnostic findings.
- Leave pressure and cap testing and air-removal procedures to the technician, using tools and methods appropriate to the system design.
- Ask what evidence identifies the fault and which check verified the repair before the car is handed back.
If initial checks do not identify the cause, broader diagnosis may be necessary. Do not jump to a head-gasket diagnosis, or rule it or another internal fault out solely because the reservoir level is stable. Testing should determine the next step.
Why Is Adding Water Not a Universal Fix?
If the level is within the correct limits, adding fluid will not repair a fan or restore impaired flow, and may exceed the permitted fill level. Use coolant meeting the vehicle’s specification and the concentration stated in the manual. Plain water is not a universal substitute, and color alone does not establish compatibility. Read about coolant differences and choosing a suitable fluid for more context.
Do not mix unknown products or experiment with additives to treat overheating. Flushing and air removal are not identical procedures on every vehicle; leave them to a professional when technically justified. Maintaining the correct level matters, but it is only one part of system health, not a replacement for checking performance.
Frequently Asked Questions About Overheating With a Stable Level
Does a full reservoir mean the radiator is full?
Not necessarily; it depends on the system design and condition. The visible level alone does not prove correct filling or circulation, and never justifies opening a hot cap.
Does the absence of a leak rule out pump failure?
No. Leakage is not the only possible sign of a pump fault. Its ability to circulate coolant needs appropriate assessment, not just a look underneath the car.
Can I drive if the gauge drops after stopping?
A lower reading does not prove the fault has gone. After an overheating warning, do not resume driving to test the car; request assistance and inspection before using it again.
Should I remove the thermostat to solve the problem?
Do not remove the thermostat as an experiment: it is part of cooling regulation. A technician should assess it and fit the correct replacement if necessary.
Does overheating without coolant loss mean a faulty sensor?
No. The overheating can be real despite a stable level. Do not ignore the warning or disconnect the sensor; have the reading and system performance checked together.
Conclusion: Check Cooling Performance, Not Just the Level
A stable coolant level neither rules out overheating nor identifies its cause. Stop safely at a warning, switch off the engine, avoid hot caps and fans, and give your observations to a qualified technician. A sound repair starts with evidence of the fault, not extra water or random parts replacement.
Nano Ceramic Coating, PPF or Wax: Choosing Paint Protection
Table of Contents:
|
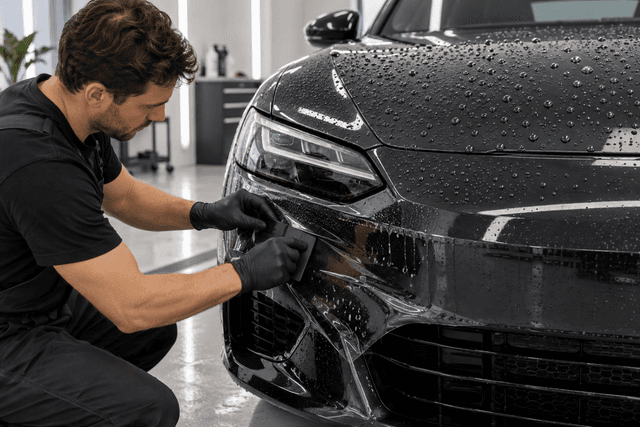
If you are weighing wax, a nano ceramic coating and transparent paint protection film (PPF), the short answer is this: wax is a temporary layer that adds gloss and light protection; a nano ceramic coating is a chemical layer that adds gloss, repels water and makes washing easier, but it does not stop stone chips; PPF is a thick film that resists stone chips and light scratches on the areas it covers. The right choice depends on how you use the car and the condition of its paint, and many owners combine film on the front with ceramic on the rest of the body. This guide explains the differences, preparation, aftercare and the questions to ask the installer.
How Do Wax, Nano Ceramic Coating and PPF Differ?
All three protect the clear coat to different degrees, but they are not interchangeable. The table summarises the practical difference before the details:
| Option | What It Is | What It Offers | What It Does Not Offer |
| Wax | A thin, temporary layer on top of the paint | Gloss, limited water beading and easy application | Does not last long and does not prevent scratches or stone chips |
| Nano ceramic coating | A liquid chemical layer that bonds to the paint surface | Gloss, water repellence and noticeably easier washing | Does not prevent stone chips or scratches and does not replace washing |
| PPF | A thick transparent film applied to the panels | Resistance to stone chips and light scratches on covered areas | Does not protect uncovered parts, and its quality depends on installation |
When comparing offers, the "does not offer" column matters more than the list of benefits; much disappointment comes from expecting protection the product was never designed to give.
When Is Wax Enough?
Wax suits you if you want gloss and light protection with little effort and can reapply it regularly. It is a reasonable choice for a car that is washed often and parked in the shade, or as a temporary step before a bigger decision you have not yet made.
However, wax wears away gradually with washing and heat, so do not expect long-lasting resistance. To understand the difference between polish, which treats the surface, and wax, which covers it, read when your car needs polish and how it differs from wax.
What Does Nano Ceramic Coating Offer, and What Are Its Limits?
A nano ceramic coating is a liquid applied to clean, prepared paint that then cures into a thin layer more resistant than wax to mild chemical contaminants. Its main practical benefits are:
- Deeper gloss and clearer paint colour, especially after paint correction.
- Water repellence and easier release of dirt, so washing is quicker and easier.
- Less adhesion of bird droppings, insects and water spots, although they still need prompt removal.
- Helping to reduce weathering and dulling of the paint compared with bare paint.
Its limits are clear: it does not prevent stone chips, does not prevent scratches caused by poor washing or wiping dust off with a dry cloth, and does not replace regular washing. It also highlights existing paint defects underneath rather than hiding them.
When Should You Choose Paint Protection Film (PPF)?
PPF is a thick transparent layer applied to the panels so that it takes the impact instead of the paint. It therefore suits drivers who cover long distances on highways, often drive behind vehicles that throw up gravel, or own a new car and want to preserve the original paint on the most exposed areas.
Some manufacturers state that their films recover from fine surface marks with heat; ask about this for the specific product offered to you rather than assuming it. Remember that film protects only what it covers, and installation quality shows in the edges, seams and the absence of bubbles or debris underneath.
Is Combining PPF and Ceramic Coating Worthwhile?
A common approach is to fit PPF on the front areas most exposed to gravel, such as the bumper, bonnet and mirrors, then apply ceramic coating to the rest of the paint to make washing easier and maintain gloss. Ceramic can also be applied over the film itself if the product is designed for films and the installer approves it.
This gives you impact resistance where chips are frequent and easier care on the rest of the car, without wrapping the whole body in film if you do not need it.
Why Does Paint Preparation Determine the Result?
Ceramic coating and film lock in the condition of the paint beneath them; swirl marks and stains that remain will show through the new layer. Good preparation therefore goes through three stages:
- A thorough, safe wash to remove dust and dirt.
- Removal of bonded contamination such as tar residue and iron particles until the surface feels smooth.
- Paint correction by polishing where needed to remove surface scratches before application.
For the tools and stages, see how to polish your car step by step. Deep scratches that reach the colour layer need repair before any protection, not covering up.
How Do Saudi Conditions Affect Your Choice?
Strong sun, dust and sand in many parts of the Kingdom expose paint to fading and fine scratches. Dust alone does not usually scratch, but wiping it off dry does, and blowing sand on open roads leaves small marks on the front of the car.
In these conditions, ceramic coating makes dust easier to rinse away, and PPF on the front helps drivers who travel often between cities. Parking in the shade and using a suitable car cover remain among the simplest measures; for more, read the summer car care guide for Saudi heat.
How Should You Care for the Car After Application?
- Follow the installer instructions on curing time and the first wash, as they vary by product.
- Wash with water and a gentle car shampoo, using clean microfibre mitts and towels.
- Avoid wiping dust off dry and avoid harsh brushes in automatic car washes.
- When using a pressure washer, keep the nozzle away from film edges so they do not lift.
- Remove bird droppings and water spots promptly, and dry the car after washing rather than leaving it to dry in the sun.
- Check film edges and water beading from time to time, and return to the installer if you notice a lifting edge or a clear drop in performance.
What Questions Should You Ask the Installer?
Before paying, ask for clear, written answers to the following points:
- Which product type is used, and is the ceramic offered suitable for application over film if you combine them?
- Exactly which areas are covered: the front only, additional parts, or the whole car?
- How are edges handled: is the film wrapped around panel edges, and is it cut on the car with a blade or with pre-cut patterns?
- Is there a written warranty? What does it cover and exclude, and what care conditions are required to keep it valid?
- What effect will removing the film later have on panels that have been repainted?
- Does the job include paint preparation and correction, or is that agreed separately?
The repainted panel question matters for used cars, because non-original paint may have weaker adhesion and can be affected when film is removed. If you are unsure of the car history, read how to tell whether a car has been repaired before installation.
When Is Paint Protection Not Worth the Cost?
- If the paint is deeply damaged or peeling, repairing it comes first.
- If the car is mostly parked indoors and used for short trips, wax and correct washing may be enough.
- If you are not ready to commit to a correct washing routine, you will lose much of the benefit.
- If the car needs essential mechanical maintenance, prioritise that over paint protection.
- If the offer relies on exaggerated promises such as "protection from all scratches" or "no need to wash".
Frequently Asked Questions About Nano Ceramic, PPF and Wax
Does nano ceramic coating prevent scratches?
No. It may reduce dirt adhesion and make cleaning easier, but it does not prevent scratches or stone chips. Impact resistance is the job of PPF on the areas it covers.
Can I stop washing the car after ceramic coating?
No. Ceramic coating makes washing easier and quicker, but dust and dirt still build up on it, and leaving them dulls the finish and raises the risk of scratches when they are wiped off.
Can ceramic coating be applied over PPF?
Usually yes, provided a film-compatible product is used and the installer approves it, so that it does not conflict with the warranty terms.
Does PPF damage the paint when removed?
When removed correctly from sound original paint the risk is lower, but repainted panels or weak paint may be affected. Ask the installer about this before installation.
What is the difference between nano ceramic paint coating and ceramic window tint?
Nano ceramic paint coating protects the exterior body, while ceramic tint is a film for the glass intended to reduce heat and glare. To learn about tint types, read how to choose the right window tint for your car.
Conclusion: Choose Protection to Match Your Use
Wax is for gloss and light, renewable protection; nano ceramic coating is for easier washing and gloss without impact protection; and PPF is for resisting gravel and light scratches where it is fitted. Whatever you choose, good preparation, a clear written warranty and correct washing are what make the difference.