Test Drive Before Buying a Car: Checklist and Comparison
Table Of Contents:
|
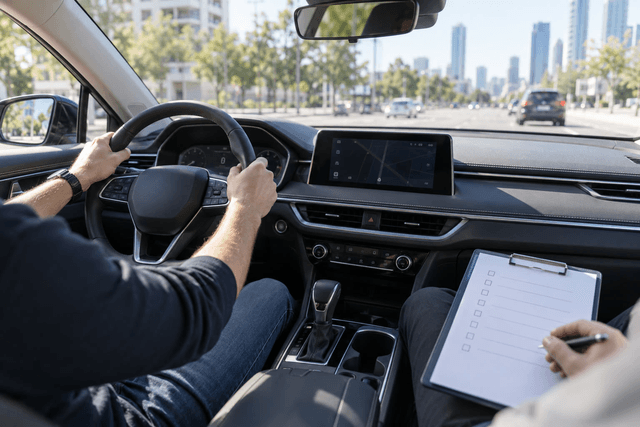
To get real value from a test drive before buying a car, ask to drive the same trim you plan to buy, and drive it on a route similar to your daily journeys: streets with speed bumps and traffic lights, a stretch of highway, and a place to park. Test the air conditioning, visibility, noise and family seating, and record your notes under the same items for every car. Budget, trims and the contract are covered in the new car buying guide.
How do you prepare for a test drive before visiting the showroom?
A successful test drive starts before you sit behind the wheel; good preparation makes you test what matters to you, not whatever catches your attention in the moment.
- Write a short description of how you will use the car: city journeys, a daily highway commute, intercity travel, passengers in the rear seats, or a tight parking space at home.
- Choose three priorities you will not compromise on, such as back comfort, easy parking and strong cooling, and make them the focus of your assessment.
- Ask the showroom in advance whether the model, trim and engine you are considering are available to test, how long the drive lasts, which route is available and which documents are required, and bring your driving licence.
- If the test car is a different trim, ask the team to explain the differences in engine, equipment, and wheel and tyre size, because they affect how the car feels and how much noise you hear.
- If you are comparing two cars, try to drive both on the same day and at a similar time, so the heat, traffic and road conditions are alike.
What should you check before the car moves?
Set aside a few minutes before driving off; much of what will bother you in everyday use shows up while the car is standing still.
- Adjust the seat, steering wheel and mirrors, and check that you can reach the pedals comfortably without stretching your leg or sitting too close.
- Stay seated for several minutes and notice whether the seat supports your back and thighs, or whether you keep changing position.
- Make sure the instruments and the dashboard screen are readable in sunlight, and that the screen does not reflect on the windscreen.
- Look at the front pillars and side sightlines: do they hide pedestrians or cars at junctions?
- Pair your phone and set a navigation destination while parked, and try the air conditioning controls without looking at them for long.
- Before handing the car back, unpair your phone and delete your data from the infotainment system.
What is the right route for a test drive?
If the showroom's arrangements allow it, ask for a route that resembles your daily driving instead of circling the building, and always keep to the speed limit and the accompanying employee's instructions.
- City streets with stop-and-go traffic: notice how smoothly the car moves off, how the transmission shifts and how the accelerator responds.
- Speed bumps and uneven asphalt: listen to the suspension, and notice whether the cabin shakes uncomfortably or the car absorbs bumps quietly.
- A roundabout or a series of bends: notice the steering weight and feel, and how much the car leans in corners.
- A stretch of highway: notice the car's stability, how easily it merges with traffic and overtakes, and the level of wind and tyre noise.
- A U-turn in a permitted place: it shows you how easy the car is to manoeuvre in narrow streets.
- Brakes: press them gradually as in normal use, and do not create a hazardous situation to test the brakes or driver assistance systems.
How do you test the air conditioning in Saudi heat during the drive?
Air conditioning is one of the most important things to test in the Kingdom's climate, but a short drive only gives a first impression and cannot prove cooling performance in every condition.
- If possible, try the car after it has been parked in the sun, which is closer to your real use than a car pre-cooled inside the showroom.
- Run the air conditioning at the setting you normally use, and notice when the air from the vents becomes cool and comfortable.
- Notice whether cooling stays good when stopped in traffic or at a signal, not only while moving.
- Ask about rear air vents, and ask your companion to assess the airflow reaching the rear seats.
- Raise the fan speed and listen to it, as some cabins become noisy at high settings.
- When comparing two cars, test the air conditioning in similar heat and at a similar time; otherwise, note the difference next to your observations.
How do you assess noise, visibility and parking?
These items are hard to judge from a specification sheet, but they become clear on a real drive.
- Noise: talk to your companion in a normal voice on the highway, and notice whether you have to raise your voice because of the tyres, wind or engine.
- Unusual sounds: if you hear a knock, squeak or vibration, ask about it and note it rather than diagnosing it yourself or treating it as a trait of every car of that model.
- Rear visibility: notice the size of the rear window and how clear the mirrors are, and whether you need to turn your head a lot when changing lanes.
- Camera and sensors: assess how clear the camera image is in strong sunlight, and how clear the sensor alerts are when approaching obstacles.
- Parking: try reverse and parallel parking in a safe, permitted place, and notice how easy it is to judge the car's corners.
- If your parking space at home is tight or its entrance is sloped, compare the car's published length and width with your space before the visit.
How do you test family seating and luggage space?
If the car is for the family, the opinion of whoever sits in the back matters as much as yours.
- Set the driver's seat to your position, then sit behind it and notice the room left for knees and head.
- Ask a family member to try getting in and out through the rear door, especially older relatives.
- If you have children, ask about the child seat anchor points (ISOFIX) and try fitting the seat with the showroom's agreement.
- In cars with a third row, try reaching it and folding the seats, and notice how much boot space remains.
- Put the pushchair or a suitcase in the boot, as written dimensions become clearer when compared with your own belongings.
How do you compare two cars after the test drive?
Write down your notes as soon as you step out of the car, before impressions get mixed up, and use a notes sheet with the same items for each car, like the table below:
| Item | What to notice | Example of a useful note |
| Seating position | Back comfort and ease of adjustment | Comfortable on the highway, but the seat is low for my mother |
| Visibility | Pillars, mirrors and rear window | The front pillar hides part of the roundabout |
| Transmission and acceleration | Smooth pull-away and overtaking | Calm pull-away, slight hesitation when overtaking |
| Brakes and steering | Pedal progression and steering weight | Progressive brakes, light steering when parking |
| Noise | Tyre and wind noise | Tyre noise is clear on rough asphalt |
| Air conditioning | Cooling speed and reach to the rear | Cold while moving, slightly weaker at the signal |
| Parking | Camera, sensors and judging corners | Clear camera, but the front end is hard to judge |
| Family and boot | Rear seats and luggage | The pushchair fitted in the boot with space to spare |
Give each item a score from one to five with a short reason, and give your three priorities more weight than the rest.
- Do not judge by the total score alone; one car beating the other on an item you do not care about does not make up for weakness in a key priority.
- Record the test conditions: the time, the heat, the route and the trim you drove.
- If the two cars are close, ask for a second drive focused on the item that remains undecided.
What are the common mistakes on a test drive?
- Settling for a short loop around the showroom that does not resemble your daily driving.
- Driving a higher trim and assuming all its equipment comes with the trim you will buy.
- Getting distracted by conversation or the screen while driving instead of focusing on the road and the car.
- Comparing two cars driven in very different conditions without noting it.
- Deciding in the first rush of excitement before calmly reviewing your notes.
Frequently asked questions about test drives
- How long should a test drive take? There is no fixed duration; what matters is that it is long enough for a route that resembles your use. A short drive may be enough to rule out a car, but it may not settle long-journey comfort.
- Should I test a higher trim if I plan to buy the base trim? It can still be useful if you know the differences, so match the engine, equipment and wheel size to the trim you want before relying on your impressions.
- Is a used car test drive different? Yes. In addition to the above, ask for the engine to be started cold, make sure the warning lights on the dashboard go out after starting, and do not rely on the drive alone; read our vehicle inspection tips before buying a used car.
- Should I take someone with me on the drive? A companion can assess the rear seats and notice what you might miss, after checking the showroom's policy on passengers.
- Do I have to decide on the same day? No. Review your notes once you are away from the showroom atmosphere, compare them with your priorities, then decide.
An organised test drive turns a general impression into information you can compare: prepare your priorities, choose a route that resembles your day, test the air conditioning, visibility, parking and family seats, and record everything under the same items. You can browse the cars available at Saleh Cars Group to compare models and trims, and contact the team to ask whether a test drive of the trim you are interested in is possible.
Vehicle Ownership Transfer on Absher: Steps and Conditions
Table Of Contents:
|
Vehicle ownership transfer in Saudi Arabia is done electronically through the vehicle sale service on the Absher platform, without visiting traffic offices: the seller enters the buyer's ID number and date of birth, the agreed sale price and the seller's bank account; the buyer then receives a notification of the request within one hour and accepts or declines it, transfers the price through Absher's secure payment system, insures the vehicle and pays the fees, and once the car is received, checked and the delivery is confirmed on Absher, ownership is officially transferred. Both parties must be registered on Absher, the vehicle registration (istimara), periodic inspection and insurance must be valid, and there must be no violations on the buyer or the vehicle.
What is the vehicle ownership transfer service on Absher?
The Ministry of Interior offers the vehicle sale service through the Absher platform, and the National Platform describes it as a service that enables individuals to sell their private vehicles and transfer ownership electronically after its dues are cleared, after reaching an agreement with the buyer and completing all required procedures, including vehicle inspection to ensure compliance with conditions, registering the vehicle under the buyer's identity, and issuing the vehicle registration license.
- Target audience: individuals, both citizens and residents.
- Service channels: the Absher website and its mobile app.
- Service duration according to the National Platform: immediate.
- Payment method: the car's price is transferred through Absher's secure payment system, and the service page on Absher explains that payment goes to an intermediary account dedicated to the service, which ensures the amounts are documented and the vehicle is received.
Procedures and conditions may be updated from time to time, so confirm the latest steps on the Absher platform or the National Platform before you start.
What are the conditions for selling a vehicle on Absher?
Before the seller starts the request, both parties should review the conditions listed on the service page on Absher, as failing to meet any of them may stop the sale:
- Both the seller and the buyer must be registered on the Absher platform.
- The vehicle must be in sound condition and not suspended, lost, wanted or impounded.
- The vehicle registration license (istimara) must be valid.
- The vehicle must have a valid periodic inspection.
- The vehicle must have valid insurance.
- There must be no violations on the buyer or on the vehicle.
- The agreed price must fall within the limits set by the service, and the vehicle must be of a type the service allows to be sold.
- Government fees are paid through the government payment system (SADAD).
The page also mentions limits on the number of vehicles of certain types that a resident may own, so review them on Absher if the buyer is a resident. If the periodic inspection is close to expiring, prepare the car early using the checklist on how to prepare your car for the periodic inspection.
What are the seller's steps to transfer car ownership on Absher?
After agreeing with the buyer on the price and other terms, the seller starts the request with these steps, as set out by the National Platform:
- Log in to the Absher platform.
- Go to vehicle services, then choose the vehicle sale service.
- Select the vehicle you want to transfer from the list displayed.
- Enter the buyer's information: ID number and date of birth.
- Enter the agreed-upon sale price.
- Add the seller's bank account details where the proceeds of the sale will be deposited.
- Carefully review the entered information, then confirm the request.
- Wait for the buyer's response: the buyer receives a notification of the transfer request within one hour and can accept or decline it.
- Once the buyer accepts the sale, both parties complete the delivery of the vehicle and the payment through Absher's secure payment system before the transfer is confirmed.
What does the buyer do to complete the sale?
Ownership does not pass to the buyer until they complete their steps on the platform, which according to the National Platform are:
- Review the Absher notification about the vehicle transfer request, and accept it within one hour if you agree.
- Carefully review the vehicle information and sale price before confirming your acceptance.
- Transfer the agreed amount to the seller's account through Absher's secure payment system.
- Insure the vehicle before the ownership transfer is completed.
- Pay the government fees and the Absher fees.
- Receive the vehicle and check it, then confirm delivery through Absher.
- Upon confirmation, the vehicle ownership is officially transferred from the seller to the buyer.
How do the seller's and buyer's tasks differ?
The table below summarises the role of each party at every stage of the sale:
| Stage | Seller | Buyer |
| Before starting | Agree on the price and terms, and check the istimara, periodic inspection and insurance are valid | Register on Absher and make sure there are no violations on them |
| Creating the request | Enter the buyer's ID, date of birth, price and bank account, then confirm | Wait for the Absher notification |
| Responding | Wait for acceptance or refusal | Review the details and accept or decline the request within one hour |
| Payment | Receive the price in the bank account entered in the request | Transfer the price through Absher's secure payment system |
| Insurance and fees | The platform lists no step for the seller at this stage | Insure the vehicle and pay the government fees and Absher fees |
| Delivery | Hand the vehicle over to the buyer after they accept the sale | Receive and check the vehicle, then confirm delivery on Absher |
How do you transfer car ownership between family members?
If you are handing your car over to a family member, Absher has a separate service called vehicle ownership transfer between family members, which allows vehicle ownership to be waived between family members electronically once the current owner and the new owner agree. The National Platform lists its steps as follows:
- Log in to the Absher platform, then select the required vehicle and the service dedicated to this.
- Select a first-degree family member: father, mother, brother, sister, husband, wife, son or daughter.
- Enter the confirmation code sent to the new owner's phone.
- Pay the service fees.
- The vehicle ownership is transferred to the new owner in the traffic systems after all requirements are met.
What practical checks protect the seller and buyer before the sale?
The platform organises the procedure, but it does not replace inspecting the car yourself; the service page on Absher states that the sale takes place after the vehicle has been viewed and inspected and the seller and buyer have agreed. Here are practical tips before accepting the request:
- Match the chassis number (VIN) on the car with the istimara and the vehicle details shown in the request; the article on what the VIN characters mean explains where to find it.
- Inspect the car in daylight and try the engine, transmission, air conditioning and tyres, or ask for a pre-purchase inspection at an independent inspection centre; you will find a wider list in vehicle inspection tips before buying a used car.
- Look for signs of accidents and differences in paint shade between panels, and read what it means when a car has been repaired before you decide.
- Check for violations through official channels such as Absher before starting the request, because the service requires no violations on the buyer or the vehicle.
- Agree in advance on what the sale includes, such as the spare key, accessories and the service record if there is one.
- Keep a private record of the agreement for yourself: the agreed price, the request date and screenshots of the request, and do not share these details publicly.
What are the common mistakes in car ownership transfer?
- Starting the request before clearly agreeing on the price and other terms.
- Entering the buyer's ID number, date of birth or the sale price without careful review before confirming.
- Creating the request at a time when the buyer is not available, although the steps ask the buyer to review and accept it within one hour.
- Overlooking the expiry date of the istimara, periodic inspection or insurance until the request stalls after the deal is agreed.
- Transferring the price outside Absher's secure payment system, although the service steps state that payment is made through it.
- Confirming delivery on Absher before actually receiving and checking the car.
Frequently asked questions about car ownership transfer
- Do I need to visit the traffic department to transfer car ownership? According to the National Platform, the vehicle sale service is completed electronically through Absher without the need to visit General Traffic Department offices.
- How long does the ownership transfer take? The National Platform describes the service duration as immediate; the buyer receives the request notification within one hour, and the sale is complete once both parties finish their steps and the buyer confirms delivery.
- Who pays the ownership transfer fees? The National Platform lists paying the government fees and Absher fees among the buyer's steps; check their current amount on the platform before you start.
- Can the sale be cancelled after the request is created? The buyer can decline the request when the notification arrives, and the service page on Absher states that in case of disagreement or unwillingness to continue, the sale can be cancelled before it is completed, according to the stage set by the platform.
- Does the buyer need insurance for the car? Yes. One of the buyer's steps is to insure the vehicle before the ownership transfer is completed.
Transferring car ownership through Absher is a clear process if you prepare for it: check the conditions, agree on the price, inspect the car before accepting, pay through the platform's secure payment system, and do not confirm delivery before checking the car. If you are looking for your next car, you can browse the cars available at Saleh Cars Group.
New Car Buying Guide: Steps and Tips Before You Sign
Table Of Contents:
|
To buy a new car with confidence and without surprises, set your full budget rather than just the car's price, choose the body type and trim that suit your daily use, take a test drive yourself, ask for a written quotation that clearly states the warranty and everything the price includes, and inspect the car carefully before taking delivery. In this guide we explain these steps in order, from planning to the first service, keeping in mind the needs of drivers in the Kingdom, from summer heat to long highway trips between cities.
How do you set your budget before buying a new car?
A realistic budget does not stop at the car's showroom price; it includes everything you will pay to own and run it during the first years.
- The price of the car itself, making sure whether it includes tax, registration, and plates or not.
- Insurance, whose cost varies with the type of car and the type of cover you choose.
- Monthly fuel consumption based on the distance you usually drive and the size and type of the engine.
- Scheduled maintenance, oil changes, tires, and battery replacement over the medium term.
- Extras you may want, such as window tint, paint protection, and floor mats.
- The payment method: paying in cash differs from paying in installments in the total you end up paying, so calculate the full cost in both cases.
What type of car suits your use?
Start from how you will use the car, not from how it looks; the right car for an employee commuting within the city differs from the right car for a large family that often travels between cities.
- A sedan usually suits daily use in the city, is easy to park, and its fuel consumption is typically moderate.
- SUVs offer more space and ground clearance, suit families and trips, and some come with four-wheel drive for those who head out to the desert.
- A pickup suits those who need to carry cargo or do field work, but it is usually less comfortable for everyday city driving.
- The number of seats matters if your family is large; some cars offer a third row of seats, so check the trunk space when it is in use.
- Powertrain: petrol, hybrid, or electric, each with its pros and cons; learn about the difference between hybrid and electric cars before you decide.
- If saving fuel is a priority for you, check our list of the best fuel-efficient cars to narrow down your options.
How do you compare a car's trims and specifications?
A single model usually comes in several trims that differ in equipment and engine, and the gap between them can be significant in both price and everyday use.
- Ask for the specification sheet of the exact trim you will buy, and do not rely on photos or ads of a higher trim.
- Put safety systems ahead of luxuries: airbags, ABS, stability and traction control, the reversing camera, and parking sensors.
- Check the strength of the AC and whether there are rear AC vents if you carry passengers in the back seats, as this matters in the Kingdom's summer.
- Compare the transmission type and engine size with what suits your driving on highways and inclines.
- Pay attention to the size of the rims and tires; larger sizes may look better but can cost more to replace, and make sure there is a spare tire.
- Do not pay for features you will not use; choose the trim that covers your actual needs.
What should you check during a test drive?
- Adjust the seat, steering wheel, and mirrors, and make sure visibility in all directions is comfortable and clear.
- Drive the car on a road you usually use, in the city and on a highway if possible.
- Notice how smoothly the transmission shifts and how the accelerator responds when speeding up and overtaking.
- Test the brakes and steering at low speeds and when parking, and listen for any unusual noises or vibrations.
- Run the AC at full power and notice how quickly it cools and how noisy the cabin is.
- Bring your family along if you can so they can try the rear seats, ease of getting in and out, and fitting child seats.
What should you read in the quotation and warranty before signing?
- Ask for a written quotation that states the model, trim, model year, and color, and everything the price includes.
- Make sure agreed extras such as tint or floor mats are written into the quotation, and do not settle for verbal promises.
- Read the warranty terms: its duration and the distance it covers, the parts included and excluded, and the conditions for keeping it valid, such as sticking to the service schedule.
- Ask about free service packages if any, roadside assistance, and the service centers near you.
- Confirm the expected delivery date, and who handles registration, plates, and insurance.
- Check the current car offers before signing, as you may find extra benefits on the model you want.
What should you inspect on a new car before taking delivery?
Even a new car can pick up a scratch or a minor defect during shipping or storage, so set aside enough time to inspect it before signing for delivery.
- Inspect the paint in daylight for scratches or color differences, and check that the gaps between doors and fenders are even.
- Match the vehicle identification number (VIN) on the car with the number written on the documents.
- Make sure the odometer reading is low and consistent with a new car.
- Test all electrical systems: lights, windows, screen, camera, sensors, and AC.
- Check the manufacturing date and condition of the tires, and that the spare tire and tool kit are present.
- Make sure you receive the owner's manual, the warranty booklet, and the spare key, and that no warning light stays on in the dashboard after starting.
What are the common mistakes when buying a new car?
- Buying on emotion or because of an ad before making sure the car suits your actual needs.
- Focusing only on the monthly installment and ignoring the total you will pay.
- Ignoring running costs such as fuel, insurance, and maintenance.
- Signing before reading the full contract and warranty terms.
- Skipping the test drive or settling for a short loop around the showroom.
- Taking delivery at night or in a hurry without inspecting the car properly.
How do you care for your new car in the first months?
- Read the owner's manual, and follow any recommendations for the early driving period if the manufacturer mentions them.
- Keep to the first service appointment and the regular maintenance schedule to keep the warranty valid.
- Keep all maintenance invoices and records; they matter for the warranty and for the car's value when you sell it later.
- Park in the shade or use a sunshade to protect the paint and cabin from the heat of the sun.
- Check tire pressure regularly, especially before trips and during very hot periods.
Frequently asked questions about buying a new car
- Is it better to buy a new or a used car? A new car gives you a warranty, a clean history, and peace of mind, while a used car usually costs less but needs a careful inspection; if you choose used, read our important tips before buying a used car.
- Does a new car need an inspection before delivery? Yes, a simple but careful check at delivery reveals any scratch or missing accessory before you sign.
- Does servicing outside the dealership affect the warranty? It depends on the written warranty terms, so ask about them before buying and always keep a maintenance record.
- Are extras such as tint and paint protection necessary? They are optional and can be useful in the Kingdom's climate, but decide based on your needs and ask for them to be written clearly in the quotation.
- How long should the decision to buy a new car take? There is no fixed period, but give yourself enough time to compare, test drive, and read the quotation instead of deciding in a single visit.
Buying a new car is a big decision, and good planning saves you a lot of money and regret. Set your full budget, choose what suits your use, and test, read, and inspect before you sign. When you are ready, browse the cars available at Saleh Cars and compare models and trims at your own pace.
Saudi Traffic Violations: How to Check, Pay and Dispute
Table Of Contents:
|
To check traffic violations in Saudi Arabia, open the Query Traffic Violations page on the Absher platform and enter your ID number together with the violation number or your date of birth. To pay, sign in to the Efaa platform through the National Single Sign-On, choose the violations you want to pay, then pay through the SADAD system, a mada card or a credit card. To object, use the Dispute Traffic Violations service that the Ministry of Interior provides online. These procedures may be updated from time to time, so confirm the latest steps on the official platform before you act.
What are traffic violations and who issues them?
Traffic violations are violations related to the Traffic Law and its implementing regulations. As the description of the dispute service on the National Platform explains, they are issued by the General Department of Traffic or by any other authority authorised to apply the Traffic Law and its implementing regulations. In practice, you deal with them through three main services:
- Inquiry: to find out which violations are registered against you, through the Query Traffic Violations page on the Absher platform.
- Payment: through the Efaa platform, as part of a Ministry of Finance service for paying government violations registered against individuals.
- Dispute: through the Dispute Traffic Violations service provided by the Ministry of Interior, if you have something showing that the violation is incorrect.
It helps to distinguish traffic violations from other government violations, such as Ministry of Transport violations or municipal violations, because each authority has its own services; you will find a summary in the table below.
How do you check traffic violations on Absher?
The Absher platform provides a dedicated page called Query Traffic Violations, which asks for specific search details. The steps usually go as follows:
- Open the Query Traffic Violations page from the official Absher website.
- Enter your ID number in its field.
- Choose the search type: by violation number or by date of birth.
- Enter the violation number or the date of birth, depending on the type you chose.
- Complete the verification code shown on the page, then display the result.
If you want to see the violations registered against you by different government entities in one place, the Efaa platform steps start with signing in through the National Single Sign-On (Nafath) and then viewing the registered violations, which we explain in the next section.
How do you pay traffic violations through the Efaa platform?
The service for paying government violations registered against individuals enables citizens, residents and visitors to view and pay all the violations registered against them by government entities, including traffic, smoking, government fines and other violations. The service page on the National Platform lists the payment steps as follows:
- Go to the Efaa platform.
- Choose to sign in through the National Single Sign-On.
- View the violations registered against you.
- Select the violations you want to pay.
- Continue to the electronic payment page.
- Complete the payment through the SADAD system, a mada card or a credit card.
According to the service description, the platform aims to unify and simplify violation procedures through a single digital platform that the relevant entities are linked to, so violations are issued and managed centrally. The National Platform also states that the service itself is free, meaning there is no charge for using it; this does not mean the violation amount is waived.
How do you dispute a traffic violation?
The Dispute Traffic Violations service provided by the Ministry of Interior allows you to dispute traffic violations issued by the General Department of Traffic and any other authority authorised to apply the Traffic Law and its implementing regulations. The service is provided online through the web portal and the mobile apps, and its path as shown on the service page is:
- Go to My Services.
- Choose Traffic.
- Choose Dispute Traffic Violations, then follow the instructions shown to complete the request.
We have not listed deadlines or detailed conditions for disputes here because they do not appear in the service description on the National Platform; read the conditions and instructions shown to you inside the service before submitting, and do not delay your dispute if you believe the violation is incorrect. Before you start, the following helps:
- Make sure the violation really concerns your vehicle or your licence, and that its details match what happened.
- Write the reason for your dispute clearly and briefly, stating facts rather than impressions.
- If you have documents that support your position, prepare them in advance, and provide the details the service asks for.
- Keep proof that you submitted the request until you receive the decision.
What is the difference between violation services on the official platforms?
Several entities register violations, and each service has a specific purpose. The table below summarises the services listed in the official sources we relied on:
| Service | Entity or platform | What it lets you do |
| Query Traffic Violations | Absher platform | Search by ID number with the violation number or date of birth |
| Payment of government violations registered against individuals | Ministry of Finance through the Efaa platform | View violations registered by government entities and choose which to pay |
| Dispute Traffic Violations | Ministry of Interior | Dispute violations from the traffic department and authorities authorised to apply the Traffic Law |
| Violations inquiry at the Ministry of Transport | Ministry of Transport and Logistic Services | Display violation details by searching with the violation number or the identification number |
| Municipal violations inquiry | Qassim Region Municipality as an example | View registered violations and the details of each one after signing in through the National Single Sign-On |
If a violation is registered with an entity other than the traffic department, look for that entity's inquiry service on the National Platform; for example, the Ministry of Transport and Logistic Services offers an inquiry through its web portal via the Ministry Services link and then the Violations Inquiry service in the list of inquiry services.
What are the most common causes of traffic violations you can avoid?
The best way to deal with violations is not to commit them in the first place, and most of their common causes can be avoided with simple habits that protect you and others on the road:
- Exceeding the speed limit: watch the road signs, because the limit changes between highways, inner streets and school areas, and cruise control helps you hold a steady speed on long roads.
- Not wearing a seat belt: make it a habit before moving off, for you and all passengers, however short the trip.
- Using the phone while driving: set navigation and calls before moving off, and leave messages until you stop in a safe, permitted place.
- Expired documents: track the expiry dates of your driving licence, the vehicle registration (istimara) and the insurance policy, and renew them before they are due.
- An expired periodic inspection: note its date in your phone calendar, and prepare the car beforehand with this checklist for preparing your car for the periodic inspection.
- Running a red light or stopping in prohibited places: slow down when approaching a signal, be ready to stop when it changes, and park only in permitted spaces.
- Neglecting the car's condition: make sure the lights and indicators work, and do not ignore warning lights; read about dashboard warning light meanings to know when to stop immediately.
Remember that driver assistance systems such as lane departure warning and adaptive cruise control help you, but they do not replace your attention, and they do not take over your responsibility to follow the rules.
What practical tips should you follow before paying or disputing?
- Check your violations regularly so they do not pile up without your knowledge.
- Read the details of each violation before deciding, then choose whether to pay it or dispute it.
- Reach the official platforms by typing their address yourself or through their official apps, and do not pay through links sent to you in messages from unknown sources.
- Do not share your verification code, login details or card details with anyone.
- Keep proof of payment until you are sure the violation status has been updated.
- If you face a technical problem, contact the entity that provides the service through its official channels.
Frequently asked questions about traffic violations
- Do I need to visit a government office to settle a violation? Usually not; the inquiry, payment and dispute services mentioned are provided online through the official portals and apps, and the dispute service page shows a branches link for anyone who needs it.
- Can I pay more than one violation at the same time? The Efaa platform steps include viewing the registered violations and then selecting the violations you want to pay before continuing to payment, so you decide what to pay.
- Does the Efaa platform include non-traffic violations? Yes. The service description states that it covers traffic, smoking, government fines and other violations registered by government entities.
- Can I dispute a traffic violation registered by an entity other than the traffic department? According to the service description, disputes cover traffic violations issued by the General Department of Traffic and any other authority authorised to apply the Traffic Law and its implementing regulations.
- Who do I call if I face a problem? The service pages on the National Platform list the Ministry of Finance number 19990 for the payment service and the Ministry of Interior number 966114011111 for the dispute service, as well as each entity's official email address.
Dealing with traffic violations is easier than it looks: check them on Absher, pay them on the Efaa platform, dispute them through the Ministry of Interior service if you have a clear reason, and always review the updated steps on the official platforms. Most importantly, avoid their common causes from the start: keep to the speed limit, fasten your seat belt, keep your phone out of your hand, and renew your documents before they expire.
Car Brand Logos and Names: A Guide to Badges in Saudi Arabia
Table Of Contents:
|
Car brand logos are the badges and names each manufacturer places on the front grille, the boot lid and the centre of the steering wheel, and the easiest way to learn them is to group them by country of origin: Japanese badges such as Toyota's three ovals, Korean ones such as Hyundai's slanted H, and Chinese brands, many of which spell out their full name in Latin letters, alongside German, European and American badges. In this guide you will find each brand's name as it is written and said, a short description of its badge, its meaning where it is documented, and a table for quick comparison.
What are car brand logos and where do you find them on a car?
A car badge (the logo or emblem) is the trademark that identifies the manufacturer, and it usually appears in several places:
- The centre of the front grille or the bonnet, the most visible spot for the logo.
- The boot lid, where the model name and sometimes the trim are usually written next to it.
- The centre of the steering wheel, the wheel caps and the car key.
Badges fall into two types: a standalone symbol such as a star, rings or a lion, or a name spelled out in letters, as with many American and new Chinese brands, and knowing this difference helps you recognise a car from a distance.
What are the best-known Japanese car brand logos?
Japanese badges are very familiar on the Kingdom's roads, and most are simple symbols that are easy to remember:
- Toyota: three ovals that form the letter T; the company says the two overlapping ovals represent mutual trust between the customer and the company, and the outer oval represents the global expansion of its technology.
- Lexus: a curved letter L inside an oval; it is Toyota's luxury vehicle division.
- Nissan: the name NISSAN across a thin circle; the name began as an abbreviation of the Japanese holding company Nihon Sangyo.
- Honda: a wide, upright letter H inside a frame with rounded corners.
- Mitsubishi: three red diamonds meeting at the centre, chosen by founder Iwasaki Yataro because they recalled the emblem of the Tosa clan that employed him and his own family crest.
- Mazda: a stretched letter M shaped like wings inside a circle; according to the company's website, the name is also linked to its founder, Jujiro Matsuda.
- Suzuki: a red letter S with sharp lines.
- Isuzu: the name ISUZU in bold letters; the name comes from the Isuzu River and means fifty bells.
What are the Korean car brand logos?
- Hyundai: a slanted letter H inside an oval; the Korean word means modernity.
- Kia: the word KIA in a sharp, angular script; according to the company, the name means rising from Asia.
- Genesis: two spread wings with a shield in the middle; it is the luxury brand of Hyundai Motor Group.
Which Chinese car brand logos are common in Saudi Arabia?
Chinese cars have become familiar in the Saudi market, and their best-known badges include:
- Changan: a shape like the letter V inside a circle; the name comes from the Chongqing Changan Arsenal and literally means long-lasting peace.
- Chery: an oval with a symbol resembling the letter A in the middle.
- Geely: the name GEELY is written in Latin letters on the rear of many of its models.
- Haval: the name HAVAL in large letters; it is a brand specialising in SUVs, owned by Great Wall Motor, which is named after the Great Wall of China.
- MG: the letters MG inside an octagon; it is a British marque founded in Oxford and owned today by the Chinese company SAIC Motor.
- BYD: the letters BYD in a bold typeface; the name had no particular meaning, and the company later adopted Build Your Dreams as a slogan matching its letters.
- Hongqi: a vertical red strip running from the bonnet to the grille on many of its models; the name means red banner, and it is the oldest Chinese passenger car brand, owned by FAW Group.
How do you recognise the new Chinese car brands?
Many Chinese brands have appeared in recent years, some cannot be recognised from the badge alone, and here are practical ways to tell them apart:
- Read the written name: many new brands spell out their full name on the grille or the boot instead of a standalone symbol, such as Jetour, Omoda, Jaecoo and Deepal.
- Know the parent company: Jetour, Omoda and Jaecoo belong to Chery, Deepal to Changan, Haval to Great Wall and Lynk & Co to Geely, and brands within one group may share some models or platforms.
- Learn what the name means: Jetour combines the words jet and tour, signifying a convenient journey according to the brand; the O in Omoda comes from oxygen and moda means modern, according to Chery; Jaecoo comes from the German word Jäger, meaning hunter, and the English word cool; and Deepal's Chinese name means deep blue.
- Do not rely on the badge alone: some brands have changed their logo more than once, and its look may differ from one model year to another, so confirm the manufacturer and model on the car's registration card.
- Check the VIN: its first characters identify the manufacturer, and it is recorded on the registration card and stamped on the car's body.
What are the German and European car brand logos?
European badges often rely on old symbols with well-known stories:
- Mercedes-Benz: a three-pointed star inside a circle, which for the original Daimler company symbolised Gottlieb Daimler's aim of motorisation on land, water and in the air.
- BMW: a circle divided into blue and white quarters inside a black ring bearing the company name; its colours recall the flag of Bavaria, while the idea that it is an aircraft propeller is a myth.
- Audi: four interlinked rings, each representing one of the four companies that joined to form Auto Union, Audi's predecessor.
- Volkswagen: the letters V and W inside a circle; the German name means people's car.
- Skoda: a winged arrow inside a circle; the arrow represents speed, the wings progress and freedom, and the eye precision; it is a Czech brand.
- Peugeot: a lion; the original logo was a lion walking on an arrow, symbolising the speed, strength and flexibility of Peugeot's saw blades; it is a French brand.
- Renault: a diamond-shaped lozenge that the French company has placed on the front of its cars since the nineteen-twenties.
- Land Rover: a green oval carrying the name of the British brand.
- Rolls-Royce: two interlocking letters R and the Spirit of Ecstasy mascot on the bonnet; the British company is a wholly owned subsidiary of the BMW group.
- Lamborghini: a raging bull, chosen by founder Ferruccio Lamborghini after he admired the fighting bulls at the Miura ranch in Spain; it is an Italian brand.
What are the American car brand logos?
American badges tend towards written names and simple shapes:
- Ford: a blue oval with the name Ford in white script.
- Chevrolet: the gold bowtie, whose origin is unsettled; the company's account says William Durant took it from a wallpaper pattern in a French hotel.
- GMC: the letters GMC, usually in red; it is a General Motors brand.
- Jeep: the word JEEP in plain letters, and many people know it by its grille with vertical slots.
- Dodge: the name DODGE in large letters on the grille or the rear.
- Lincoln: a four-point star inside a frame; it is a luxury brand owned by Ford and named after US President Abraham Lincoln.
Car brand logos table: brand, country of origin and badge description
A quick summary of each brand's badge:
| Brand | Country of origin | Badge description |
| Toyota | Japan | Three ovals |
| Nissan | Japan | Name inside a thin circle |
| Honda | Japan | Upright letter H |
| Mitsubishi | Japan | Three red diamonds |
| Hyundai | Korea | Slanted H in an oval |
| Kia | Korea | The word KIA in a sharp script |
| Changan | China | V shape inside a circle |
| Chery | China | A-like symbol in an oval |
| Jetour | China | Name in Latin letters |
| Haval | China | HAVAL in large letters |
| MG | Britain (Chinese owner) | MG inside an octagon |
| BYD | China | The letters BYD |
| Mercedes-Benz | Germany | Three-pointed star in a circle |
| BMW | Germany | Circle with blue and white quarters |
| Audi | Germany | Four interlinked rings |
| Volkswagen | Germany | VW letters in a circle |
| Peugeot | France | Lion |
| Ford | USA | Blue oval |
| Chevrolet | USA | Gold bowtie |
| GMC | USA | Red GMC letters |
Frequently asked questions about car brand logos
- How do I tell the Hyundai logo from the Honda logo? The Hyundai logo is a slanted letter H inside an oval, while the Honda logo is a wide, upright letter H inside a frame with rounded corners.
- Which car has a horse, bull or lion logo? The black prancing horse on a yellow background is the logo of Italy's Ferrari, the horse inside a coloured shield belongs to Germany's Porsche, the raging bull to Lamborghini and the lion to Peugeot.
- Is a brand's country of origin the country where the car is made? Not always; the country of origin is the brand's home, and its models may be built in other countries, so check the manufacturing details in the VIN and the registration card.
- Why do companies change their logos? Usually when they renew their identity, as Nissan, Kia and BYD have done in recent years, so you may see two logos for the same brand on cars from different years.
- How can I confirm a car's brand if its badge has been replaced? Some owners fit modified badges or the badge of another model, so rely on the registration card and the VIN rather than the badge, especially when buying a used car.
Car brand logos become easier to remember when you link each badge to its country and parent company, read the name written on the boot when in doubt, and check the registration card and the VIN before any purchase decision. You can browse the cars available at Saleh Cars Group to get to know the different brands and models.

Car Trim Levels Explained: How to Choose the Right Trim
Table Of Contents:
|
The difference between car trim levels is the difference in the equipment a manufacturer fits to the same model: the engine, transmission and drivetrain, safety and driver assistance systems, comfort and air conditioning, wheel and tyre size, and the screen and infotainment. Labels such as “standard” and “fully loaded” are not consistent between manufacturers, so a fair comparison depends on the official trim name, the model year and the written specification sheet. Here we explain where trims differ and how to compare them with a table, without paying for features you will not use.
What are car trim levels and why do their names vary?
A trim is a version of the same model with an equipment package set by the manufacturer; a model usually starts with a base trim, each higher trim adds a group of features, and trims may also differ in the engine or exterior styling.
- Standard, mid-spec and fully loaded are rough sales descriptions, and each manufacturer has official names for its trims.
- A fully loaded version of one model may lack a feature found on the mid-range trim of another, so never compare by the label alone.
- A trim's contents can change from one model year to the next and may differ by market, so a brochure from another country does not prove the car offered to you has the feature.
If you are at the start of the buying process, begin with our new car buying guide to set your budget and choose the type of car, then return to this article to compare trims in detail.
Do trims differ in engine, transmission and drivetrain?
On many models every trim shares the same engine, but some offer a larger, turbocharged or hybrid engine on higher trims. When the mechanical components differ, they matter more than any cosmetic extra, because they affect performance, fuel consumption and maintenance for as long as you own the car.
- Engine: record its size and type, and do not assume the larger engine suits you best if most of your trips are in the city.
- Transmission: the type may differ between trims, so read how a car transmission works and its main types before you compare.
- Drivetrain: two-wheel drive is usually enough in the city, while four-wheel drive helps if you head into the desert and sandy roads, but it adds weight and parts that need maintenance.
- Fuel consumption: it may differ between trims of the same model, so ask to see the fuel economy label for the version you are considering; the Saudi Standards, Metrology and Quality Organization explains that this label is a guide for consumers before purchase, to raise their awareness of energy efficiency.
How do safety and driver assistance systems differ between trims?
A phrase such as “comprehensive safety features” is not enough; ask for the names of the systems fitted to each trim and understand what each one does: does it only warn the driver, or does it intervene with braking or steering?
- Airbags: how many there are and where, plus child-seat anchor points if you travel with children.
- Forward collision warning only alerts you, while automatic emergency braking may apply the brakes if you do not react.
- Lane departure warning only warns, while lane keeping assist makes a limited steering correction.
- Blind spot monitoring and rear cross-traffic alert are useful on highways and when reversing out of busy parking spaces.
- Adaptive cruise control keeps a set distance from the car ahead and is comfortable on long trips between cities.
- A reversing camera and parking sensors, or a surround-view camera on some higher trims.
These systems assist the driver and do not replace attention, and dust on the sensors can affect how they work.
Which comfort and air conditioning features change from trim to trim?
Some comfort features help you every day in the Saudi climate, while others you may rarely use even though they raise the trim's price.
- Air conditioning: manual or automatic, single-zone or dual-zone, with or without vents for rear passengers.
- Seats: fabric or leather, manual or power adjustment, and ventilated seats that ease the summer heat.
- Keyless entry and push-button start, and a powered tailgate.
- A sunroof is appealing, but many drivers do not use it in summer, so weigh its value to you.
How do wheels and tyres affect comfort and running costs?
Higher trims often come with larger wheels and tyres with a lower sidewall, which gives a sportier look but does not necessarily mean more comfort.
- A lower sidewall usually absorbs bumps less, so the ride feels firmer on uneven roads.
- Check the spare: full-size, temporary, or a repair kit instead of a spare.
- Large or less common sizes may cost more to replace, so ask about the availability of the size on the trim you will buy.
Is the screen and infotainment worth paying for a higher trim?
A large screen is one of the most visible differences between trims, but its real value lies in how easy it is to use while driving.
- Test how quickly the screen responds and how clear it is in sunlight, and how easily you can reach the air conditioning settings without taking your eyes off the road.
- A digital instrument cluster, an upgraded sound system and wireless charging are pleasant extras, but not essential for every driver.
- Physical buttons for air conditioning and audio can be easier than touch control alone, so try both.
Does a higher trim hold its value at resale?
There is no fixed rule; resale value depends on market demand for the model and trim, and on the car's condition and service history.
- Expensive extras rarely recover their full cost, so do not buy a higher trim hoping to recoup the difference when you sell.
- Equipment that many buyers look for, such as a camera, sensors and safety systems, may make the car easier to sell.
- Browse used listings for the same model in different trims to gauge demand.
How do you compare car trims using a table?
Put the trims you are considering in one table and write against each item what is confirmed on the specification sheet, not what you heard or saw in an advert. Here is a template you can copy:
| Item | What to record for each trim | Question to check |
|---|---|---|
| Identification | Official trim name and model year | Does the car on offer match the written quotation? |
| Mechanical | Engine, transmission and drivetrain | Does fuel consumption differ? |
| Safety | System names and what each one does | Is the feature standard or part of an optional package? |
| Comfort | Air conditioning, seats and keyless entry | Will you use it every day? |
| Wheels and tyres | Tyre size and spare | Is the size easy to find? |
| Infotainment | Screen and phone connection | Have you tried it yourself? |
| Offer | Price difference between trims | Which confirmed features do you get for that difference? |
- Classify each feature: essential and non-negotiable, desirable, or unimportant to you.
- Rule out any trim that lacks even one essential feature.
- Start with the lowest trim that covers all your essential needs.
- Compare the price difference to the next trim only with the desirable features it adds.
How do you avoid paying for features you will not use?
The money you save on luxuries may be more useful for maintenance, insurance or a smaller finance amount.
- Do not be swayed by the display car: the car on show or the advertising photos may be of a higher trim, so ask to see and drive the trim that fits your budget.
- Watch out for packages: a feature you want may be bundled with features you do not need, so ask whether it is available on a lower trim or in a smaller package.
- Distinguish factory equipment from accessories fitted later, such as window tint, and ask who provides their warranty and what it covers.
- When buying with financing, the price difference between two trims becomes part of the finance amount and you carry its cost for the whole contract; read our comparison of buying a car with financing or cash before you decide.
- Ask about each feature: how often will I actually use it? If the answer is rarely, it is not reason enough to upgrade.
Frequently asked questions about car trim levels
Does fully loaded mean the same equipment on every car?
No. It is a sales description that varies from model to model and from year to year; ask for the official trim name and its detailed equipment list, and check every feature that matters to you.
Is the top trim of a smaller model better than the base trim of a larger model?
If space and seating are the priority, the larger model suits you better; if equipment matters more and the space is enough, the top trim of the smaller model may suit you.
Can higher-trim features be added after purchase?
Some accessories can be fitted later, but many driver assistance systems depend on factory sensors and software and are not easy to add, so ask how any modification affects the warranty.
Are videos and brochures enough for a comparison?
They help you understand the general idea and prepare your questions, but verify the specifications of the car offered to you, because the model year, market or trim may differ.
The right trim is neither the cheapest nor the most expensive; it is the lowest trim that covers your essential needs with written, confirmed specifications. Put the mechanical components and safety first, then the comfort you will use every day, and leave luxuries at the bottom of the list. When your table is ready, you can browse the cars available at Saleh Cars Group and compare their trims in the same way.