Accident Damage Assessment in Saudi Arabia: Taqdeer Guide
Table of Contents:
|
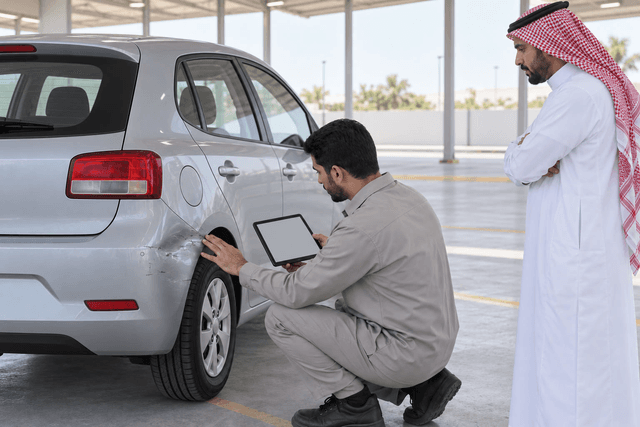
Accident damage assessment is a step you may need after a Najm or traffic police report. According to the Saudi Authority for Accredited Valuers (TAQEEM), it means determining the cost of repairing the vehicle, including parts, or estimating its market value before or after the damage. These assessments are managed electronically through the Taqdeer system, which operates under the Authority’s supervision and lets you book an appointment and check the status of your assessment. This guide covers the stage after the report: when to seek an assessment, what to prepare, how to read the report and review it with your workshop and insurer, and what to do if you disagree with the result.
What Is Accident Damage Assessment and Who Oversees It?
On its official English website, TAQEEM describes vehicle damage assessment valuation as “the act or process of determining the value of repairing the vehicle including the spare parts, or estimating the market value of the vehicle before and after the accident”; the Arabic version also mentions labour explicitly. The outcome may therefore be a repair cost, or a market value before or after the damage, depending on the case.
TAQEEM describes Taqdeer as “an online integrated system for managing, operating, and organizing vehicle damage assessment processes” and lists “Book an appointment at Taqdeer centers” among its services. The Taqdeer system website (in Arabic) states that it operates under the supervision of the Saudi Authority for Accredited Valuers. An assessment is a technical valuation of the damage; it is neither the accident report nor your insurer’s decision.
When Do You Need an Assessment After a Najm or Police Report?
The sequence starts with attending to and documenting the accident. If you have not completed that stage, begin with the guide to Najm reporting steps and when to call the traffic police, then return to this guide.
The official pages we relied on do not state that an assessment is required for every accident, nor do they describe the content of report messages. Follow what the accident report and your insurer require in your case, and ask before any repair starts, because repairing damage before it is assessed may cost you the chance to document it as it was. Useful questions for your insurer:
- Does my case need a damage assessment, and from which body?
- Is the electronic report enough, or must it be sent in a particular way?
- Should I wait for the assessment before taking the car to a workshop?
- Which documents do you need with the report to progress the claim?
How Do You Book a Taqdeer Appointment and Track It?
The Taqdeer website presents the service in three consecutive stages, which can be summarised as follows:
- Book an appointment and go to the assessment center, using the booking service, which the site describes as booking a new appointment to assess your vehicle’s damage.
- Have the vehicle damage assessed at the assessment center.
- Receive the report electronically, with the option to follow it through the report status service, which lets you check the status of your assessment.
If your plans change before the appointment, the manage bookings service allows you, according to the site, to modify or cancel the booking, and the assessment centers page helps you find the nearest centers in your city. We do not mention numbers of centers, timings or fees here; follow what the service shows for your case when you book.
What Should You Prepare Before Visiting an Assessment Center?
The pages we reviewed do not publish a document list, so the list below is practical rather than an official requirement; what the booking screen and center ask for takes precedence:
- Your booking details as shown once the booking is complete.
- The accident report reference from Najm or the traffic police.
- Your ID and the vehicle registration; ask what is needed if you are not the vehicle owner.
- Unedited photos of the damage taken at the time of the accident.
- Your insurance policy details and the party handling the claim.
Do not repair the damage being assessed before the appointment unless the relevant authority tells you to, and do not drive an unsafe car; arrange transport if you notice a leak, a red warning light or a steering fault.
How Do You Read a Damage Assessment Report?
The report format may vary from case to case, but the Authority’s definition shows what it centres on: labour, spare parts, or market value before or after the damage. Use the table to review it item by item:
| Item | What to Check | What to Ask |
| Vehicle and accident details | The car and the accident reference match | Do these details relate to my car and this accident? |
| Spare parts | The listed parts compared with the documented damage | What type of part does the assessment assume? |
| Labour | Listed work such as bodywork and paint | Does the work cover all the damage I documented? |
| Market value | Whether a value before or after the damage is stated | On what basis was this value reached? |
To understand how the type of part affects a repair, see genuine vs aftermarket vs used car parts. Do not assume the report specifies the type of part unless it says so explicitly; ask about it.
How Do You Review the Assessment With Your Workshop and Insurer?
The assessment sets a value, while the compensation and repair path is governed by your policy and your insurer. Check your policy type and what it covers in the guide to comprehensive versus third-party car insurance, and do not assume that the assessed amount is what you will receive in every case.
- Show the report to the workshop before work starts and ask them to compare its items with what they will actually do.
- If hidden damage appears after disassembly, ask your insurer how it will be handled before the repair continues.
- Ask the workshop for an itemised invoice and photos before and after the repair.
- Record every contact with your insurer: the date, the person and what you were asked for.
If the car needs sensor or camera calibration after the repair, ask whether it is included in the assessment or in the workshop’s quote.
What Should You Do If You Disagree With the Assessment?
We did not find a published objection mechanism for assessment results on the official pages we reviewed, so we do not describe a specific procedure. The right step is to ask the source about the official procedure:
- Identify exactly which item you disagree with: a part, a piece of work or a market value.
- Gather supporting evidence: accident photos, the workshop’s notes after disassembly and any invoice.
- Contact Taqdeer through the support and help channels shown on its website and ask what procedure is available for your case.
- Also ask your insurer about its review procedure and what it needs from you in writing.
Do not accept a settlement you disagree with before you understand its consequences, and ask for written replies where possible.
Why Should You Keep the Assessment Report After the Repair?
The report and invoice help you later when you sell the car or when a buyer asks about the accident. The guide to reading a Mojaz report and its limits explains how accident records in a vehicle history should be understood and what cannot be concluded from them.
If you are a buyer looking at a car with signs of repair, ask for the assessment report and invoice if they exist, and use the guide on how to tell whether a car has been repaired alongside an independent technical inspection.
Frequently Asked Questions About Accident Damage Assessment
Is an accident damage assessment the same as a Najm report?
No. The report documents the accident, while the assessment estimates the repair cost or the market value of the vehicle before or after the damage.
Do I need an assessment for every accident?
Do not rely on a general rule; follow what the accident report and your insurer require in your case, and ask them before repairing the car.
How can I check the status of my assessment report?
The Taqdeer website offers an assessment status inquiry service and lists receiving the report electronically as one of the service stages.
Can I change or cancel my assessment appointment?
The website offers a manage bookings service for changes and cancellations; follow what the service shows for your booking.
Is the assessed amount the final compensation?
Not necessarily. Compensation depends on your policy and your insurer’s procedures, so ask your insurer how it is calculated in your case.
Conclusion
After the report, ask your insurer what your case needs, book the assessment through the official system and read the report item by item before any repair. If you disagree, ask Taqdeer and your insurer about the official procedure, and keep your documents for the future.
Transmission Limp Mode: Stuck in Gear, Causes and What to Do
Table of Contents:
|
An automatic transmission stuck in one gear and not shifting has usually entered what is known as emergency or protection mode, commonly called transmission limp mode: the transmission computer detects a fault and holds a fixed gear to protect itself and let you reach a safe place. The cause may be linked to the transmission fluid or its temperature, a sensor or electrical connection, a weak battery or internal wear. The right response is to stop safely, watch the dashboard warning lights, avoid driving long distances and then have the fault codes read with a scan tool by a qualified technician.
What Is Transmission Limp Mode?
A modern automatic transmission is controlled by an electronic unit called the transmission control unit (TCU), often referred to as the transmission computer. The unit relies on sensor readings to decide when to shift, and operates electric valves (solenoids) that direct fluid pressure to the internal clutches.
When it receives an implausible reading or detects a significant fault, it may enter limp mode: automatic shifting stops and the transmission holds one gear, throttle response may be reduced, and the check engine light or a transmission message often appears. The aim is to protect the transmission from further damage and let you reach a safe place or a nearby workshop at low speed, not to continue the journey.
The transmission may behave normally again after a restart, but that does not mean the fault has gone. For other general warning signs, such as leaks and slipping, see the warning signs of low transmission fluid and how to prevent damage.
Why Does the Transmission Stick in 3rd, 4th or 1st Gear?
The gear held in limp mode depends on the transmission design: some designs keep the gear they were in when the fault was detected, while others move to a fixed backup gear. That is why drivers describe the problem as the transmission being stuck in 3rd, 4th or 2nd gear.
Sticking in a high gear makes pulling away from a stop feel heavy, while sticking in 1st raises engine speed as you go faster without a shift. This may point to a problem with the speed signal the computer reads or with the shift solenoids, or to protection triggered by fluid temperature.
Before drawing any conclusion, make sure the selector is not in manual mode, L or any position that restricts the gears.
What Causes an Automatic Transmission Not to Shift?
The causes usually fall into five categories, and more than one can be present at the same time:
- Transmission fluid: a low level, degraded condition or high temperature may weaken the pressure that shifting depends on. Maintenance is covered in the guide on why ignoring transmission fluid changes can ruin your gearbox.
- Sensors: such as the input and output speed, selector position, fluid temperature and accelerator pedal sensors; a wrong reading from any of them may push the transmission into limp mode.
- Transmission electrics: wiring, connectors, solenoids and the control unit itself; corrosion, moisture or a damaged harness may cut the signal or make it intermittent.
- Battery and charging system: low voltage may confuse electronic control units and produce scattered faults, including transmission faults.
- Internal mechanical wear: such as worn clutch packs (friction plates), valve body problems or torque converter issues, which only a specialist inspection can confirm.
This is why the symptom alone is not enough to identify the faulty part; a simple electrical fault can feel similar to an internal one.
Which Symptoms Appear in Each Situation?
Pay attention to the situation in which the problem appears, because describing it accurately helps the technician:
- Stuck in a high gear: weak take-off and slow acceleration, and the gear number may stay fixed on the dashboard.
- No upshift: engine speed rises and the engine gets louder as you go faster without moving to the next gear.
- Delayed engagement or harsh shifts: a clear delay after moving the selector to D or R, or a strong jolt when shifting; harsh shifts can also be linked to the engine and transmission mounts.
- Transmission not responding: you move the selector to D or R and the car does not move or moves with difficulty; in this case do not try to drive.
- Warning light or message: such as the check engine light or a message about the transmission or its temperature, depending on the car. See dashboard warning light meanings and when to stop immediately.
Why Is the Shifter Stuck in P?
A selector that will not leave P is usually a different case from limp mode; most automatic transmissions lock the selector until you press the brake, using an electric lock that relies on the brake pedal switch signal. Possible causes include:
- A faulty brake pedal switch, which may also stop the rear brake lights from working.
- A fault in the electric selector lock or its connections.
- A weak battery, so the lock does not receive enough voltage.
- Parking on a slope so the car’s weight rests on the park lock, making the selector stiff; apply the handbrake before selecting P.
Press the brake firmly and do not force the selector. In many cars the owner’s manual describes a way to release the selector lock manually in an emergency; use it only as described in the manual with the handbrake applied, then have the cause checked. If the brake lights do not work, do not drive the car until they are repaired, because drivers behind you will not know you are braking.
What Should You Do Step by Step When the Transmission Sticks?
- Switch on the hazard lights, move calmly away from the fast lane and stop in a safe place.
- Watch the dashboard: if a red light or a temperature warning appears, switch the engine off and do not continue driving.
- Make sure the selector is in D and the car is not in manual mode or L.
- Let the engine and transmission cool down, and do not touch hot parts.
- Check the transmission fluid only if your car has a dipstick for it, and only with the method and temperature specified in the owner’s manual; many modern transmissions have no dipstick and need a workshop to check them.
- If the transmission returns to normal after a restart, treat it as a temporary improvement and drive calmly to the nearest workshop; otherwise call a flatbed tow truck after checking the owner’s manual on towing.
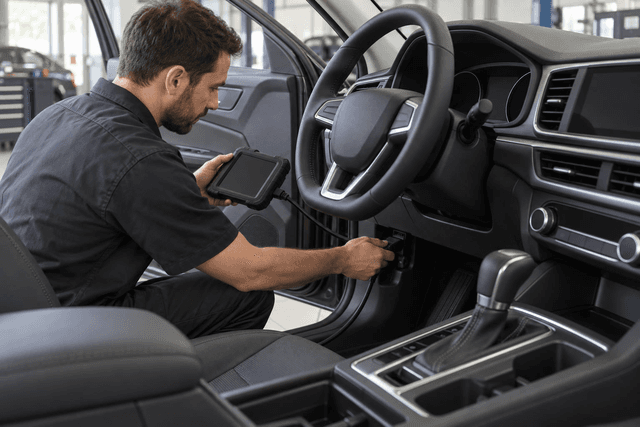
- Ask a qualified technician to read the fault codes with a scan tool that supports the transmission, and to check the sensors, connections and fluid.
Do not settle for clearing the codes; clearing them without fixing the cause hides the problem and deletes data the technician needs, and limp mode may return at a worse moment. Continuing to drive long distances in this mode may also turn a simple fault into greater internal damage.
Table: Symptom, Likely Cause and What to Do
The following table summarises common possibilities; it is guidance, not a final diagnosis:
| Symptom | Likely cause category | What to do |
| Stuck in a high gear with weak take-off | Limp mode due to a sensor, transmission electrics or fluid | Stop safely and have the codes read |
| No upshift with a loud engine | Speed signal, solenoids or fluid temperature | Avoid long distances and book an inspection |
| Delayed engagement or harsh shifts | Fluid level or condition, internal wear or engine mounts | Check fluid per the manual, then diagnose at a workshop |
| Selector will not leave P | Brake switch, selector lock or battery | Press the brake, check the manual, do not force it |
| Scattered faults with weak starting | Weak battery or charging system | Test the battery and charging before blaming the transmission |
| Red warning, overheating or the car will not move | High temperature, very low fluid or internal fault | Switch the engine off and call a technician or flatbed |
Is a Stuck Transmission Different in a CVT?
A CVT changes its ratio continuously and does not rely on fixed gears, so it does not usually stick in 3rd or 4th in the same sense. It may, however, enter a protection mode that limits acceleration, so engine speed rises without matching progress. It also needs the fluid type specified in the owner’s manual. Learn the difference in the comparison of CVT and conventional automatic transmissions.
Frequently Asked Questions About Transmission Limp Mode
Can I drive while the transmission is in limp mode?
Only for a short distance at low speed to a safe place or a nearby workshop, provided no red light, temperature warning or unusual noise appears. Otherwise, call a flatbed tow truck.
Does a weak battery affect an automatic transmission?
It may; low voltage can confuse control units and produce transmission faults, and it may prevent the selector from being released from P, so the battery and charging system should be tested as part of the diagnosis.
What are the symptoms of a faulty transmission sensor?
They may include sticking in one gear, erratic shifts or shifts at the wrong moment, or an incorrect gear number on the dashboard, together with the check engine light. Nothing can be confirmed before the codes are read and the sensor and its connections are checked.
Does clearing the codes with a scan tool fix the problem?
No; clearing switches the warning off temporarily without fixing the cause, and it may delete data that helps the technician with the diagnosis.
How can I reduce the chance of the transmission sticking again?
Follow the maintenance schedule in the owner’s manual, deal with leaks and warning lights early, and avoid straining the transmission with heat and excessive loads. For more, see the tips to maintain your car’s automatic transmission.
Conclusion
A transmission stuck in one gear and not shifting is often a sign that it has entered limp mode. Stop safely, watch the dashboard, check the selector position and only check the fluid using the manual’s method, then have the codes read by a qualified technician instead of clearing them or continuing to drive.
How to Test MAF Sensor Readings and Clean the Sensor
Table of Contents:
|
How to test MAF sensor readings correctly starts with ruling out simple causes such as a clogged air filter or air entering after the sensor, then a visual inspection, then reading codes and live data with an OBD-II scan tool and comparing them with what the service data states or the technician expects. If the sensor is dirty, clean it only with a spray made for MAF sensors and without touching the sensing element. Your owner’s manual and a qualified technician remain the reference for your car’s values and procedures.
What Does the MAF Sensor Measure and When Should You Suspect It?
The MAF (mass air flow) sensor usually sits between the air filter box and the throttle body and measures the amount of air entering the engine, so the engine computer can calculate the right amount of fuel. It differs from the manifold absolute pressure (MAP) sensor, which measures pressure inside the manifold, and from the intake air temperature sensor, which may be built into the MAF sensor housing. Some engines rely on a MAP sensor instead of a MAF sensor or alongside it, so first confirm which sensor your car has.
Symptoms may include the engine warning light, an unstable idle, misfiring, weak pulling and higher fuel consumption, and they are shared with many other faults; so see MAF sensor symptoms, causes and prevention for details, and causes of power loss under acceleration if weak pulling is the main symptom.
Which Simple Causes Should You Rule Out Before Testing the Sensor?
Many abnormal readings are caused by what surrounds the sensor rather than the sensor itself. Check the following with the engine off and cold:
- Air filter: a clogged or poorly seated filter may restrict airflow or let dust reach the sensor. Review the signs your car needs a new air filter.
- Air entering after the sensor: the sensor does not measure this air, so the air-fuel mixture may be upset and symptoms may resemble a sensor fault.
- Intake hose and clamps: look for a crack, a loose hose or a slack clamp between the sensor and the throttle body.
- Sensor connector: make sure it is firmly seated, its pins are free of corrosion and moisture, and its wires are intact.
How to Test MAF Sensor Readings Step by Step
Order the tests from the simplest to the most precise, and do not move on before finishing the previous step:
- Visual inspection: look for dirt, oil traces, damage or a foreign object in the air path, without touching the delicate sensing element with your fingers or any tool.
- Reading codes and live data with an OBD-II scan tool, usually the most important step.
- Unplug test: an indicative test that a technician performs with care, and it should not be relied on alone.
- Multimeter check: an electrical test that differs from car to car and is done according to the service manual.
How Do You Read Fault Codes and Live Data With a Scan Tool?
Connect the scan tool to the diagnostic port under the dashboard, and note the stored and pending codes and the freeze frame data before clearing anything. Codes may point to the sensor circuit, a reading out of range, or a lean or rich mixture; for other reasons, see the common causes of the engine warning light.
Then open the live data and watch the sensor reading:
- At idle: once the engine reaches operating temperature, compare the reading with what the service data states or the technician expects for your engine.
- When raising the revs gradually: the reading is expected to rise smoothly, while jumps, dropouts or a flat reading may point to a problem with the sensor or its wiring.
- Fuel trims: the technician reads them alongside the sensor reading, as their pattern may help distinguish unmetered air from an inaccurate reading.
Do not rely on figures published for other cars, because values vary with the engine and its design.
Is the Unplug Test Reliable, and When Is a Multimeter Used?
In this test the technician unplugs the sensor connector with the engine off and then starts it to see whether its behaviour changes, since the computer usually falls back on estimated values without the signal. If performance clearly improves, this may suggest an inaccurate reading, but the result is indicative, not a final verdict.
Some cars enter limp mode, run worse or show no change at all, and a fault code is stored because of the disconnection; so the test stays with the technician as part of a broader diagnosis, and the car should not be driven with the sensor unplugged.
A multimeter is used to check the supply, ground and signal, but connector pins and the measuring method differ between cars, and some sensors send a frequency signal that a standard measurement cannot read; so it follows the wiring diagram in the service manual or is done by a qualified technician.
How Do You Clean a MAF Sensor Correctly?
Cleaning helps when the sensor is dirty but sound; it does not fix an electrical fault. Follow the cleaner’s label; in general:
- Switch the engine off, let it cool, and work in a well-ventilated place away from flames, as cleaning sprays are usually flammable.
- Disconnect the sensor connector, then remove the sensor carefully with the right tool, as some sensors use special screws.
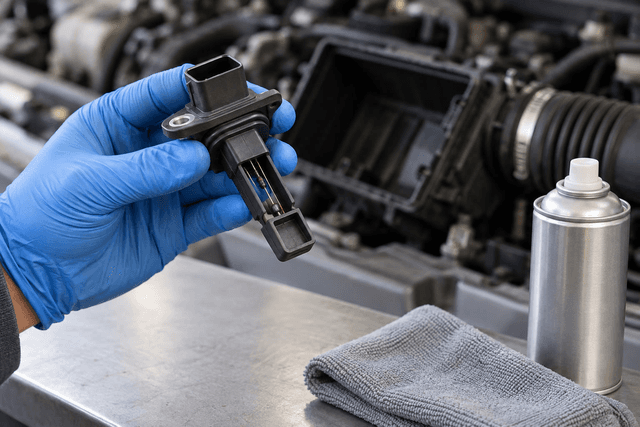
- Spray the sensing element with a cleaner made for MAF sensors only, from the distance recommended on the can, without touching it or wiping it with a cloth, brush or cotton bud.
- Let it air-dry completely, and never install it while wet.
- Refit the sensor and connector, tighten the intake hose and clamps, then start the engine and watch its behaviour and the engine warning light.
Which Mistakes Damage the MAF Sensor During Cleaning?
Avoid the following, because it may damage the sensor or hide the fault instead of fixing it:
- Using brake cleaner, carburettor cleaner or general solvents, which may leave residue or damage plastic and the sensing element.
- Blowing compressed air or spraying water, which may damage the delicate element or let moisture reach the circuit.
- Touching or wiping the sensing element, or cleaning while the engine is running or hot.
- Over-oiling washable air filters, because excess oil may travel with the air and contaminate the sensor; follow the filter instructions or use the filter specified in the manual.
- Clearing codes straight after cleaning before confirming the cause has been addressed.
Once the real cause has been addressed, the codes can be cleared and the repair verified with normal driving and another look at the live data; the computer may need some driving to relearn its fuel trims. If the code returns, the problem is not solved yet.
When Is Cleaning Enough and When Does the MAF Sensor Need Replacing?
Cleaning is often enough if the reading returns to a normal pattern and the symptoms disappear. Replacement is considered when:
- The sensing element is broken, the sensor body is cracked or its terminals are damaged.
- The reading stays abnormal after cleaning and after ruling out air leaks and wiring or connector problems.
- The technician confirms with a scan tool or electrical measurement that the fault is inside the sensor itself.
When replacing it, choose a part matching the part number or the vehicle identification number, as a non-matching sensor may give wrong readings. If high fuel consumption continues after the repair, review the causes of higher fuel consumption, as there are many other possible reasons.
What Do the Test Results Mean and What Is the Next Step?
The table summarises common findings; all of them are possibilities that need confirmation:
| Symptom or finding | What it may mean | Next step |
| Clogged or poorly seated air filter | Restricted airflow or dust reaching the sensor | Replace the filter as per the manual, then retest |
| Cracked hose or slack clamp after the sensor | Air entering that the sensor does not measure | Fix the leak before judging the sensor |
| Dirt or oil traces on the sensor | Inaccurate reading | Clean it with the dedicated spray and find the oil source |
| Reading does not rise smoothly with revs | Dirty or failed sensor or a wiring problem | Clean it, then have the wiring and reading checked by a technician |
| Code related to the sensor circuit | Fault in the connector, wiring or sensor | Inspect the connector and request electrical testing per the service manual |
| Code returns after cleaning and repairs | Fault inside the sensor or an undetected cause | Diagnosis by a qualified technician; replacement may be needed |
Frequently Asked Questions About Testing and Cleaning the MAF Sensor
How do I know if the MAF sensor is bad?
Symptoms alone are not enough because they resemble other faults. Confirmation comes from reading codes and live data after ruling out the air filter, air leaks and the connector, preferably with a qualified technician.
What is the best spray for cleaning a MAF sensor?
A product whose label clearly states that it is made for MAF sensors, leaves no residue once dry and is safe on plastic parts. Read the label and follow its instructions.
Can I clean the MAF sensor with brake or carburettor cleaner?
This is not recommended, because these cleaners are harsher than needed and may leave residue or damage the sensing element.
Should I clear the fault code after cleaning the MAF sensor?
Clear it only after the cause has been addressed, then verify by driving and checking the live data. Clearing the code does not fix the fault, and if it returns, have it diagnosed.
Can I drive the car with a faulty MAF sensor?
It may remain drivable, with performance and fuel consumption affected. But if the engine warning light flashes, the engine clearly loses power or a red warning appears, avoid driving and call for help.
Conclusion
The right way to test a MAF sensor starts with ruling out the air filter, air leaks and the connector, then a visual inspection, then reading codes and live data. Clean the sensor with a dedicated spray without touching the sensing element, do not clear codes before the cause is addressed, and leave electrical tests and the replacement decision to a qualified technician.
Vehicle Registration Renewal on Absher: Steps and Requirements
Table of Contents:
|
Vehicle registration renewal is available electronically through Absher vehicle services once the service requirements are met and the automated eligibility check is passed. Start by reviewing insurance, technical inspection and any required payments, then select the vehicle, choose registration renewal and confirm the transaction. Istimara means the vehicle registration here, not the person’s driving licence. This guide explains what to prepare and how to handle a renewal that cannot proceed, without confusing renewal with ownership transfer or an inspection booking.
What Is Vehicle Registration Renewal on Absher?
Renewal extends the registration of a previously registered vehicle. The official vehicle registration renewal page on the National Portal explains that the service is available electronically through Absher without visiting traffic offices, and that eligibility is checked automatically against the service requirements. Reaching the vehicle screen therefore does not establish that renewal is complete.
When checking an expiry date, first identify the document: a driving licence relates to the driver, while vehicle registration relates to the vehicle. This distinction matters when researching requirements; do not apply driving licence renewal conditions to registration renewal. Follow the service name shown in your account rather than an old screenshot of a different menu.
What Are the Vehicle Registration Renewal Requirements?
The official service page lists the following requirements. Use them as a checklist before starting, while also referring to what the service displays for your vehicle when you apply. A receipt or an old copy of a document is not a substitute for checking its validity and that it relates to the intended vehicle.
- Valid vehicle insurance: check the coverage dates and vehicle details, not just the purchase notification.
- A valid technical inspection certificate: distinguish an inspection appointment from an existing valid certificate.
- Payment of renewal fees and any late-renewal penalty, as required by the service, rather than relying on a widely quoted amount.
- Payment of any traffic violations: check the payment status rather than assuming that starting a bank transaction completes the process.
The required-documents tab also specifies an existing vehicle registration. This guide does not add requirements to upload photographs or other documents simply because somebody else encountered them; follow what the service actually requests. Because renewal eligibility is checked automatically, verify availability in your account rather than deciding based on a date quoted in an unofficial explanation.
How Should You Check Insurance, Inspection and Violations?
Start with insurance: open the policy details and check that the policy is valid and covers the same vehicle. To distinguish the type of cover from the validity of a policy, read about comprehensive versus third-party car insurance. Choosing cover that fits your needs is different from checking a renewal requirement; the name of the cover alone does not establish that an application will be accepted.
Next, review the inspection certificate. If you need to prepare for an appointment, use the periodic vehicle inspection preparation checklist to organise technical checks, not as proof of passing. Inspection is a separate process with its own result, not a renewal-screen button that substitutes for a valid certificate.
Then review violations and any payment requirements displayed. The guide to checking, paying and disputing traffic violations explains the related services. Do not confuse filing a dispute with satisfying the renewal payment requirement; rely on the displayed status and the relevant authority’s instructions rather than assuming another action removed the obstacle.
What Are the Steps to Renew Registration on Absher?
The following route follows the official service instructions. Read the details on each screen before moving on. If the menus appear in a different order in your interface, look for vehicle registration renewal under vehicle services rather than selecting another service because its name is similar.
- Log in to Absher through its official channel, then select Vehicles.
- Select Manage Vehicles from the services menu and review the vehicles shown in your account.
- Choose the vehicle whose registration you want to renew and check its details before proceeding.
- Select Renew Vehicle Registration; the system automatically checks eligibility against the service conditions and requirements.
- Review the information displayed, complete any requirements and select Confirm Renewal.
- Check for the successful renewal message, review the updated registration details and retain any transaction reference displayed.
Payment alone, or closing the screen, does not prove successful renewal. If your session ends before the result appears, return to the vehicle details and check what actually happened before repeating the steps. The aim is to confirm that the correct vehicle’s registration was updated, not simply to complete a sequence of clicks.
How Do Renewal, Ownership Transfer and Inspection Differ?
These services may relate to the same vehicle, but each serves a different purpose. Use the table to identify your starting point, then review the relevant service conditions separately. Do not assume completing one also completes another.
| Procedure | Purpose | What Does Not Prove Completion? |
| Registration renewal | Renew the vehicle registration | Buying insurance or booking an inspection alone |
| Ownership transfer | Transfer the vehicle to another owner | Registration renewal alone |
| Technical inspection | Inspect the vehicle and obtain its result | An appointment without the inspection taking place |
If your aim is to sell or buy the vehicle, review the Absher ownership transfer steps and sale conditions instead of treating renewal as a substitute for transfer. Organise your notes under separate headings: registration status, insurance status, inspection result and transfer transaction status when relevant. This helps avoid confusing different documents.
Why Can Renewal Fail to Proceed, and What Should You Do?
An unmet published requirement is a possible reason renewal cannot proceed, but it does not explain every message. Start with the text displayed in your account and review the item it identifies, rather than repeating the request or changing several things without understanding the issue.
- If the message concerns insurance or inspection, match the vehicle and validity dates against the relevant document and contact its issuer if the information conflicts.
- If it concerns payment, review the requirement, transaction status and receipt before paying again. Do not assume an amount or reason that the screen does not state.
- If eligibility is unclear or the renewal option is missing, review the current service conditions and vehicle details, then ask official support for clarification.
- If a technical message appears without explanation, note its text, the time and the stage reached. Reopen the service to check the result; do not describe it as a final rejection without confirmation.
When contacting support, explain where the process stopped and which documents you checked. Never share your password or verification code, and hide personal details in any screenshot you post. This is a way to organise follow-up, not a guarantee of processing time or acceptance.
Frequently Asked Questions About Vehicle Registration Renewal
- Is registration renewal the same as driving licence renewal? No. Registration, or Istimara, relates to the vehicle, while the driving licence relates to the driver. Check the service name before reviewing its requirements or using it.
- Is valid insurance enough to renew registration? No. Insurance is one requirement; the official page also lists a valid inspection certificate and payment requirements. Automated eligibility verification remains part of the renewal process.
- Is booking a periodic inspection enough? The published requirement is a valid technical inspection certificate. A booking is not that certificate and does not show that the vehicle passed the inspection.
- Must I visit a traffic office to renew? The official page describes electronic renewal through Absher without visiting traffic offices. If your case cannot proceed, follow the service message and support guidance rather than assuming a particular in-person procedure.
- How can I tell that renewal is complete? Check the successful renewal message and then review the registration details. The National Portal lists digital registration display and registration printing as related services; do not confuse accessing the document with carrying out renewal itself.
In short, prepare the vehicle requirements, renew the registration through Absher and verify the result. If the process cannot proceed, address the item identified in the message or request official clarification, without assuming fees, deadlines or exceptions that the service does not show.
Choosing a Car Battery: Size, Capacity, Type and Installation
Table of Contents:
|
Choosing a car battery starts with confirming that the battery really is the cause of the problem, then matching what the owner’s manual or the current battery label specifies: size and mounting, terminal orientation, capacity in Ah, cold cranking amps (CCA) and battery technology. After that, check the manufacture date and warranty terms, and make sure installation is done properly, which may include registering the battery in the car’s system. This guide explains each step in general terms; your owner’s manual and a qualified technician remain the reference for your car’s specifications.
When Should You Start Choosing a Car Battery?
Do not buy a battery just because the car failed to start once. Weak starting can be linked to the battery, but also to the starter motor, the connections or the charging system. Ask a specialist to test the battery and charging system with suitable equipment, and review the car battery failure symptoms and how to test them to recognise signs worth checking.
If the engine cranks normally but does not start, the battery may not be the cause; see the guide on an engine that cranks but will not start. If the battery keeps going flat, there may be a hidden electrical drain in the car, and fitting a new battery without fixing the cause may simply pass the problem on to it. Once testing confirms the battery, prepare the following before visiting the seller:
- A clear photo of the current battery label showing all printed details.
- The battery specification page in the owner’s manual, if available.
- Whether the car has an automatic engine stop-start system.
- Where the battery sits: engine bay, boot or under a seat.
Which Specifications Should Match the Manual or Label?
The first reference is the owner’s manual, then the label of the original battery if it is still fitted. The table below summarises what to compare before paying and where to find it.
| Item | Where to find it | Why it matters |
| Size or group | Owner’s manual or current battery label | Defines overall dimensions and fit on the tray |
| Mounting dimensions | Battery tray and hold-down clamp | A poorly secured battery vibrates and can be damaged |
| Terminal orientation | Position of the positive and negative terminals on the current battery | A different layout may stop cables reaching or strain them |
| Capacity (Ah) | Label or owner’s manual | Indicates the energy stored in the battery |
| Cold cranking amps (CCA) | Label | Indicates the battery’s ability to deliver starting current |
| Technology type | Label and owner’s manual | Must suit the charging system and any stop-start system |
Two batteries can look alike yet differ in terminal orientation, height or mounting lip. Ask the seller to compare the new battery directly with the old one. If the current label differs from the manual, the previous battery may not have matched in the first place; rely on the manual or ask the dealer or a qualified technician.
What Do Capacity (Ah) and Cold Cranking Amps (CCA) Mean?
Capacity in Ah describes how much energy the battery stores, which matters when the battery powers the car’s systems with the engine off. Cold cranking amps (CCA) describe the battery’s ability to deliver a high current at the moment of starting in cold conditions, according to a specific test standard.
A label may state CCA according to a different standard from another battery, so only compare two figures measured to the same standard, and ask the seller to clarify. The general rule is not to go below the car’s specified capacity or current.
On the other hand, a higher figure is not automatically better; what matters is that the battery keeps the correct size and technology. In cars that record battery data in their system, the actual capacity of the new battery may need to be entered during registration, so tell the technician about any difference from the original.
What Is the Difference Between Flooded, EFB and AGM Batteries?
The general idea of each type is as follows, while the manual decides what your car needs:
- Conventional flooded battery: common in cars without an automatic stop-start system; some serviceable types need the electrolyte level checked.
- EFB battery: an enhanced flooded battery built to withstand repeated starting and discharge cycles better than a conventional one, used in many cars with stop-start systems.
- AGM battery: the electrolyte is absorbed in glass fibre mats and the battery is sealed; it copes better with electrical loads and repeated discharge, and is used in cars with higher electrical demands.
In a car with automatic stop-start, the battery handles frequent engine restarts and powers systems while the engine is stopped. Fitting a lower technology than specified, such as a conventional flooded battery instead of EFB or EFB instead of AGM, may weaken system performance, shorten battery life and trigger warning messages. Moving to a higher technology should only happen if the owner’s manual or the dealer allows it.
If the battery sits inside the cabin or boot, the manufacturer may specify a sealed type or a particular vent outlet; do not fit a different battery in that location without confirming that it matches.
How Do You Read the Manufacture Date and Warranty Terms?
The manufacture date usually appears as a code printed on the lid or case or on a small sticker, and the code format differs between manufacturers, so ask the seller to explain the code on the battery itself, and prefer the most recently made battery among the matching options.
A battery stored for a long time may lose some charge, so ask whether the seller tested it before sale. For the warranty, read the written terms on the invoice or warranty card rather than relying on a verbal promise, and pay attention to the following:
- What the warranty covers, how a fault is proven, and whether the battery must be tested by the seller.
- Whether installation elsewhere, or fitting the battery to a car it does not match, affects the warranty.
- Which documents are needed for a claim; keep the invoice somewhere easy to find.
How Does Saudi Heat Affect Your Battery Choice?
High temperatures speed up the reactions inside a battery and may increase fluid loss and ageing of the internal plates. This does not mean choosing a battery simply because it is marketed for heat; it means sticking to the correct specification and technology and choosing a recently made battery.
After installation, help the battery by parking in the shade where possible, keeping the terminals clean and checking the battery and charging system during routine maintenance. For more on how heat affects the car in general, read the summer car care guide for Saudi heat.
What Should You Consider When Installing the New Battery?
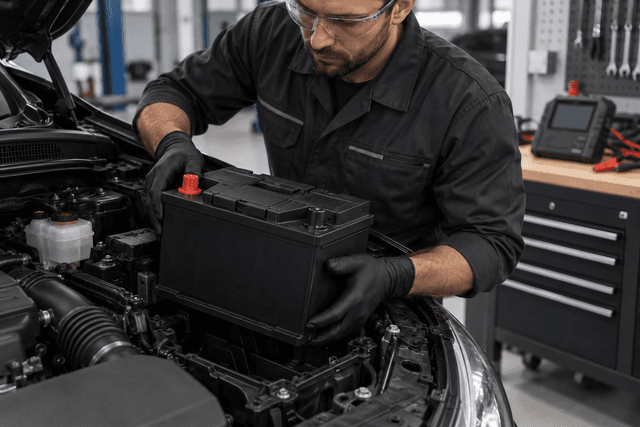
If you are not confident about the steps, leave the installation to a qualified technician. If you fit it yourself, wear eye protection and gloves, switch the engine off and keep the key away, disconnect and reconnect the terminals in the order given in the owner’s manual, avoid letting a metal tool touch both terminals, and keep any sparks or flames away from the battery.
- Battery registration: some cars require the new battery to be registered in the energy management system with a diagnostic tool so that charging is adjusted for a new battery. Ask the technician whether your car needs this.
- Saving settings: disconnecting the battery may erase settings such as the clock and radio, and some systems may need resetting according to the manual. Some technicians use a memory saver during the swap.
- Clean terminals: remove corrosion from the terminals and cable ends, and check that the clamps are sound before connecting.
- Secure mounting: fix the battery with its hold-down clamp so it cannot move, tighten the terminals without excessive force, and refit the protective covers.
After installation, start the car and watch for any warning message. If one appears, return to the technician to check the installation and registration rather than trying to clear the warning yourself.
How Do You Dispose of the Old Battery Safely?
A battery contains acid and lead, so do not open it, drain it or put it in household waste. Keep it upright, protect its terminals from contact, and hand it to the seller, a workshop or a party that accepts used batteries for recycling. If it is cracked or leaking, do not touch it with bare hands and ask the workshop to handle it.
Frequently Asked Questions About Choosing a Car Battery
How can I tell a battery fault from a starter fault?
Slow cranking with dim lights may point to the battery, while a click with bright lights may point to the starter motor. These are indications, not a diagnosis, so have the battery and charging system tested and review the signs of a failing starter motor before buying.
Can I fit a battery with a higher capacity than the original?
It may be possible in some cases if the size and technology still match, but the decision rests with the owner’s manual and the technician, especially in cars that record battery data in their system.
Can I fit a conventional battery to a car with stop-start?
This is not recommended; use the technology specified in the manual, such as EFB or AGM, because a lower technology may not withstand the frequent restart pattern.
Do all cars need the new battery to be registered?
No, but some cars require it using a diagnostic tool. Ask the technician or check the manual before installation, and do not assume the swap is complete once the terminals are connected.
What should I do with the old battery after replacing it?
Do not open it or throw it away with household waste. Keep it upright and hand it to the seller, a workshop or a party that accepts used batteries for recycling.
Conclusion
First confirm that the battery is the problem, then match size, terminals, capacity, CCA and technology to the owner’s manual, and check the manufacture date and warranty terms. Leave installation and registration to a technician if you are unsure, and dispose of the old battery safely.
Car Won't Crank: Battery or Starter Problem? How to Tell
Table of Contents:
|
If you turn the key or press the start button and the engine does not turn over at all, the cause may lie in the car battery or its connections, in the starter motor and its circuit, or in a starting condition that has not been met, such as the gear position or key recognition. Whether it is a battery or starter problem usually shows in the dashboard lights, the type of sound and the result of a jump start test. These are indications for ordering the checks, while confirmation comes from a qualified technician with proper equipment.
How Is a No-Crank Different from Cranking Without Starting?
A no-crank means the engine does not turn when you try to start it: you hear nothing, or only a click or rapid clicking. If the starter turns the engine at its usual sound but the engine does not fire, that is a different situation, usually caused by fuel, spark or sensors, which we cover in the guide on an engine that cranks but will not start. Here we focus on the first case, whose diagnosis starts with the electrical side.
How Can Sounds and Lights Reveal a Battery or Starter Problem?
Watch the moment of starting and the dashboard lights before and during it, as each sign has a more likely cause, not a final verdict:
- No sound and no lights, or a very dim dashboard: this may point to a completely flat battery, a loose or corroded terminal, or a main fuse.
- No sound with bright lights: this may mean the start command is not reaching the starter, because of the gear position, the brake or clutch pedal, the key not being recognised, or a relay or fuse.
- A single click with bright lights that do not dim: this may point to the starter or the switch that pushes its gear (the solenoid), or to a weak starter cable or ground strap.
- Rapid repeated clicking with dimming lights: this may point to a poorly charged battery or badly connected terminals, so the solenoid does not receive enough current, releases and tries again.
- Slow, laboured cranking: this may point to a weak battery or corroded connections, and sometimes to a starter drawing excess current because of internal wear.
- Whirring or grinding without the engine turning: this may mean the starter gear is not meshing with the flywheel ring gear or that teeth on one of them are damaged, so stop trying.
- It starts one time and not the next: this may point to a loose connection, a starter that is starting to fail, an intermittent relay or the gear position sensor, so note when the problem occurs and tell the technician.
For more detail on each side, see the signs of a failing starter motor and car battery failure symptoms and how to test them.
Why Won’t the Car Crank with a New Battery?
Fitting a new battery does not mean the problem is over; the old one may have been fine, or the cause may be somewhere that was never checked. The main possibilities are:
- Terminals not tightened properly, corrosion left on the cable ends, or a damaged or loose ground strap between the engine and the body.
- A new battery that is not fully charged, because it was stored for a long time or was drained by lights or accessories left on.
- A battery that does not match the car’s specification in capacity, cranking current or technology; see the guide to choosing a new car battery.
- A parasitic drain that empties the battery while parked, so the car starts today and will not crank tomorrow morning; read about hidden electrical drain in the car.
- A weak charging system (alternator), so the battery runs down gradually despite driving, and a charging warning light may appear on the dashboard.
- The starter relay or the starting circuit fuse, or the starter motor itself and its solenoid, especially if the symptoms were present before the battery was changed.
- The key not being recognised because of a weak remote battery or a fault in the immobilizer, which blocks the starter in some cars.
- The gear selector not in P or N on an automatic, the clutch not fully pressed or its switch faulty on a manual, or the brake not pressed in cars with a start button.
Which Safe Checks Can You Do Before the Workshop?
These checks do not require removing any part, and they help you narrow down the likely cause:
- Make sure the gear selector is in P or N and that you are pressing the brake or clutch as the owner’s manual requires, and try starting in N if it fails in P.
- Look at the dashboard lights: bright, dim or off? Does a message about the key or a battery warning light appear?
- Headlight test: switch on the headlights and watch their reflection on a wall while trying to start. Heavy dimming may point to the battery or its connections, while lights that stay bright with a single click may point to the starter. Some cars switch off electrical loads during starting, so do not rely on this observation alone.
- Try the spare key, check the remote battery if a key-not-detected message appears, and follow the alternative starting method if the owner’s manual gives one.
- Inspect the terminals by eye with the engine off: are the cables secure? Is there white or green corrosion? Do not move them with a metal tool, and never touch both terminals together.
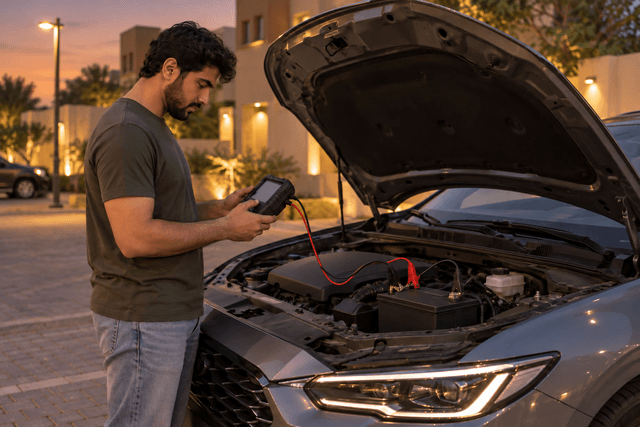
- Try a jump start by following the steps to jump-start a car safely: if the engine cranks normally, the battery or its connections are more likely; if the same click remains, the starter or its circuit is more likely.
What Should You Avoid When the Car Won’t Crank?
- Do not tap the starter with a tool while someone else tries to start the car; being close to the fan, belts and hot parts during a sudden turn can cause injury.
- Do not keep cranking without a pause or hold the start for long; the starter is designed for intermittent use and can overheat, so let it rest between attempts as the owner’s manual advises.
- Do not bypass the relay or bridge the starter or battery terminals with a screwdriver or wire; the engine may turn suddenly while the car is in gear, or sparks and electrical damage may occur.
- Do not replace the starter or battery by guesswork before testing, as that may not fix the problem.
- Do not try to jump-start a battery that is swollen, cracked or leaking fluid; ask for help.
How Do You Read Battery and Starter Signs in One Table?
The table below summarises common signs, the more likely side and the suggested next step:
| Sign | More likely | Also worth ruling out | Next step |
| No sound, dashboard dark | Battery or terminals | Main fuse | Inspect the terminals by eye and try a jump start |
| No sound, dashboard bright | Starting circuit | Gear position, key and relay | Confirm P or N and the brake, and try the spare key |
| Single click, bright lights | Starter or solenoid | Starter cable or ground strap | Have the starter and its circuit tested |
| Rapid clicking, lights dim | Battery or terminals | Weak charging system | Try a jump start, then test the battery and charging |
| Slow, laboured cranking | Battery or connections | Starter drawing high current | Ask for a battery load test and a starter draw test |
| Whirring or grinding, no crank | Starter gear | Flywheel ring gear teeth | Stop trying and have it inspected |
| Intermittent problem | Loose connection or weakening starter | Relay or gear position sensor | Note when it happens and tell the technician |
What Does a Technician Test to Confirm the Cause?
A technician relies on measurement against the manufacturer’s data, and usually checks:
- The battery’s condition under load or with a battery tester, not just its charge.
- Voltage drop across the positive cable and the ground path while cranking, to reveal resistance in connections that cannot be seen.
- The current the starter draws, since a high draw may point to a tired starter or mechanical resistance in the engine.
- Whether the start signal reaches the starter through the relay, the fuse and the gear position or clutch switch.
- The charging system, and stored fault codes in the car’s computer if messages about the key or the immobilizer appear.
Frequently Asked Questions About a Car That Won’t Crank
What is the starter motor in a car?
The starter motor is a small electric motor that draws its current from the battery and turns the engine at the moment of starting through a gear that meshes with the flywheel, then disengages once the engine runs, so it needs a healthy battery and good connections.
How can I tell the starter has failed rather than the battery?
If the battery is charged and tested, the terminals are sound, and the single click with bright lights repeats even with a jump start, the starter or its circuit becomes more likely, and a technician confirms it by measuring voltage drop and current draw.
What does a clicking sound from the starter mean when starting?
Rapid clicking usually happens when the starter does not receive enough current because of a weak battery or corroded or loose terminals, while a single click with bright lights may be linked to the starter or its solenoid.
Does tapping the starter fix the problem?
The starter may work temporarily after being tapped, but that is a sign of a fault in it rather than a fix, and it is dangerous while someone else tries to start the car.
Can a smart key stop the car from starting?
Yes. If the car does not recognise the key because of a weak key battery or a system fault, the starter may not turn or the engine may not fire, a message usually appears on the dashboard, and the owner’s manual may explain an alternative starting method.
Conclusion
When the car will not crank, note the dashboard lights, the type of sound and the result of a jump start: dim lights and rapid clicking lean towards the battery, while a single click with bright lights leans towards the starter, and do not forget the gear position and the key. Avoid risky shortcuts, and leave confirmation to a qualified technician.